Play Podcast
It’s the beginning of May; we’ve wallowed in the delights of an Indian summer, but now the leaves are turning, there’s seed emerging….
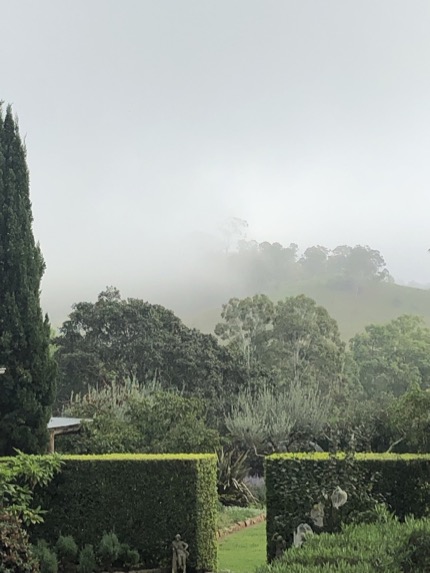
Easter week is always a significant marker of time. Whether early or late, it portends a moment in the year when life changes gear. There’s almost always a subtle shift in the weather, and although late this time, it was no exception. Early morning fogs lifted to reveal exquisite golden days, bluer than blue, with temperatures one might experience in summer climes more gentle than our own, and oh so conducive to gardening!
Rather like at Christmas, I get over excited at the prospect of a festive celebration (and a few uninterrupted days at home); so fill the house with plants….

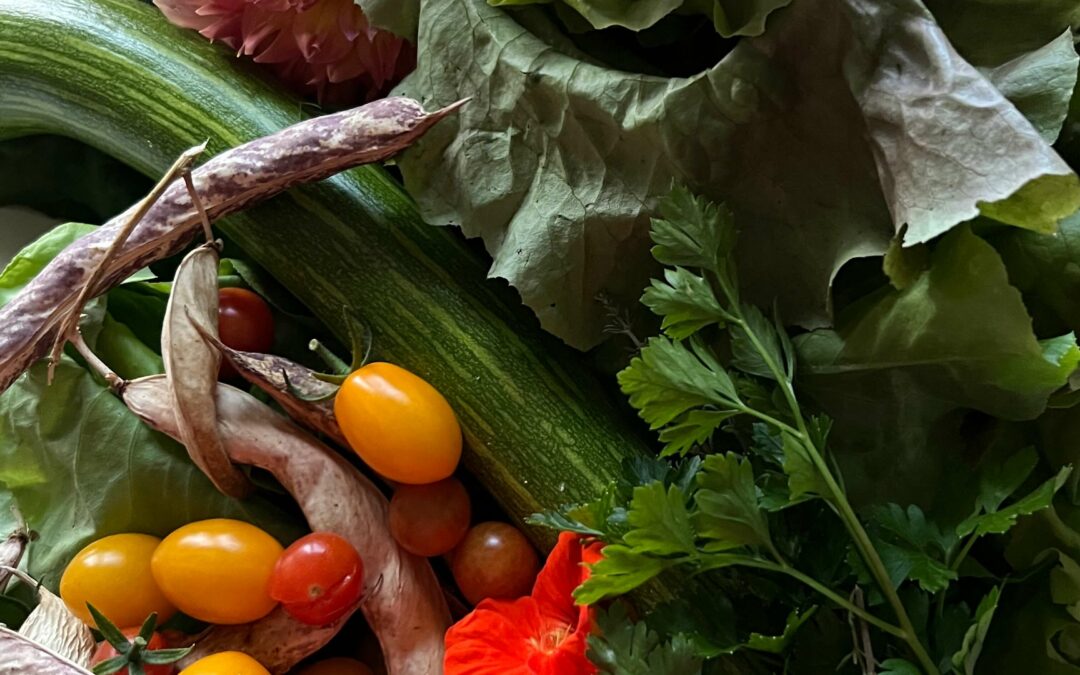
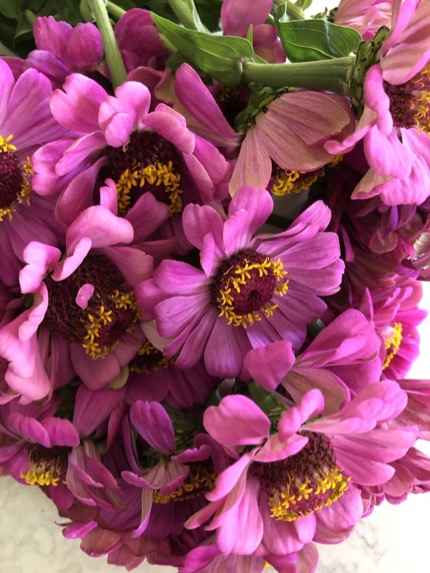
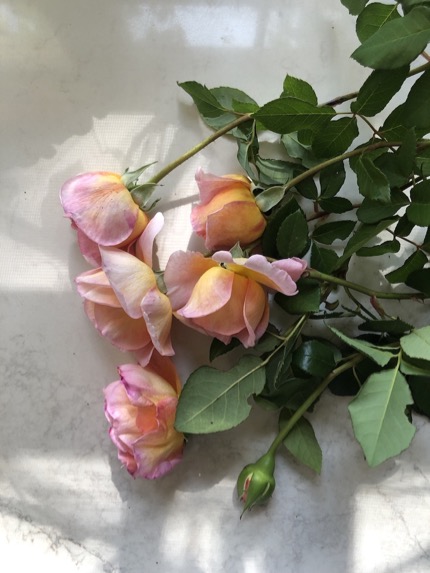
Bring out the collection of pretty eggs the girls had so much fun painting during Easter week when they were little….and collect lots of flowers from the garden; from ginger and zinnias…
To roses…
And this year, intoxicating snippings of Firecracker honeysuckle…

To pop on our breakfast table. While there’s always a pretty Sunday morning breakfast table here on the verandah (it’s the one morning of the week we revel in), at Easter, although I don’t go quite as bonkers as I used to when the girls were at home, there’s a different cloth, napkins, favourite china.
And I cook…just for the pleasure of it.
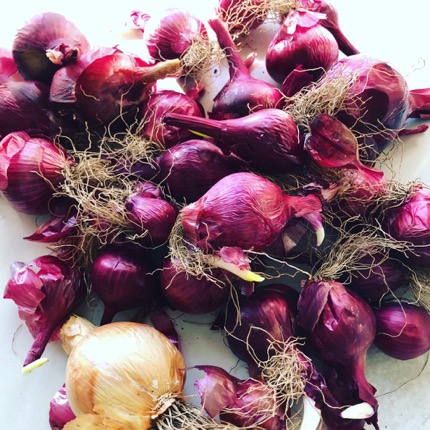
The red onions were sprouting in the cellar below, so a batch of Onion Marmalade, or Confit d’Oignon, was top of my to-do list for fear of losing that hard one bounty!
The two reasons I grow red onions are for the Sicilian Caponata, which comes first in the season; and for a batch of Onion Marmalade. Once the onions sprout, it’s a natural time to stop making and eating that beautiful melange of late summer/early autumn produce that make up the ingredients of Caponata (which features heavily in our diet in those early autumn weeks) before easing our way into the new season’s delights.
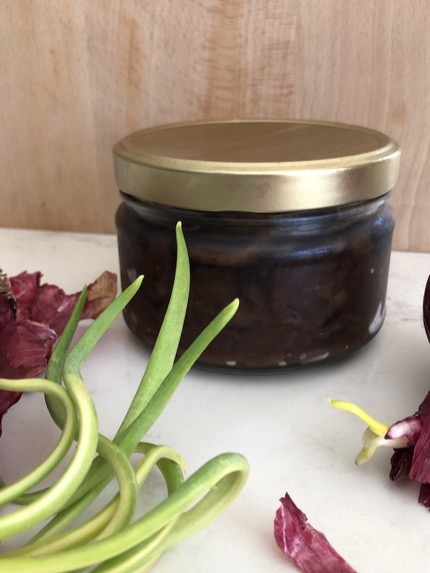
We enjoy a little spoonful of onion marmalade from time to time, to accompany something or other, throughout the winter months. The recipe only yields one jar, but that seems to be enough for us….it’s a treat.
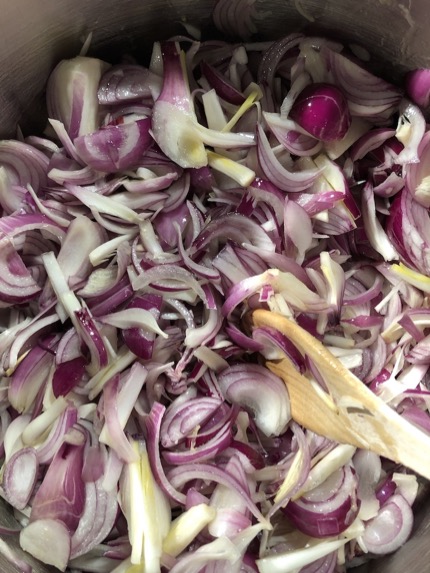
The recipe is: 1kg onions, 100ml olive oil, good pinch sea salt and several rounds with the black pepper grinder, 2 bay leaves, 2 rosemary sprigs, 150g brown sugar (I use rapadura), 75ml white wine, 75ml red wine vinegar, 25ml balsamic vinegar.
Peel, halve and finely slice the onions (there will be tears!). In a heavy frypan, heat the olive oil then add the onions and toss well to coat. Cover and cook over a gentle heat ’til they begin to colour (stir from time to time to make sure they’re not sticking to the pan). Add salt, pepper, bay & rosemary and cook for a further 20 to 30 minutes. Remove the lid; add the sugar, wine, vinegars and stir. Bring to the boil, keep stirring, then lower heat and simmer for 20 – 30 minutes until the liquid has dissolved and the onions are soft and sticky. Be very careful towards the end of cooking that the onions don’t stick to the pan…stir regularly. Cool, pick out the bay leaves and rosemary and spoon into a sterilised jar. Seal and store for at least two weeks before using.

Along with baking an Au Pair’s Apple Cake (Easter wouldn’t be Easter without one); I launched into my favourite of the season, Torta di Melanzane!
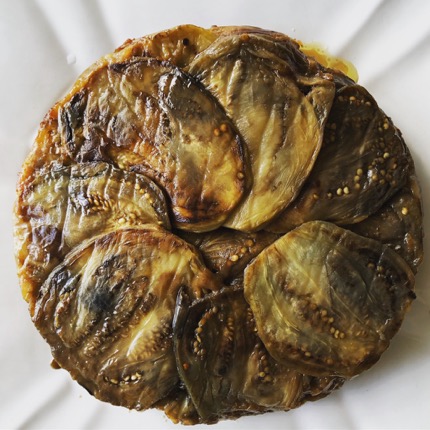
There’s a recipe that’s lived in my file for years on end, with an image that my early attempts never seemed to live up to; or the taste somehow. It was never ‘tall’ enough in my opinion! So last year, I decided to make it in a cake tin, instead of the pan suggested in the recipe, which was a huge improvement. This time, thanks to cutting slightly thicker slices to begin with, and adding less cheese than the original recipe suggested, it actually tasted of aubergines too. As I like the taste of aubergine (just as I like the taste of most vegetables…isn’t that why we grow them?) I don’t like to drown out their flavour. But then, perhaps it’s just that home-grown veg taste so darn good!
This isn’t hard at all to make, though the initial preparation is a bit time consuming. But it’s worth it….and as it’s best compiled a day in advance (then left in the fridge overnight to bake the next day), it’s ideal for a festive lunch…or anytime. Just add a few oven-roasted tomatoes, and a dollop of pesto. Really, I think I could live on this combination!
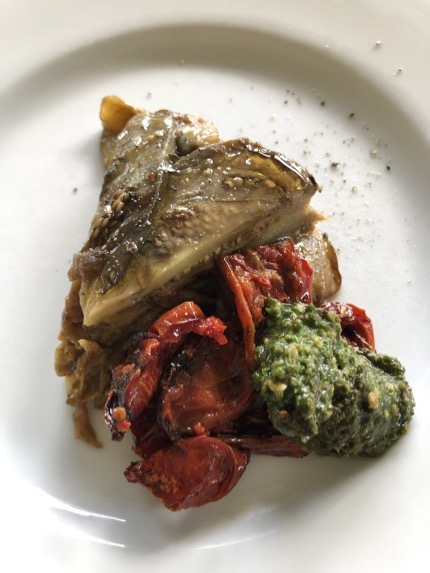
Now I’m no food photographer or food stylist, but I couldn’t resist slipping this in!
The recipe is: as many garden aubergines as you can get your hands on – a combination of large oval and long, skinny ones is fine….just try to fan out the neatest ones on the bottom of the tin as they will be the top you see when you turn it out (the layers in between really don’t matter so much).
If you’re buying aubergines….about 8 medium ones…(best to have too many to play with…you can never have too many aubergines!).
Grated mozarella and grated parmesan….I’m not going to suggest an amount, except to say the original recipe asked for a cupful of each, which simply drowned the taste of the aubergines themselves. Maybe I use half a cup altogether…I tend not to measure these things!
Method: peel the aubergines and cut lengthways into 1cm slices. Sprinkle with salt and leave in a colander for an hour or so to weep, then wash well and pat dry. Shallow fry the slices in olive oil in batches ’til cooked, but only gently coloured.
Line a 23cm springform cake tin with baking paper. Neatly fan out the first layer of slices as they will form the top of the Torta when you release it from the tin. Scatter a very fine sprinkling of one or other of the cheeses, then fan out the next layer of aubergine, scatter with the second cheese and continue ’til you end with a cake tin filled with layers. You only need a little cheese to bind the layers together. Cover and pop into the fridge ’til you intend to cook (I usually do the prep a day in advance, so leave it in overnight).
Pre-heat oven to 220C and bake for about 45 minutes. Allow to rest and when cool enough to handle, release the sides of the tin and turn out onto a serving plate. Then comes the fun of the ‘reveal’!
To see the ‘reveal’ of this one, here it is on instagram! (for those unfamiliar with little video clips, hit the arrow…yes I mean my mother!). How appropriate is the aria in the background…as always at the weekend, we had ABC Classic FM blaring in the background!
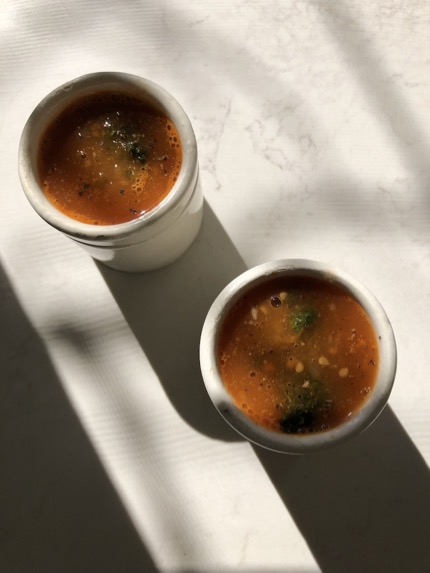
Then there was that batch of Tomato Soup I mentioned in the episode, that used up a lot of the last tomatoes from the fruiting bed in the garden. What a delicious little accompaniment it made, to the Torta di Melanzane, or as a starter before dinner that weekend.
The recipe, as promised: 2kg tomatoes (preferably from the garden!), 1 brown onion, 2-3 cloves garlic, 2 tbsp olive oil, 1 litre chicken stock (home made please).
To remove tomato skins, score a cross in the base of each one while you bring a large saucepan of water to the boil and get a bowl of iced water ready.
Drop the tomatoes into the boiling water for about 10 seconds…you’ll see the skins split, so remove them quickly to the iced water to stop them from cooking. It’s easy to remove the skins now; then roughly chop the flesh.
Heat the olive oil in a large saucepan; add thinly sliced onion and garlic and stir from time to time…’til beginning to caramelise. Add the tomatoes, chicken stock and bring to a simmer. Cook ’til tomatoes are tender, which can be as little as 5 minutes for home grown ones. Cool slightly and blitz.
Drop a spoonful of basil pesto (or fennel frond pistou as we progress to the next season) into the soup when you serve.
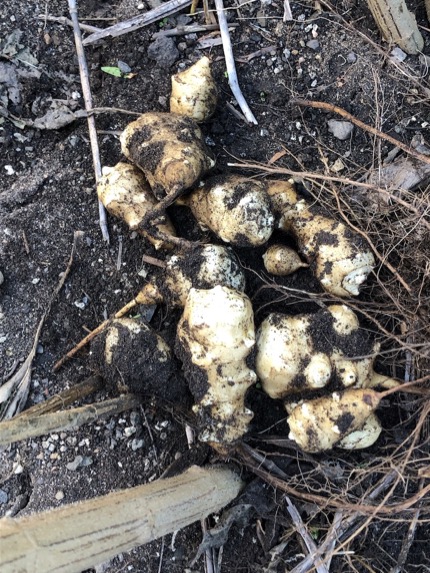
I went foraging around the base of the tall Jerusalem artichoke stems, who’s leaves had shrivelled and flowers died back, for a sneak peak. Filled with anticipation and expectation, you can see I wasn’t disappointed!
A little collection joined potatoes for our first taste of autumn mash this year; but our palates are yet to catch up with wintry food…it’s still just too warm to contemplate cool weather favourites; so I’ll leave these to store in the ground for now….like buried treasure!
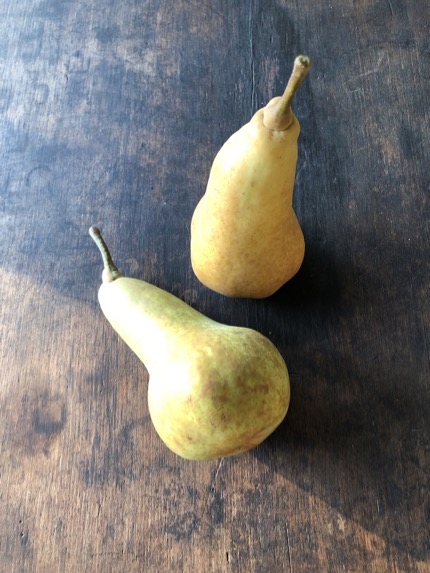
There were two pears I’d missed on the tree, hiding amongst the foliage, and oh what a couple of beautiful specimens these were! There were also more quinces to bake, and…
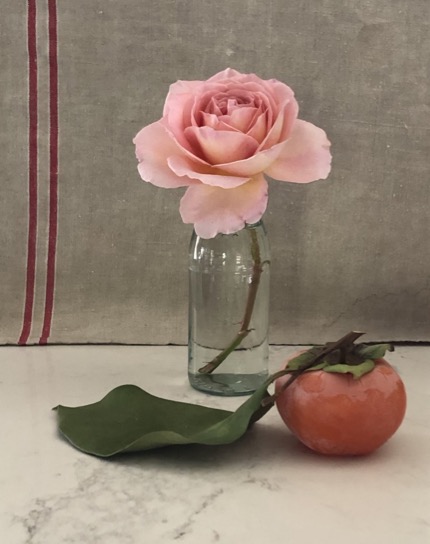
How I revelled in consuming that very first of only four persimmons this year! Here it is with another of those luscious autumn David Austin ‘Abraham Darby’ roses, whose scent is positively scintillating!
The two Persimmon trees here preceded our tenure by many a decade and I’ve always thought them the prettiest ones in the garden…from their tantalising tiny, fresh new lime-green leaves that herald the spring; to their dense summer shape and the shade they offer during summer; their exquisite autumn leaf colour; to their bare, lichen-covered winter form. The girls loved climbing them too, when they were small…they offered various good footholds and were not too tall!
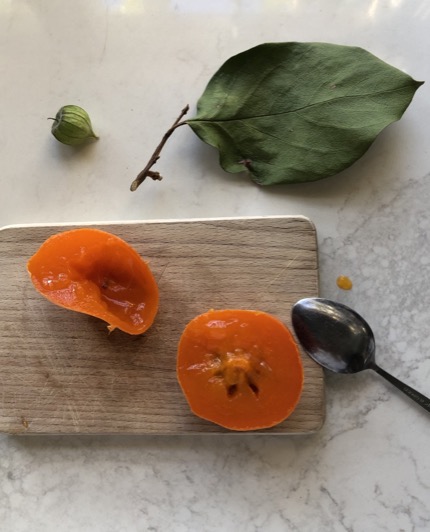
The taste of the persimmon was sublime. I find the trees seem to fruit well every second year, and also better in drought, so they don’t necessarily enjoy those summer thunderstorms. But then, we had a bumper crop last year, so I’ll just enjoy each spoonful from this year’s literal handful of fruit. No need to do anything with them but spoon them into your mouth! Being the old-fashioned astringent variety, eat them too early at your displeasure…..
But……
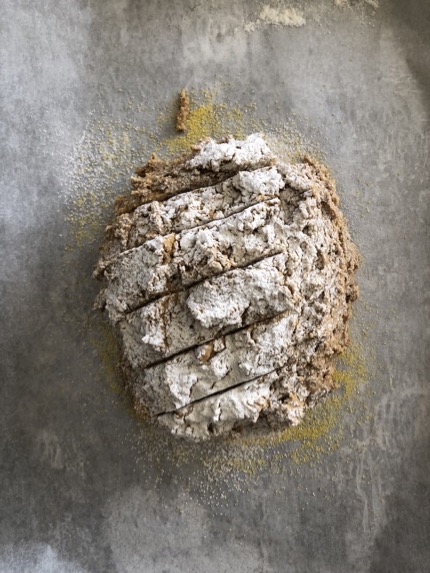
I can highly recommend them squashed onto a slice of Belinda Jeffery’s Pumpernickel Soda Bread that, if you’re in a hurry, has been smeared with a knob of good old Philly cream cheese, or….
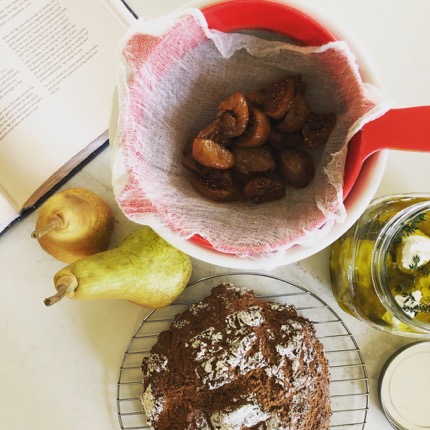
With Belinda’s Labneh, which I couldn’t resist making a batch of at Easter either….it just goes with all of the above! She very generously shared the recipe on her instagram account a couple of months ago and it’s already become a Glenmore staple, along with her famous Pumpernickel Soda Bread!
(By the way, in case you think I’m being greedy…Larry hasn’t developed a taste for persimmons, or Bonnie; though Clemmie loves them as much as I do but she’s off gallivanting, so they are indeed all mine! Usually I’d be delivering bags to the few friends and neighbours who I know are obsessed too….hopefully next year.).

Oh those figs….what a bounty we’ve enjoyed this year! But these almost last….(there are just a trickle more that will end the season), are a bit dry now; especially given we haven’t had a drop of rain, and they went straight into a pan where they yielded the little juice they had and reduced to a delicious pulp to add to yoghurt at breakfast.
As soon as the last edible ones are off the tree, I’ll remove the nets. But still that intangible sweet fig aroma wafts in the air….
Then at last…..
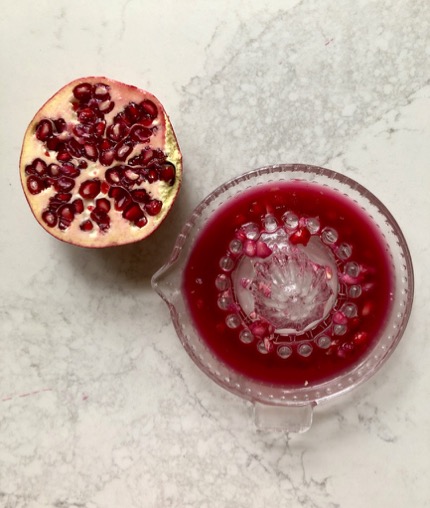
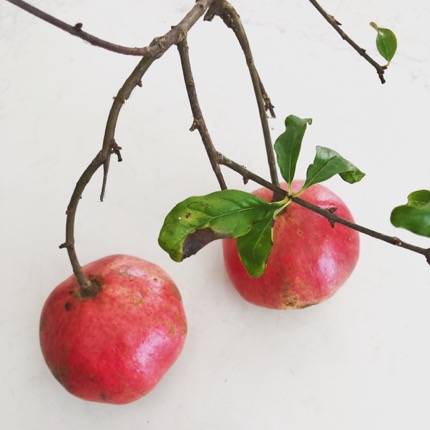
I got the timing of the pomegranates right! There are about half a dozen good ones, but really I do think I’ll have to net them too, next year. You’d think the birds would leave them alone, with their shells of armour; but like everything else, they attack them before they’re ripe, which then opens them up to infestation by other insects. As usual….grrrrrr……but the taste of even a few makes persevering worthwhile!
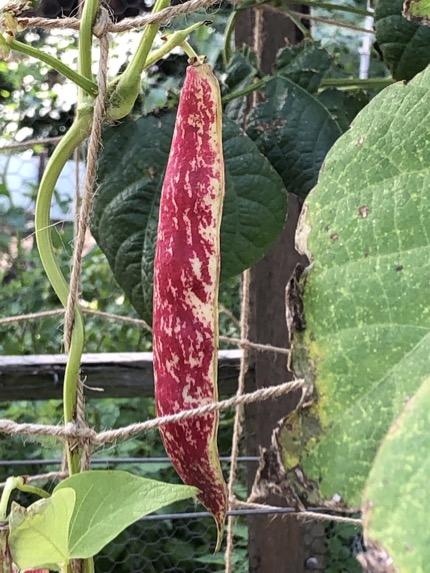
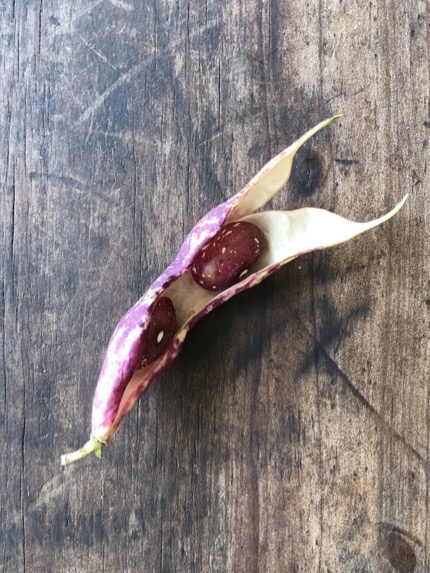
Not for the first time, I’m struck at how produce of a similar colour arrives in unison with the season….isn’t this Speckled Cranberry Bean pod simply spectacular? As I’m growing them for their inner Borlotti beans, I’ll leave them awhile longer on the vine….hopefully their colour won’t progress too quickly so that next week’s kitchen gardening participants can see the spectacle of them at this vibrant stage, dangling all in a row.
This is a very old variety, apparently making its way to America from England, around 1825. I love when fruit and veg (as well as flowers of course) come with a history attached, as heirloom varieties often do. While I think of it, this is a good reminder to sow your Sweet Pea seeds if you haven’t done so yet….I’ve been collecting seeds each year of the heirloom Painted Lady, who dates back to the mid-18th century, for about 25 years (and I sowed her seed at Easter, but there’s still time to get yours in too for a spring show).
Time to get into the garden proper, don’t you think?
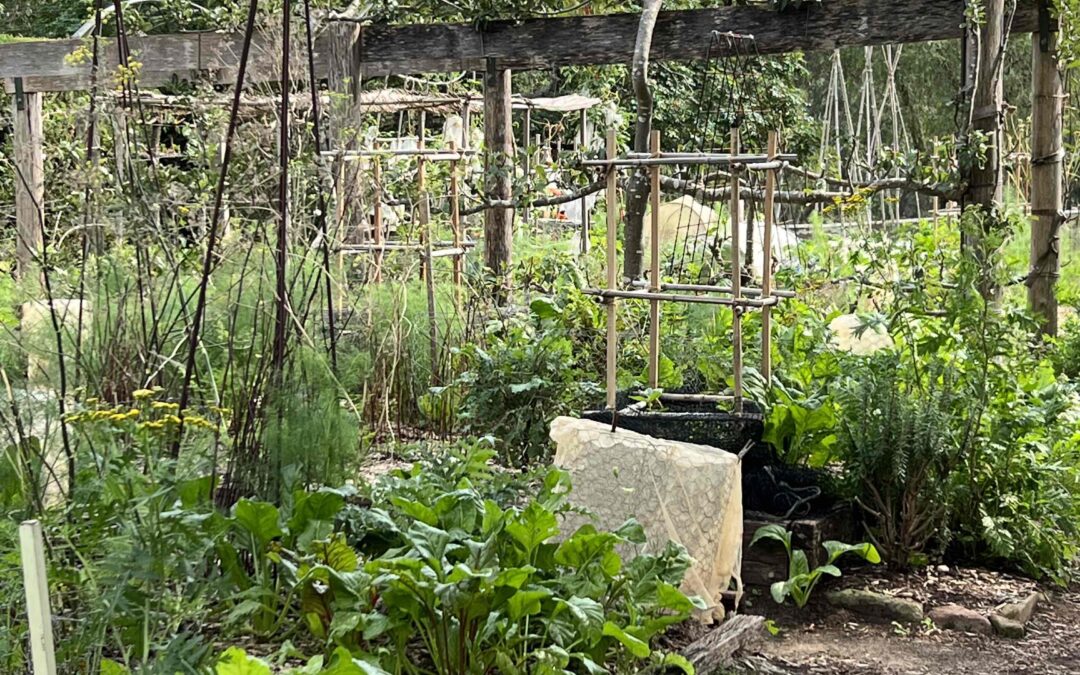
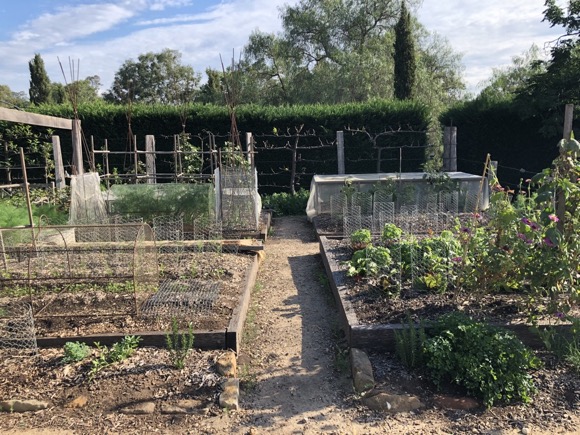
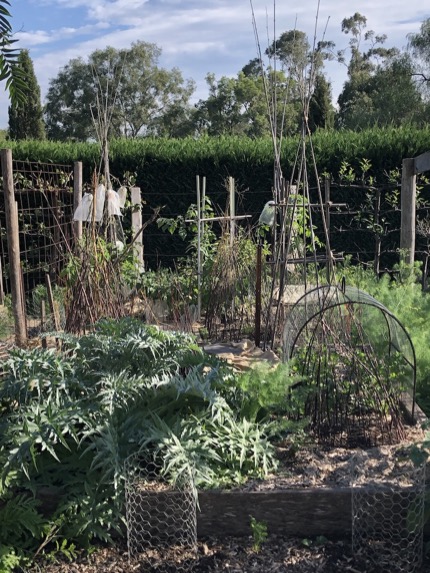
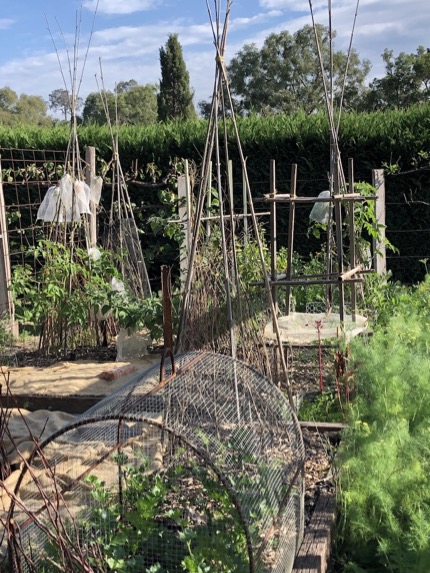
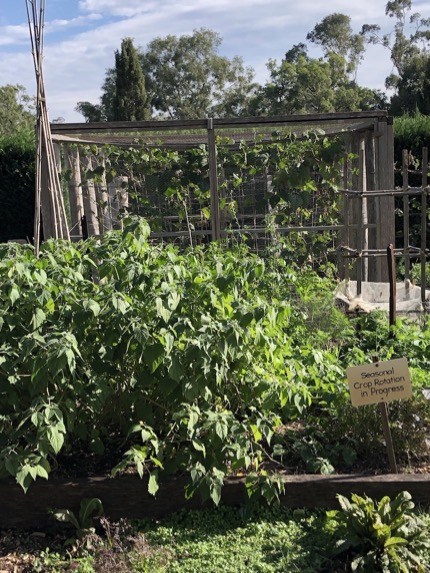
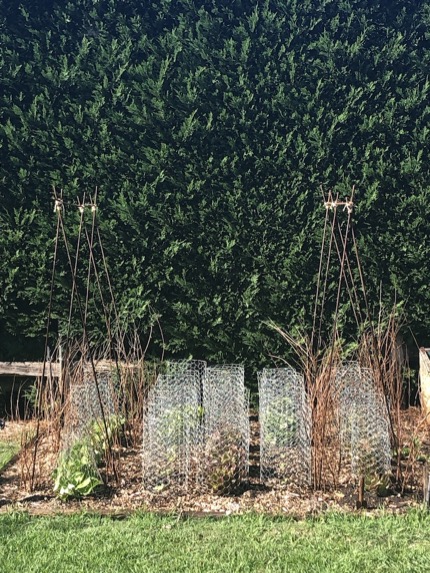
On the traditional side, most of the work of crop rotation has been completed now….except for the few stragglers; like the sweet potato wigwams at the rear of last season’s root veg bed (this new season’s legume bed at rear left). And the row of zinnias at the front of the extra leafy green bed, at front right. It is all looking rather ‘traditional’! And, as you would expect, a bit bare, at this early stage of the season.
The rows of radicchio, beetroot, basil, mignonette lettuce and chard are all happy basking in the autumn sun, and I will pull those zinnias out….some time between now and the next episode! Oh but their flowers (if you ignore the straggly mess) are so enchanting with their halo rings of little yellow flowers that attract the bees…
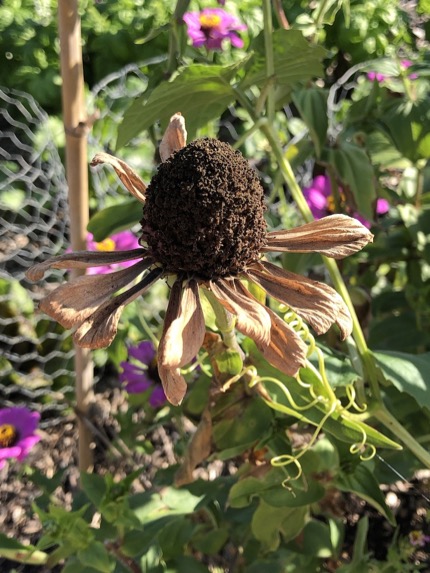
Even their spent flowers are really quite captivating!
In the fruiting bed that was; now this season’s root veg bed; here’s the ‘Wild Sweetie’ tomato cascading from the top of its rusty wigwam; where it adds a bit of height and interest while the root veg are bound to take some time to get established.
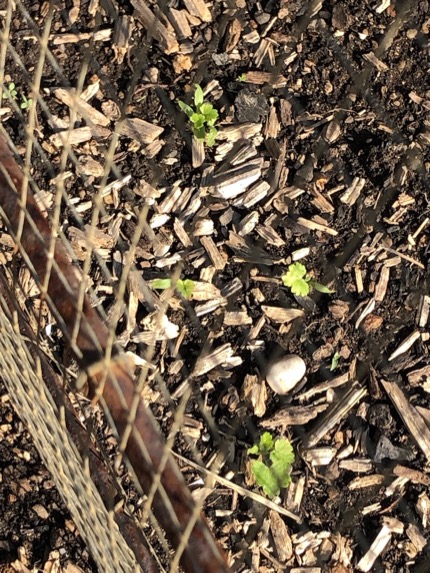
For example, it will take some time for these emerging parsnip seedlings to make any impact at all, from a growth, and therefore an aesthetic perspective. And months indeed before there’s any prospect of eating them!
I have a tunnel over the row of emerging parsnips and carrots…the carrots are zooming ahead, and I’ve already thinned them out. Then wire cylinders protect a row of celeriac and another of fennel, with a half row of beetroot in between.
The bare row has just been sown too, with a back-up of more parsnip seed…I soaked it this time, out of curiosity, to see if it emerges any faster! It’s going to need some protection too. Then there’s space for just two more rows, where the bed has been forked, and is waiting under hessian for whatever I decide comes next.
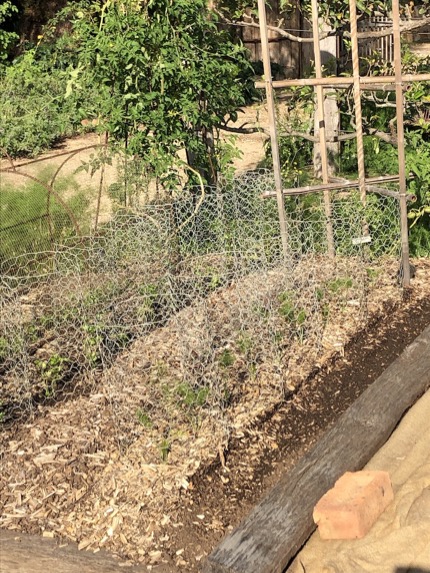
In the legume bed behind the roots, at rear left, well….you can see what I mean by the reference to Steptoe & Son!* Wire, net…the temporary measures go on and on! But as long as they’re working, I’m prepared to live with them…for now anyway!
One wigwam is encased in sturdy wire mesh…I haven’t used this one before but I thought if the pea tendrils got over excited, it might be easier to fish them out of this mesh than the black net I usually use. (At the moment I have the white insect net around the other wigwam but you know I don’t like using it – remember the issue I had in late spring with the beans? Although the weather isn’t as humid now, air flow and fungal disease shouldn’t be such an issue). Anyway, I’m hopeful that soon, both will be banished!
Can you see the size of the fennel now? The space it’s occupying is a useful transient one, between the two wigwams at the front of the bed. These are the first fennel seedlings I planted this season and as you can see, have swollen to an edible size already. But there’s no harm in allowing them to grow a bit larger – they’ll be no less sweet, and I’d like better value for the effort that’s gone into getting them this far.
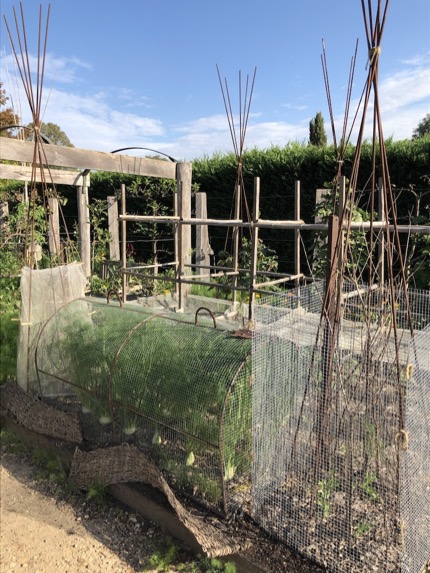
To remove or not to remove the tunnel? That is the question!
*not that this was a favourite programme…in fact I’m not sure I ever watched an episode but for those too young to remember, merely mentioning the name of this television series became synonymous with the appearance of a scrap yard, ie an unruly mess!
Behind them, the continuous broad bean box-frame contains newly emerged seedlings. All but two came up and I’m hopeful my re-sowing attempt will work. Although in all honesty, if the ones that are up flourish, they will be more than enough! I just like to see the full pattern of my seedlings emerge!
Note the wire protecting the entire base of the structure, so that neither bird, nor rabbit or possum can get in from the sides at ground level, while the net, at this stage, is preventing those bower birds from dive-bombing in from above! I’ll soon have to raise it to the next level.
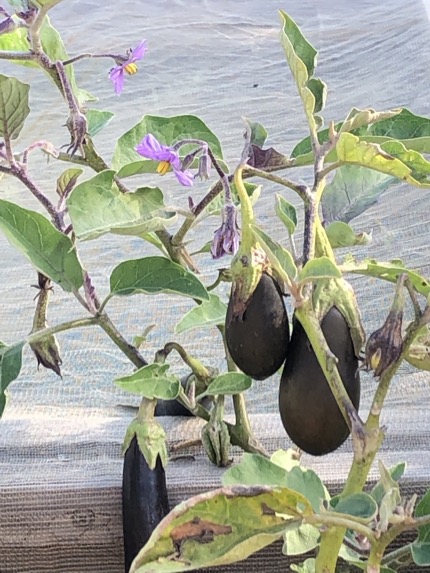
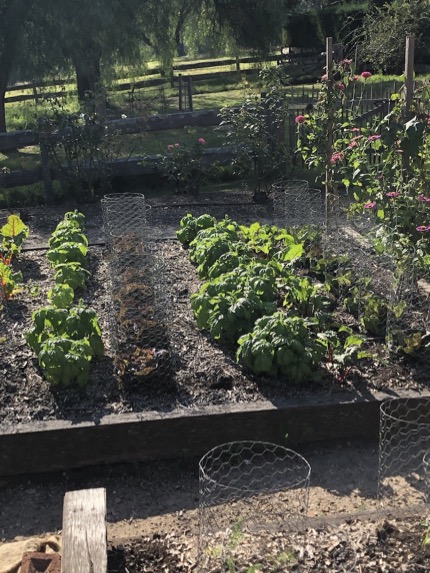
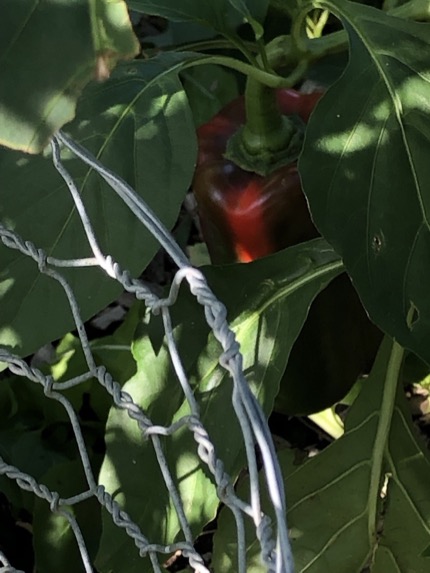
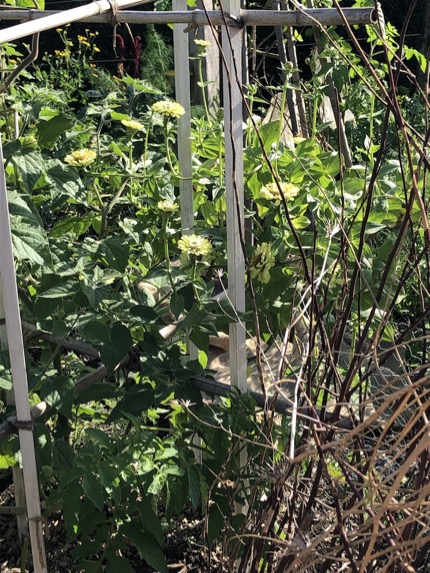
At rear right, the real leafy green bed for the season, contains the majority of brassicas in the wire cage; but those aubergines that straddle the seasons are still going strong down the centre; their pretty mauve flowers complimenting the blue/grey foliage of this family, even if it is just for a brief moment in time.
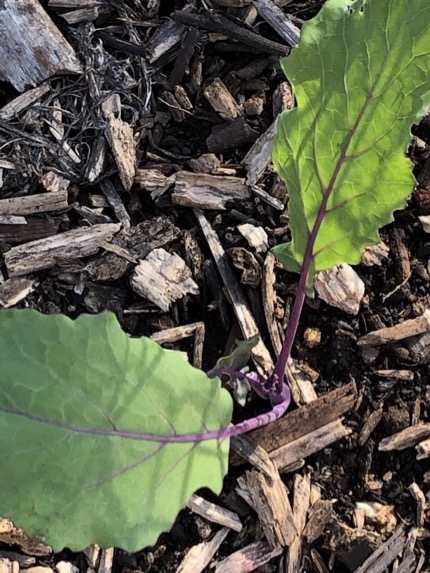
My intention was to get the row of Kohlrabi in earlier, to amplify the effect of blue/grey leaves and purple veins, jostling with the aubergine fruit and flowers for you to see, but there was a little slip-up in the weekends I missed, so the plants aren’t as advanced at this point as I’d have liked. Not to worry…I’m sure you get the picture!
In between, I do wish the row of Dianthus (which is an experiment for this year) would put on some strong growth at the base instead of lazing around on leggy growth! Maybe there’ll be a pretty picture of them next time – the aubergines only have so much longer to survive, so you may find me striving for this vision next year instead! I’ve said it before and I’ll say it again….“if at first you don’t succeed, try, try again!”.
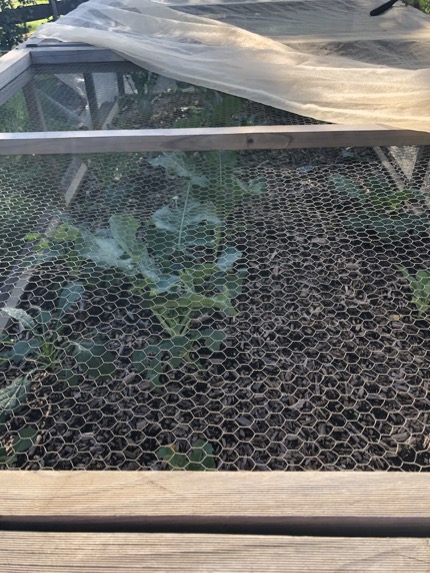
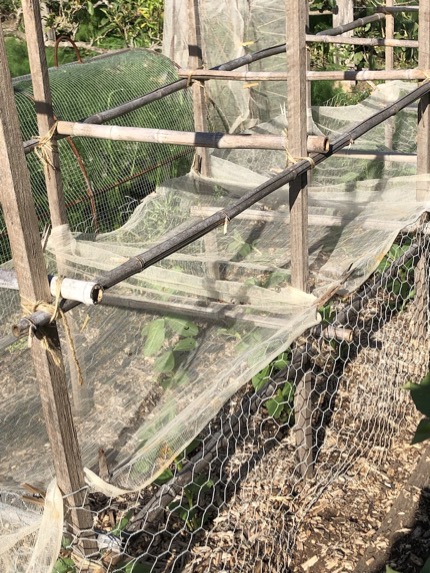
The brassicas themselves though, are putting on fabulous growth inside the cage. You can see how I had to toss a net over the top of the wire as well, to keep out those very determined white cabbage moths. Again…grrr….
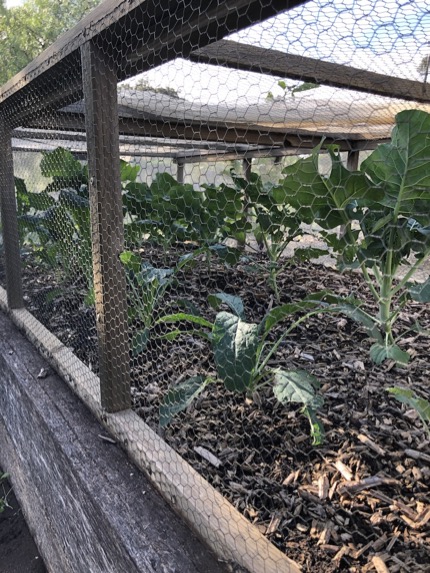
Until we have the first frosts (which should bring a temporary end to the cycle of the moths) I’m afraid the net must stay.
Frost too, should sweeten the leaves of the black Tuscan kale; but as I imagine that’s at least a few weeks off; Larry needn’t worry quite yet about them ending up on his plate!
The guild beds, to the left of the apple arch, present quite a different picture to those on the traditional side. There are still a number of plants clinging on from last season, along with plenty of self-sown fledglings. You can see the deeply serrated artichoke leaves have grown considerably since coming back from their mid-summer hibernation.
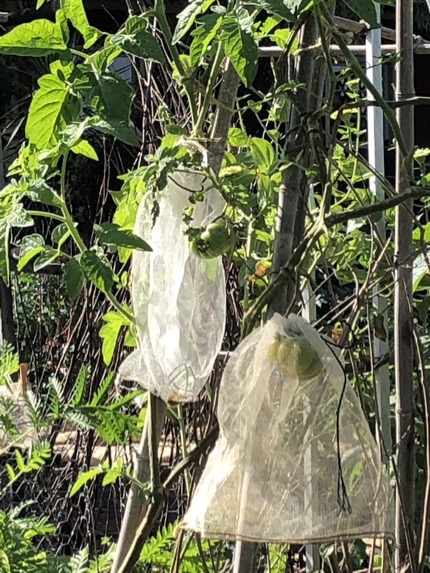
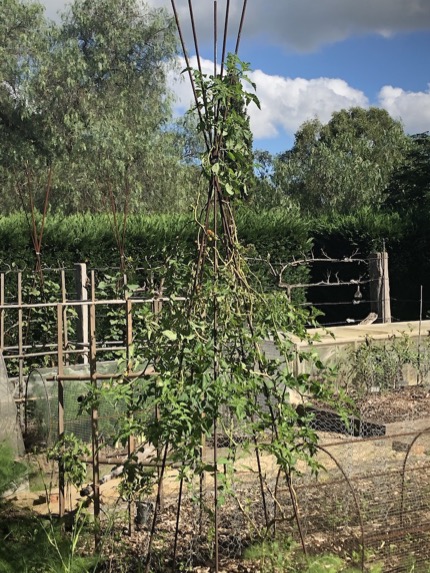
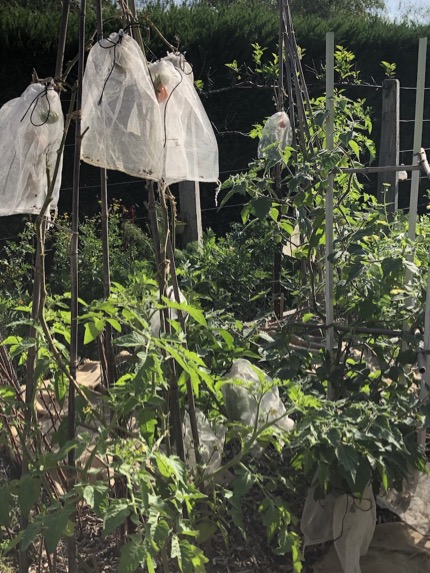
While Costoluto and Black Krim tomatoes continue to fill net bags on their frames….

I work away between existing plants; aerating soil, marking areas for seed sowing with prunings from the fruit trees and adding layers of compost (except for where I intend to sow root veg).
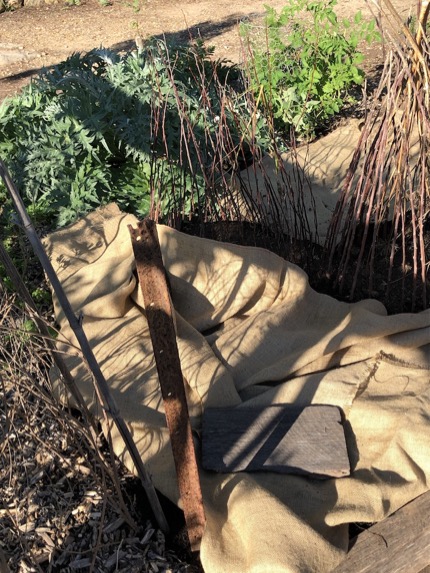
Until I make up my mind just what and where I’m going to plant seedlings or sow seed, I cover our precious fresh compost with hessian.
I find it easier to add mulch later, if I’m sowing seed as well as planting seedlings, because sowing seed in mulch can be rather irritating. While I really don’t like to leave any soil exposed to the elements, mulch can impede the growth of fine seed, so I make an exception in those circumstances, then mulch once the seed has emerged. Or, if the seed is thickly sown and emerges like a carpet, then it won’t need mulch at all…the foliage of the plants themselves will cover the soil.
Yes, this part is all a bit of a fiddle, but aside from growing what we want and need to eat; just what the spring garden will look like all begins right here….right now….
You can see I’ve got a lot of prep done; around those stragglers that are holding up the sequence; and I intend to plant up everywhere that’s ready to go this weekend!
Do you remember months ago, when I noticed a tiny Cape Gooseberry seedling had emerged and I almost weeded it out by mistake? I also mentioned that it would not have the tidiest form! You can see what I mean now…it’s sprawling over a quarter of the bed, and is as healthy a specimen as I’ve ever seen.
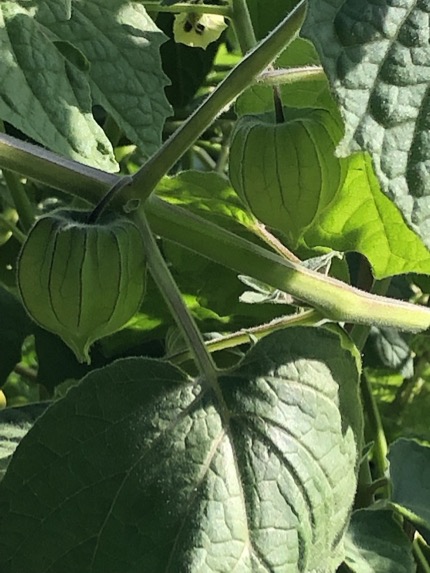
Hiding among it’s foliage though, are dozens of green lanterns, containing immature fruit; so here it will stay, whatever form it may take, ’til it yields its bounty!
Eclipsed by the gooseberry’s rampant growth are capsicums, an aubergine, a globe artichoke, fennel and beetroot seedlings planted anew, as well as a broad bean box, a wigwam for peas and numerous self-sown lovelies.
From some standpoints, this side still looks almost ‘summery’.
But it won’t last much longer!
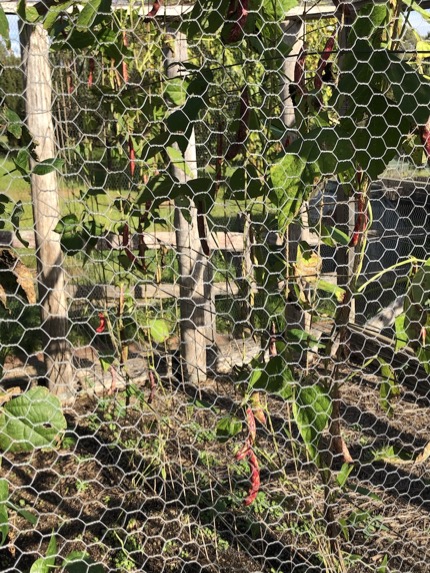
In the cage, the row of much anticipated Speckled Cranberry beans are pretty much ripe for picking. And the time is right too, to order bare-root raspberries if I’m going to re-plant the cage for its original purpose.
Heavily patterned Borlotti beans nestle inside each pod…I thought I’d pick this stunted one for a sneak peek at what lies inside before picking the beautiful long ones!
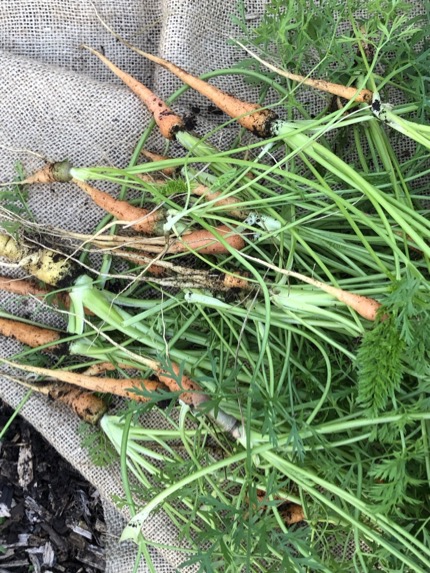
Since recording the episode, I thought I must pull some of those carrots that re-grew their foliage to see what was happening underground…well, while not bad, I’ll leave the rest to swell some more. Clearly the defoliation retarded the speed of their growth, which is hardly surprising; and these were delicious roasted alongside a chicken earlier this week. A good recovery effort!
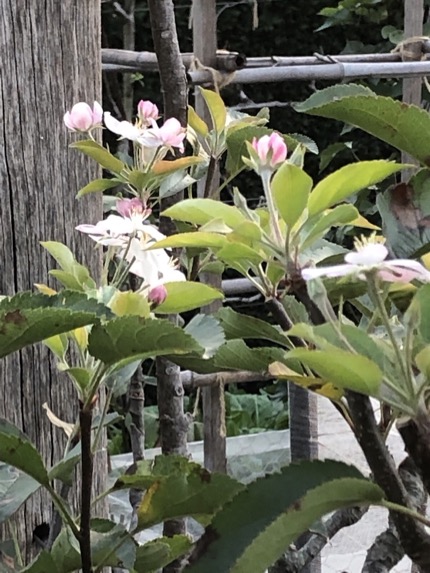
It seems the apples have got their seasonal wires crossed! To be honest, this does often happen with our fruit trees in the autumn, but this really is rather late in the season for it to occur. The cherry and plum as well as one apricot and an almomd have also sent out random blossom, but I don’t expect it to amount to much. Oh but how pretty?
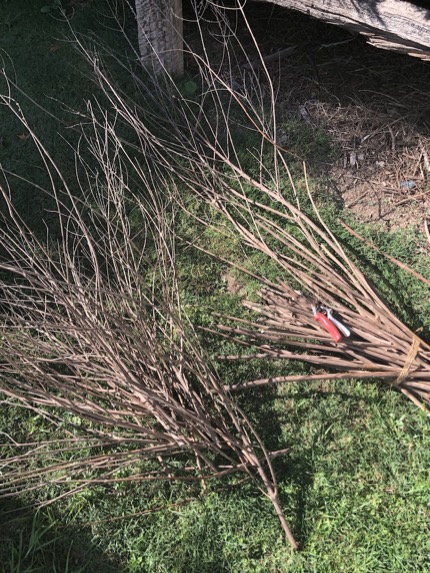
One of the shrubs (Tree of Chastity, Vitex agnus-castus) in the ornamental garden produces ideal prunings to use for peasticks and I make sure to save them each year. They send out multiple fine twigs that make ideal ‘nests’ for emerging pea tendrils to cling to, as well, hopefully, as providing impenetrable baskets to protect them from the birds.
I made a pair of short tunnels using the iron rods, over the top of the lettuces that will soon come out to free the space (but I’ll keep re-sowing ones down the centre of the bed). I then pegged strips of net around the pea sticks as soon as I’d sown the seed but thought I’d spare you that ugly sight!
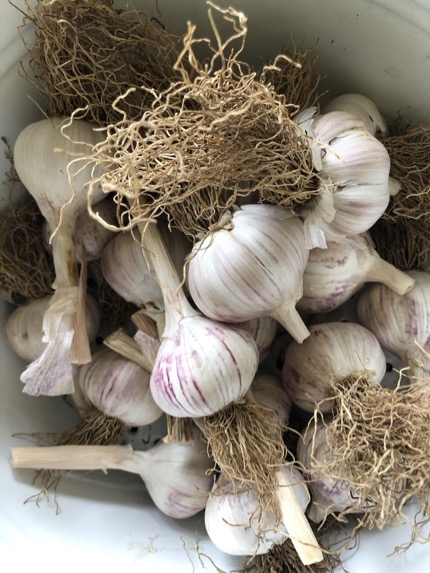
On Anzac Day, as planned (it’s become a Glenmore tradition by now), it was time to select the largest heads of garlic from last year’s crop. These were grown from Patrice Newell’s ‘Purple Glamour’ variety, that she brought to share with participants at the garlic event I invited her here for last year.
I took the opportunity to begin with this new stock last year; as the drought had affected the size of the heads I’d produced the previous season (that I’d collected year in, year out, also from Patrice’s garlic). So I was thrilled to pull as many good sized heads as I did last November, to sow this year.
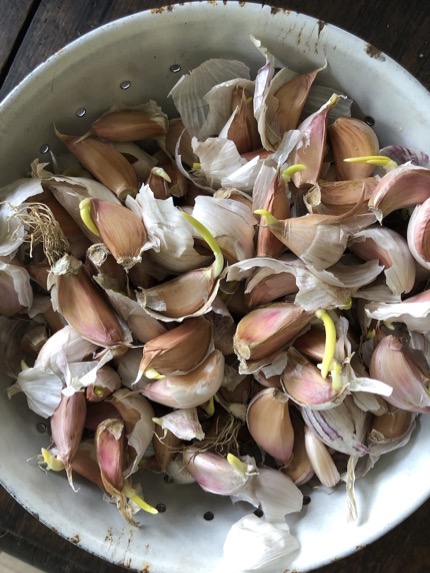
The largest cloves form around the outside of each head of garlic, so I broke up the heads and selected the best before setting off to prepare the bed…which I forked through well before going about planting…
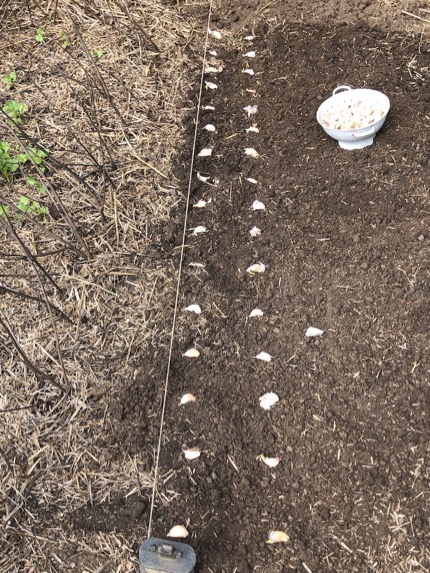
The string line gives me a guide, but I won’t know how straight my eye was ’til they all come up!
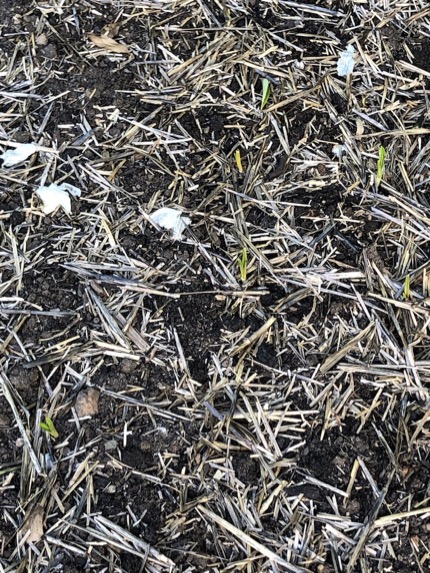
Which won’t be long by the look of it….just one week on and the first shoots are already pushing through the earth!

The San Marzano tomatoes are heavily laden….with both fruit and nets!
At last I decided to simply re-seed the last bed in the strip on the drying-green side of the compost bays. With decisions made for where to plant the main overflow veg, like garlic, onions and leeks, and given it’s not an ideal bed anyway for growing (with a Cyprus pine in one corner!); I reckon seeding that bed is better than wasting space.
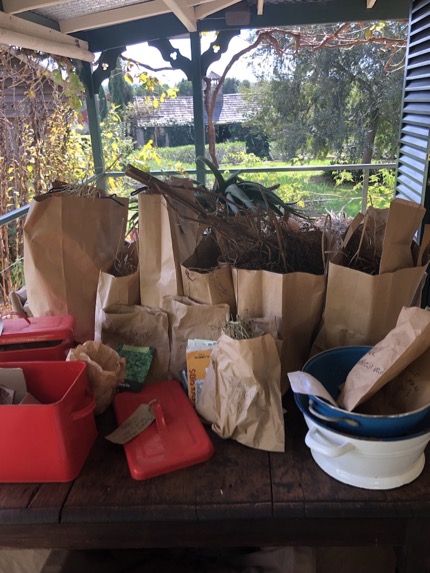
So….it was down to the cellar for a good look at all the seed I hadn’t used last year! As you know, I store it in brown paper shopping bags, so out they all came (I had a good sort through my tins as well).
Then off I went to the drying green, and had a lovely time tossing it all about with great glee!
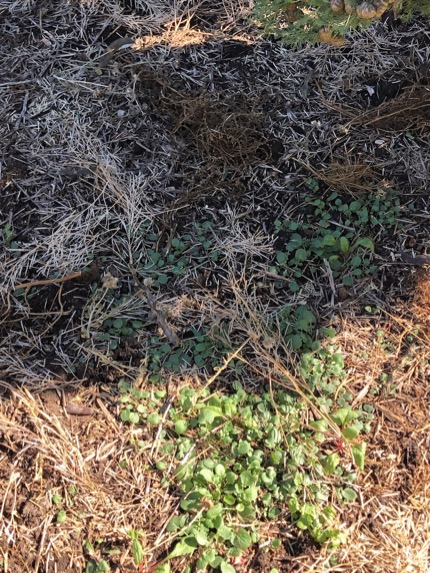
Some seedlings had already emerged of their own accord, so before I went hurling all my seeds about; I gave it a fork over, and sprinkled some compost.
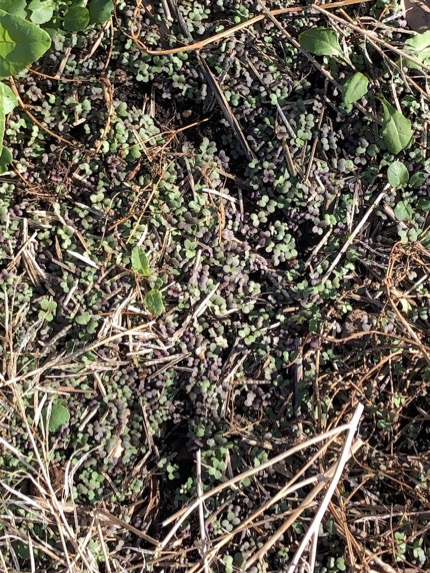
One week on and already a whole load of tiny new seedlings are emerging…oh what fun! We’ll eat well from all of this; then as the season marches on, I’ll allow much of it to go to flower, to create a romantic vision, fodder for the bees, and ultimately, collect the seed to begin the journey all over again.
If you have children, I can’t urge you strongly enough to try this! Begin with packet seeds, then save your own at the end of the season (on the stem), as it’s so much more fun with all the stalks and seed pods, for children to marvel at all the different shapes and sizes of pods, as well as seeds; the sounds they make, the variations in colour.
The world of seed is a marvel for adults and children alike, and a garden bed like this on even the smallest scale is oh so very easy to achieve!
This is where the fennel stalks ended up! Hanging over both here, on the corner…
And the wire bed out in the Pumpkin Paddock; where the potatoes grew last season! As you can see, many seedlings have come up, but the bed’s not yet smothered, so I’m still tossing seed heads all about, in hope, for Open Garden in November!
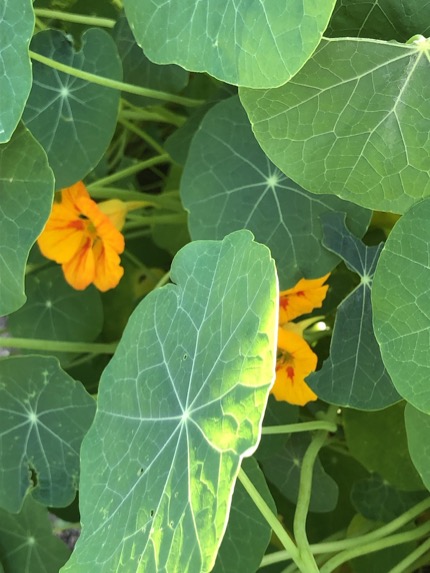
The very first nasturtiums are peeking out from under their lovely fresh new season’s leaves; so their petals are back in our salad bowl.
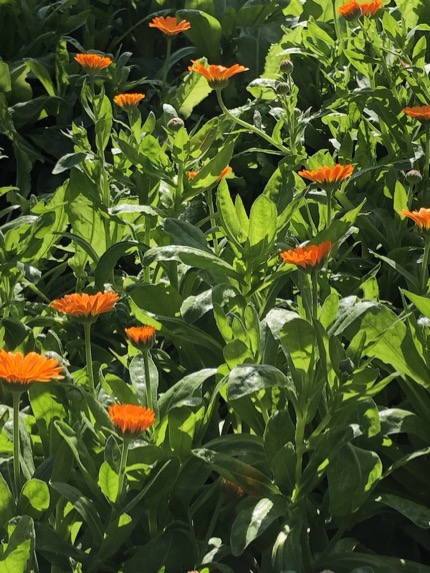
As are calendula petals too…
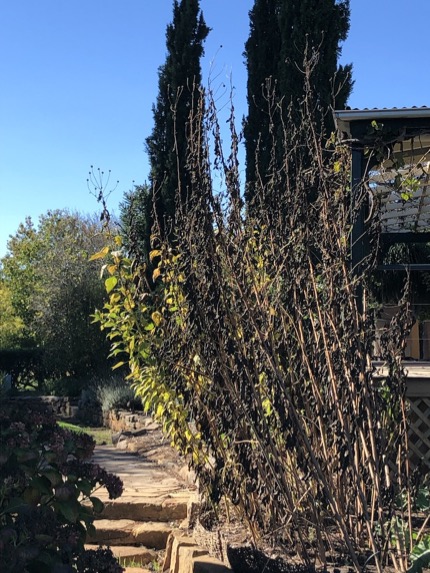
This is how the growth of the Jerusalem artichokes ended up….
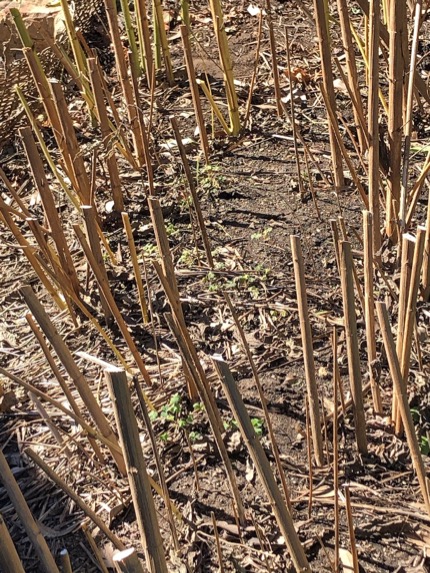
I cut their stalks down to around knee-height. This way, I can clearly see where I’ve dug their booty from the ground and where the rest are stored.
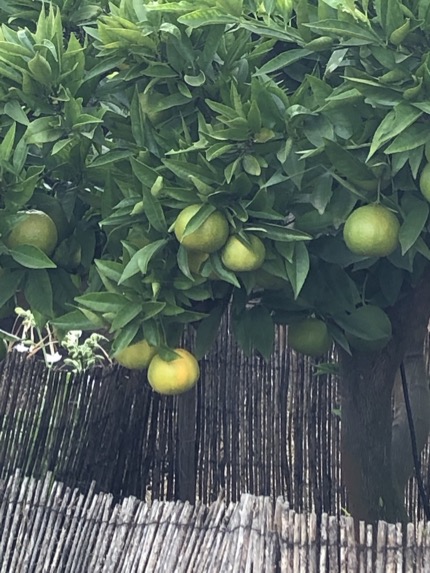
Clementines will probably be the first of the citrus to ripen…with oranges and lemons in their wake. These should coincide nicely with the first fennel, for one of our favourite early winter combinations….but there….I’m getting ahead of myself!
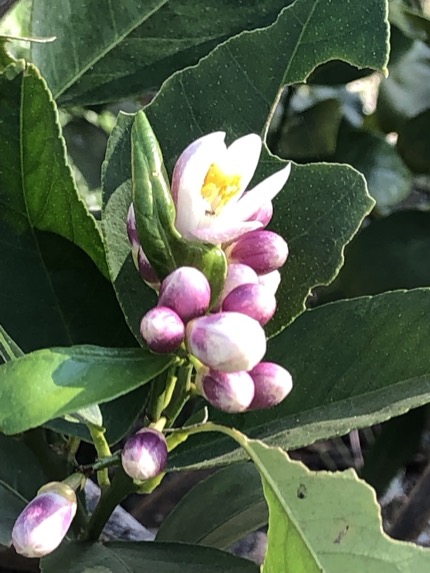
The Meyer Lemon, who is inclined to fruit twice a year, may just pip the Clementine at the post though. It’s back in blossom again too.
And to end, here’s a little mid-autumn delight…one of my favourite views of all in the garden…a little stuff ‘n nonsense, down the back, that kind of came to fruition in the end! The zinnia bed, that is bound to expire before the next episode!
So….’til next time…get planting!

| Going, going…… | fancy tomatoes, apples, figs, quinces. |
| Eating…. | lettuce, coloured chard, beetroot leaves, sorrel, tomatoes, aubergines, capsicums, rhubarb, apples, figs, quinces, fennel seedlings and new fronds, basil, salad burnet, lovage, chives, French tarragon, parsley, calendula petals, nasturtium petals, amaranth leaf, red elk, giant red mustard. |
| Sowing seed of…. | peas, (you should have your broad beans in but if not, do it pronto!), fennel, carrot, parsnip, beetroot, turnip Australian yellow leaf lettuce, celery, rocket, red elk and giant red mustard, parsley, dill, chervil, coriander, nigella, borage, calendula, nasturtium, poppies. Sow garlic cloves and sweet peas asap if you haven’t done it yet. |
| Planting seedlings of… | lettuce, fennel, coloured chard, beetroot & celery (if you’d rather not grow from seed), kale, broccoli, cabbage, cauliflower, kohl Rabi, (Brussels sprouts if your climate is cold for long enough…last chance), globe artichoke, leeks, celeriac. Order bare root fruit trees and berries; order potatoes, rhubarb and asparagus. |