Play Podcast
It’s late October, when crop rotation and compost take centre stage and broad beans hold up the works….
What a lot of activity there’s been in the garden since the last episode! This time of the season is, without question, the most labour-intensive of all, but once the bulk of the jobs are done, we can take a deep breath and kick off our shoes! Well…it doesn’t mean there’s nothing to do! But the heavy work is almost done. And getting it done before the heat sets in, so planting can be done in order that fledgling seedlings can settle in and acclimatise, is important.
So I’ve literally been chasing my tail ever since I farewelled you at the end of the last episode! But oh the beauty of the garden, after the rain – so much blossom, so much pink! But how I love that mad burst after winter, before it all settles into its summer stride.
But that’s elsewhere in the garden (and there’s a pic further down!). In the kitchen garden, it’s been all systems go: pulling out, replenishing the beds and building the framework to support what will hopefully be rampant summer growth.
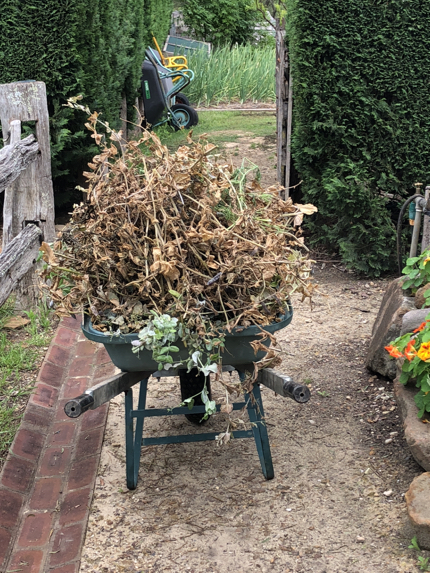
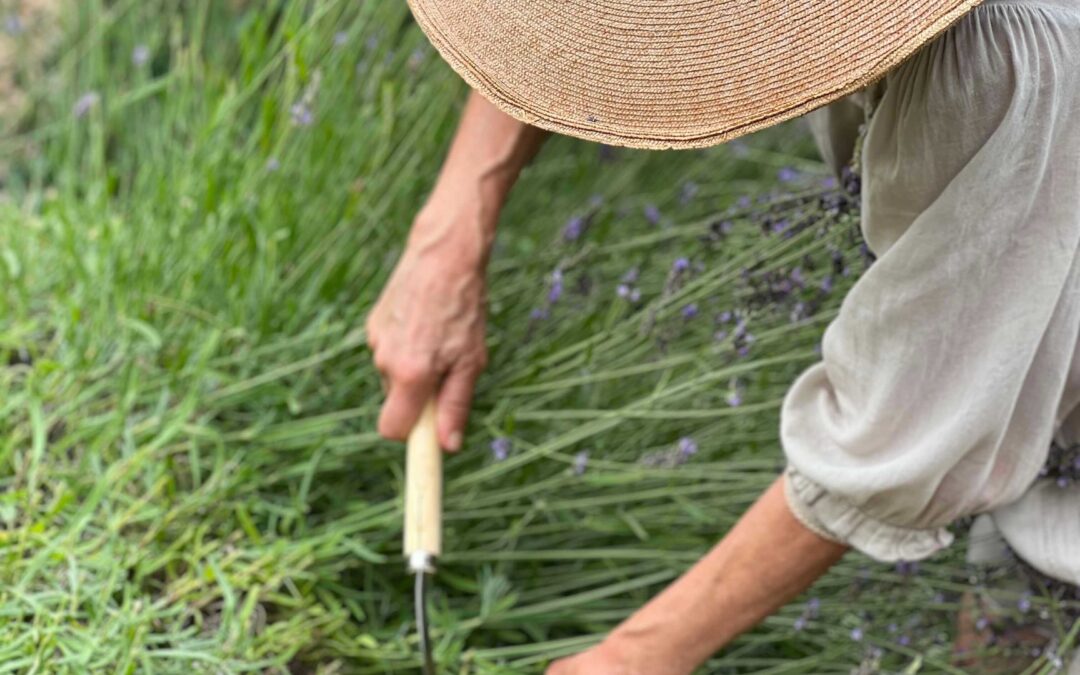
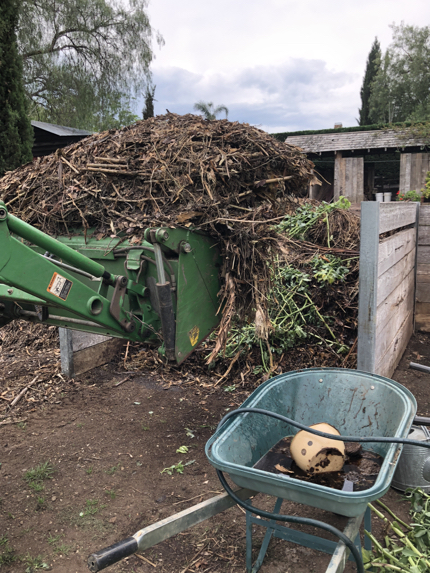
But we can’t get anywhere with the rotation process if we don’t pull out all the spent vegetation first. Here’s just the first barrow of spent foliage heading down the path to the compost heap.
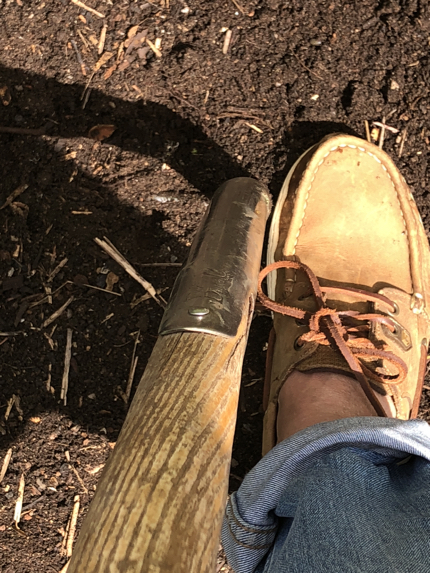
After the foliage is pulled, the chooks go in to have a good scratch around – usually in the big cage (there were images last time). Then once the chooks go home, any last mess is raked out, taken to the compost, then the next job is to plunge the border fork into the earth over and over again. I start at one end of a bed and work backwards, trying not to step onto the aerated earth again….well, if I can help it.
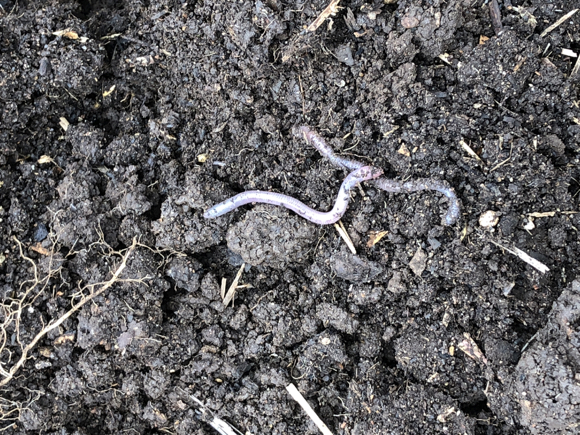
One of the joys of forking over the beds is discovering earthworm after earthworm coming to the surface, then burrowing back down again to the depths – a sign of good soil health.
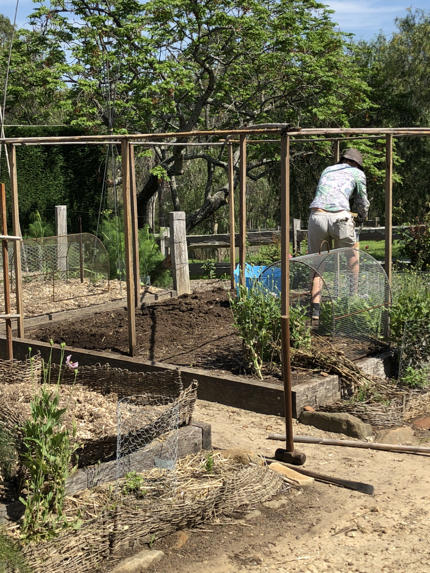
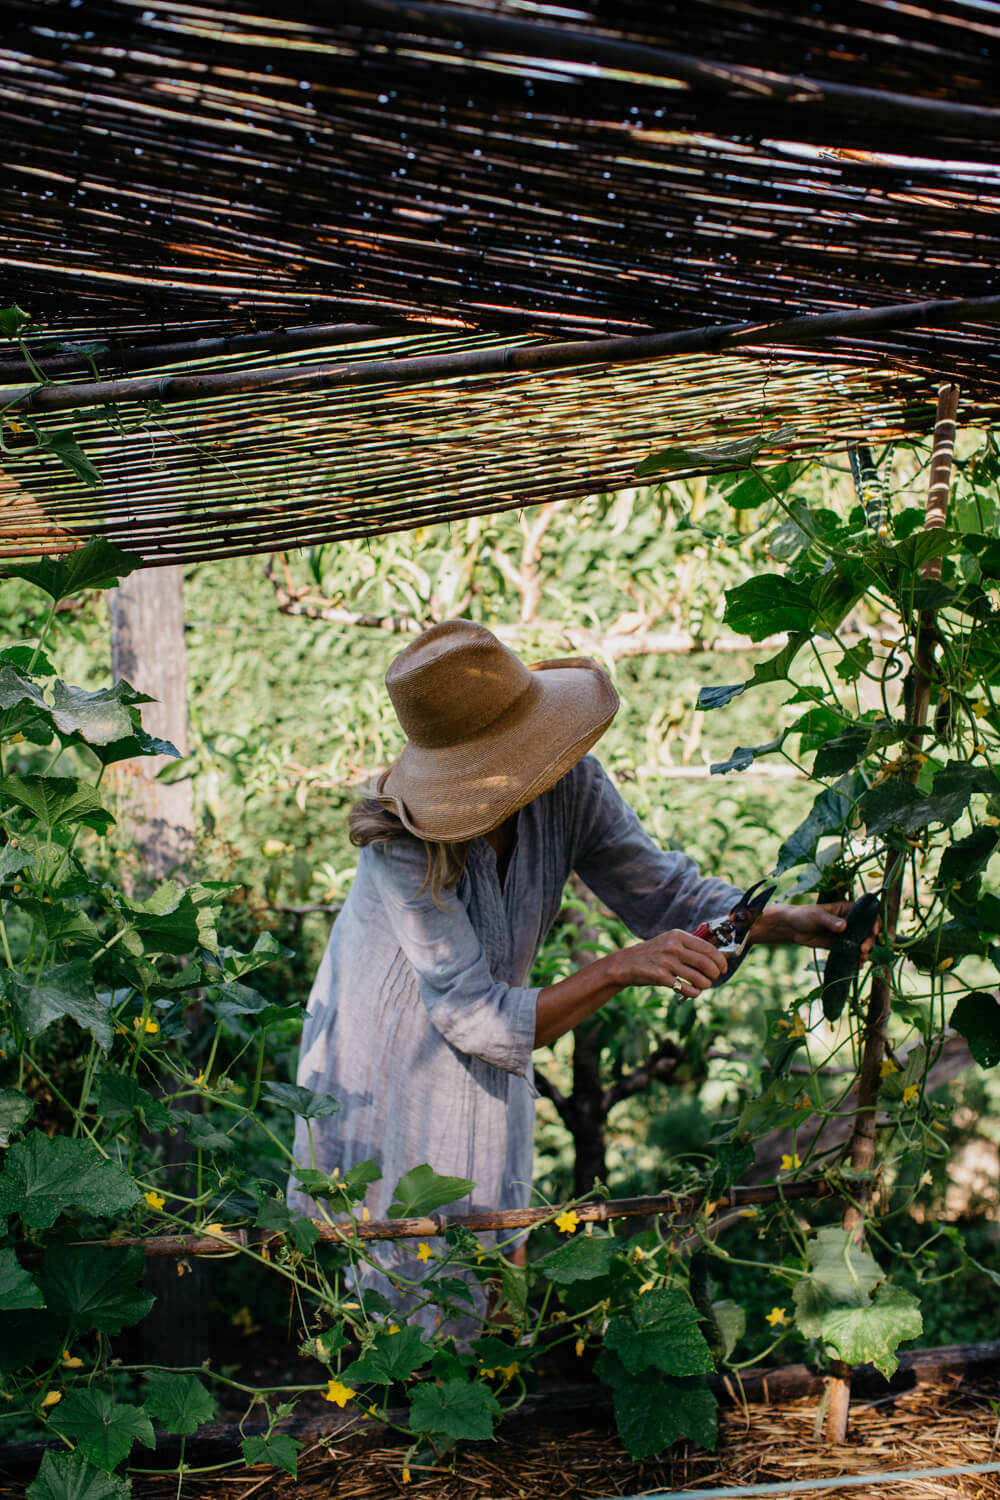
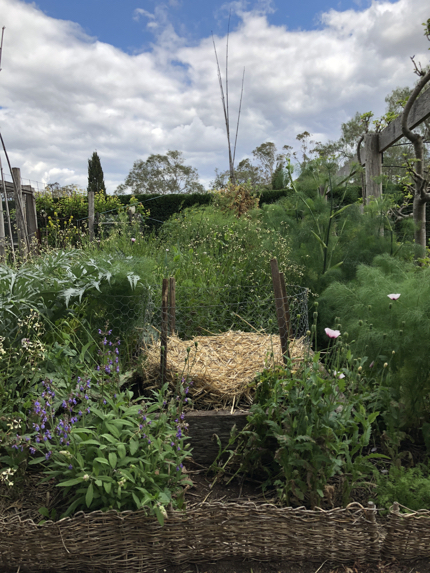
In most of the beds, it’s once the digging is done and the mulch has been spread out on top, that we build structures. We lay boards on top to walk on, so we don’t squash our precious compost. But the shade structure is quite an effort to build, so I’m in the habit of erecting the frame first and doing all the tying of rods before carrying out the earthworks, as it’s quite difficult to complete without walking all over the bed! Here’s Thalia digging away and I’m about to join her again. We’ll roll out panels of willow on top just as soon as it sounds like we’re in for a really hot spell of weather. And of course, after the aeration process, the mulch went on top immediately after we added barrow loads of compost.
So….are you ready for a digression into mulch? As promised, here we go on a little tangent!
So….years ago, when I began this whole gardening escapade and first learned about compost and mulch (remember – I was a city girl – and pretty clueless about this stuff back then!), I read about the value of adding lucerne as a mulch, because as it breaks down, it adds nitrogen to the soil. I got to talking about such things with our dear local friends, who happen to grow a lot of lucerne….prize-winning beautiful lucerne, and was a lucky girl indeed to receive a few bales to try. Well….I soon learned that straight-from-the-farm lucerne, added to a garden bed, contains many seeds! And quite frankly, they are an absolute nightmare to weed out, and it wasn’t long before lucerne was taking over my newly planted garden beds! Hmmm….so I had to think again on that front. We’re still friends incidentally!
It was at about this time that sugar cane mulch became the most popular and easiest mulch to get hold of in these parts….and much as I hated the fact that it came wrapped in plastic, we began to use it on all the ornamental beds. In those days, it was more about establishing the ornamental garden than growing veg – but that’s another story (those who have a copy of The House and Garden at Glenmore will know it well, so I won’t get bogged down in that here). But once I got the kitchen garden established, I also used sugar cane mulch in all those beds, and it was here that the problem with it, became the most clear to me:
It looks beautiful when you first spread it out (and smells rather lovely too). It’s all fluffy and soft and, incidentally, the best thing if you have a photo shoot and want everything to look plump and gorgeous in an instant! But give it a couple of months, and it seems (to me anyway, and now I’ve also had so many people raise the same issue with me), that it kind of matts together and doesn’t allow water to penetrate through its mass, thereby causing the soil to become hydrophobic…repelling, rather than absorbing water. Now I’m no scientist, I can only go by experience. But I was looking for an alternative, when I got talking to a lovely farmer / gardener from the southern highlands….who said to me “Mickey….why don’t you just use bedding straw”?
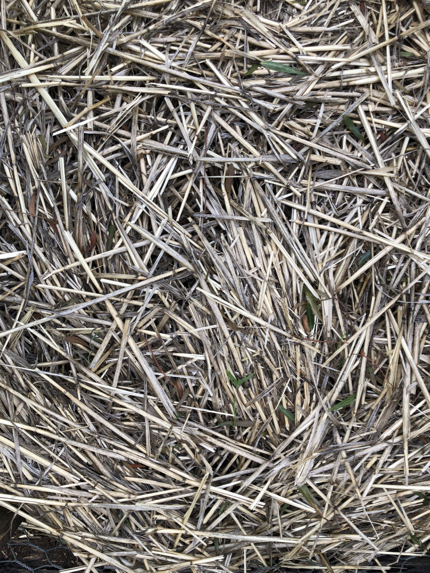
And so I did, and have been for years. It comes in bales so there’s no plastic, and while it isn’t ‘fluffy’ (it’s much more coarse, so open), and yes I know it doesn’t look as pretty as sugar cane mulch, but nor does it smother the soil; it allows the water through. So this is what I’ve been using here now for years. With happy results…except for one: a bit like the lucerne, it often contains seed heads of wheat or barley, or whatever it was in its previous cycle, which like lucerne, can take over. So that’s the downside. But once you’ve weeded it out, that’s it. Done and dusted for the season.
But the story doesn’t end there, and this is what I love about gardeners – generous souls, they’re always so willing to share their experiences…..
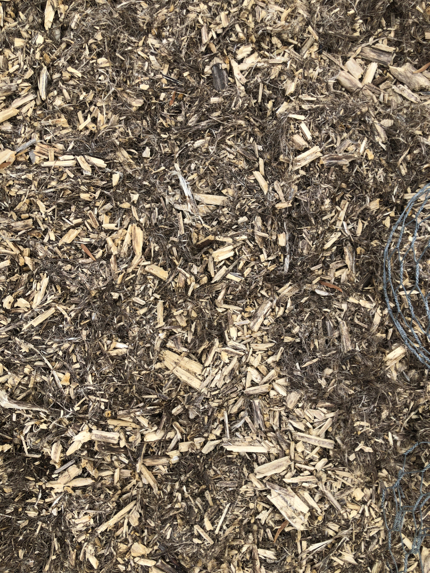
It’s with thanks to Justin, and his allotment at the Camden Community Garden, that a new product came to my attention: Hemp mulch. Hmmm…..
Personally, I associate hemp with the textile industry….and must have used hundreds of metres of it during my career in interior design – there was a particular natural weave I favoured for years for the reverse side of cushions, and all kinds of upholstery as well as ‘soft’ blinds, until the supplier, in Byron Bay, disappeared off the radar which was such a shame. Then I reverted to linen for the same purpose but I always favoured hemp in those particular situations. (Incidentally, and this really is a tangent, but if, like me, you have a passion for textiles, I think Johanna @lagrosstoile is more knowledgeable on the subject of hemp than anyone I know – she collects the most beautiful old textiles and explains her warps and wefts, their provenance and flaws, their beauty, their stitching in such an evocative manner, that you may enjoy taking a peek into her world).
But hemp….in the garden? Well why not I say! I took myself off to Tim’s Garden Centre at Campbelltown, from where Justin said it came, and got hold of a couple of bags. One experiment coming up! And I’ve got to say….so far so very, very good! A combination of coarse, chipped stalk and fibre, that’s almost fleece-like. It’s not fine to work with like sugar cane, but once it’s in place, it stays put – it doesn’t shift about. And so far, water seems to be penetrating. It’s almost like a lovely doona on top of the soil. So….whilst it’s early days….I’m tentatively giving it the thumbs up! One downside though is that it comes wrapped in plastic. Uggghhhh…..but the upside? It’s organic! Woohoo!
OK – let’s get back on track!
In the midst of all the heavy activity, there were more fiddly tasks to keep on top of – like soaking bean seeds so they’re ready to sow next day….
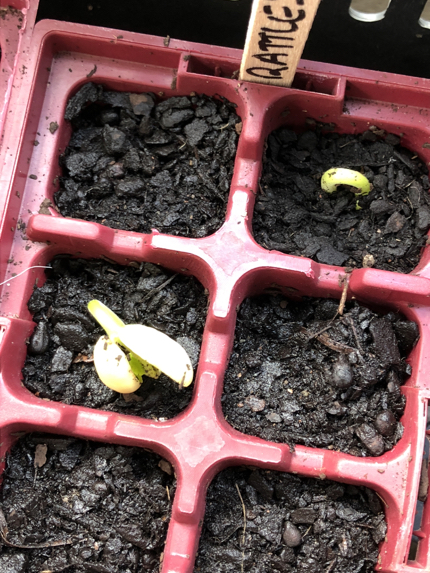
Then ten days or so later, there were signs of life – what a relief! Seeing beans like this always puts me in mind of The Good Life – the tv series that I loved so much in my young teens, and even more second time around when the girls were growing up, and I’d embarked on my own gardening madness! Do you recall the episode where Tom & Barbara run an experiment to see which bean comes up first – the one they’re they’re sweet talking, the one they’re being rude to, or the one left as the ‘control’? And Tom gets jealous when Barbara names her one Douglas! Douglas Bean. It’s one of the funniest episodes of all and I always think of it when i plant bean seeds and have a giggle to myself!
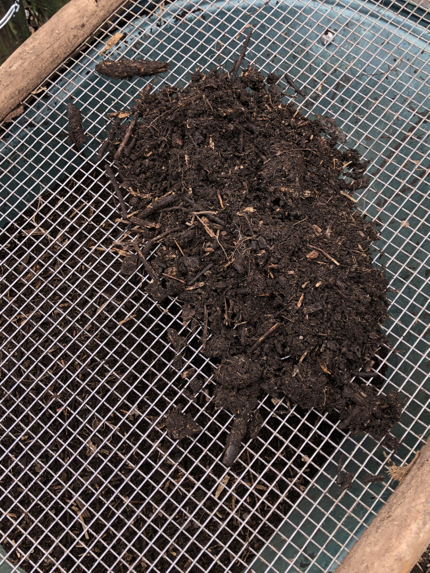
But let’s get back to the prep…..we shovel a good heap of compost onto the top of a piece of wire made into a sturdy frame to sieve out any large pieces of material that may not have broken down…..or to remove pieces of tape that may be left behind from decomposed cardboard boxes and the like – it’s a last chance to take anything out that I don’t want in the beds and it also just fluffs up the compost one more time before it goes to its new home – replenishing the veg beds.
Here, I’ve added a good mound of our compost over potatoes that I planted deep down into that corner I told you about last episode, where the broad beans hadn’t done so well. Then I covered the compost with mulch just as soon as I was done, so as not to allow any of the precious micro-organisms we’ve been building up during the making process, escape.
I thought I’d get in at least one vaguely pretty picture before launching back into compost! But that topic does rather pre-occupy my thoughts at this time of the season.
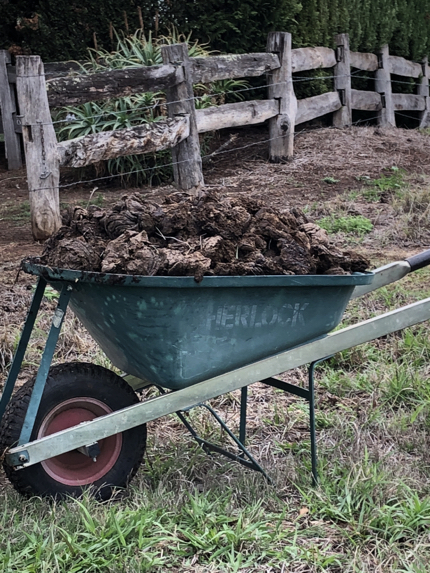
So the week before the big compost-making episode, we collected a good couple of loads of cow pats from the paddocks! These are well spent…..in fact, we destocked our tiny herd earlier this year when we realised, thanks to the drought, that we’d have no grass for feed, so these have been hanging around in the paddocks for some months, but they still make valuable material.
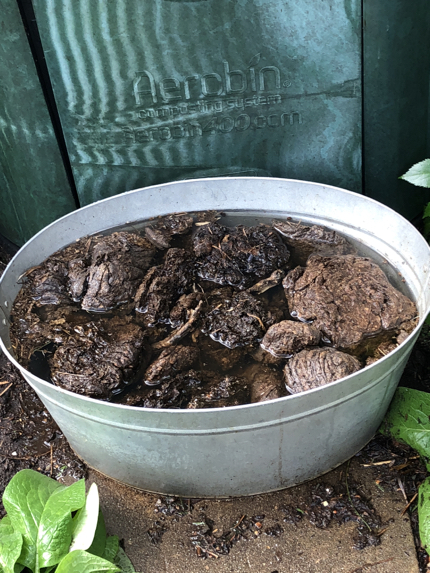
So back at compost headquarters, I tossed a bundle of pats into the big oval tin, topped it up with water and left it to steep, for a week, before the big compost making session was scheduled in the diary. So let’s take a little diversion for a moment, as I did in real time, from muck!
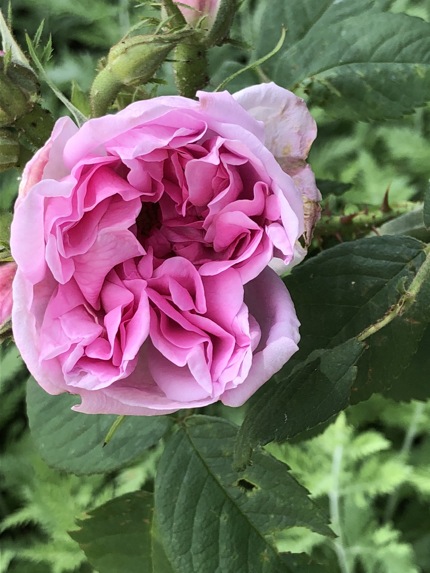
Elsewhere, the ornamental garden has been exploding with prettiness all over and one of my absolute favourite roses of all is in bloom – Quatre Saisons, R.x damascena bifera, the ‘Autumn Damask’. While I recall reading somewhere some years ago, that she was reputedly the rose from which all repeat flowering roses was bred; in Peter Beales’ illustrated encyclopaedia ‘Roses’, she’s described as hailing from the “Middle East, Extremely ancient. Thought to be R. gallica x R. moschata A very old rose, loosely double with large, sometimes rather crumpled petals…..”
I could read rose descriptions all day….
Isn’t she exquisite? Beyond this stage, her flowers flatten out and she also has the most glorious rose scent. It’s only petals from such an old fashioned rose that I’m tempted to scatter into something we might eat, because unlike modern roses, who’s petals are inclined to be more ‘fleshy’, the petals of these are fine and delicate. And I did just this at the willow workshop last week, when a plate of beetroot was scattered with thyme and rose petals, just for fun!
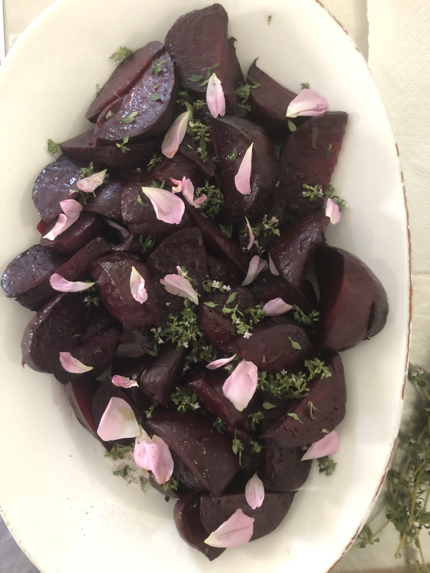
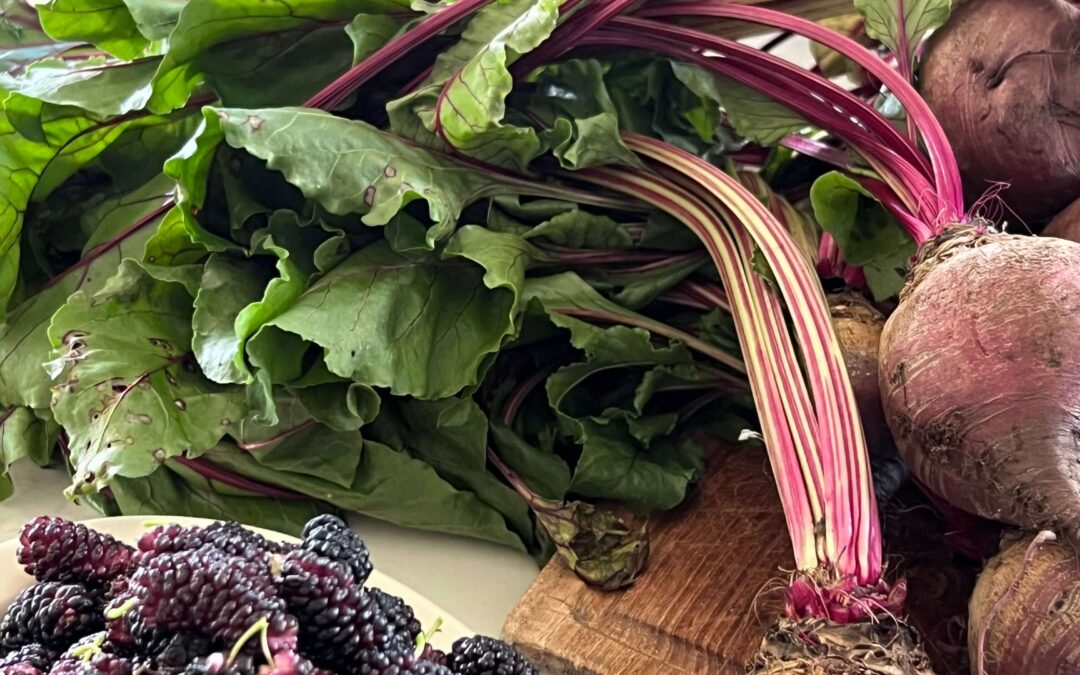
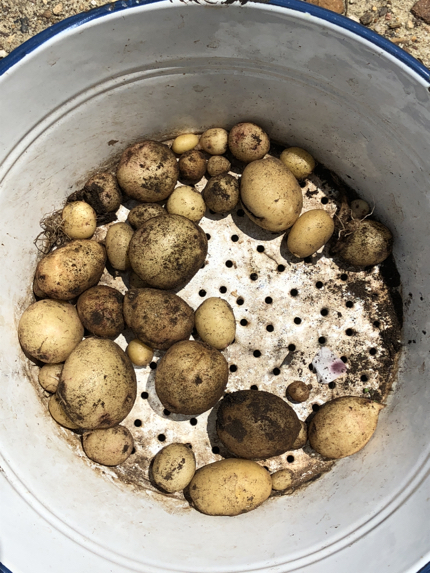
Lunch that day consisted of a sort of seasonal garden tasting plate – a little teacup of pea and lovage soup of the most beautiful pea green and slightly smoky taste with a couple of tiny chive flowers on top; a little broad bean puree, the baked beetroot; asparagus with tiny magenta-backed amaranth leaves scattered on top, and a handful of the tiniest baby new potatoes that I dug up by chance earlier in the week, with wilted beetroot leaves.
This seems like a good place to follow up on my promise to pop in something about broad beans. Because when you grow your own, you have the opportunity to pick them at the most succulent stage – to eat the entire pod raw in its early, immature stage of growth, the tips before that, and the flowers. But once they reach a proper stage, it’s still best to pick them quite small.
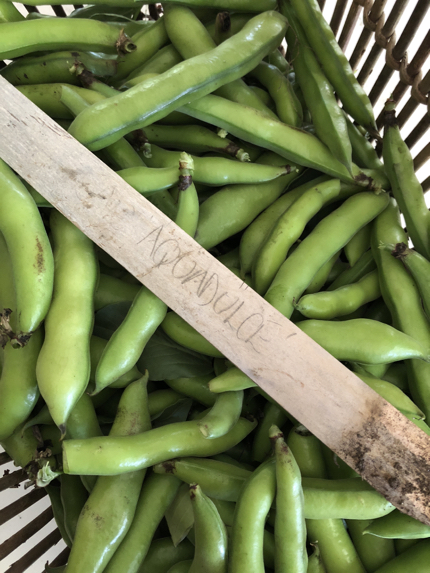
This is the last of the haul I took off when clearing the plants from the winter legume bed.
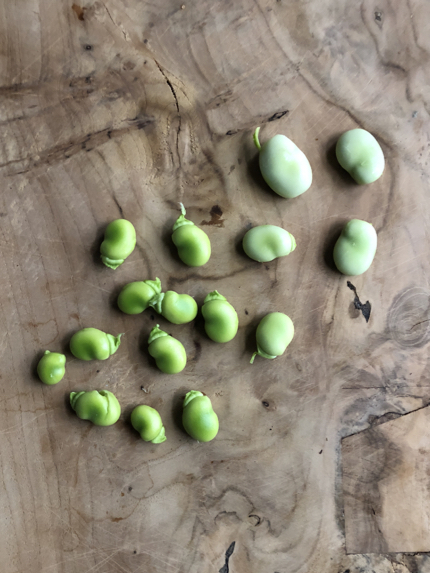
And at the risk of boring those who do know….I just want to take a moment to explain for those who don’t….about the double-shelling situation of the broad bean. The ‘first’ shelling is when you open the outer pod (previous image), yielding the beans you see in the image directly above.
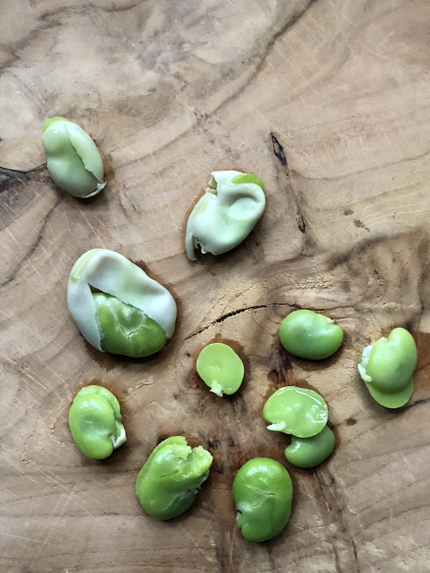
Then after blanching for just a couple of minutes in boiling water, drain, then while still warm, slip the inner bean from its now wrinkly, crinkly, outer shell, to reveal the brightest treasure inside. The colour is exquisite, the taste sublime. But it does take rather a long time, if you do a LOT of them in one go – like for the broad bean puree, which I usually make only once a year – with the final glut! You can see an image of when I began preparing them here. Most of the time, I treat them as a highlight, scattered over other veg or pasta, and if I’m in the mood, a mound of them is just delicious.
It was when I began growing broad beans that I began to wonder if they’re the reason so many Italian families keep their nonnas living with them – just to know someone can sit at the kitchen table and double-shell broad beans! But I think each one is worth this effort, so remember when you see them on your plate, how much love has been poured in to what you’re about to eat.
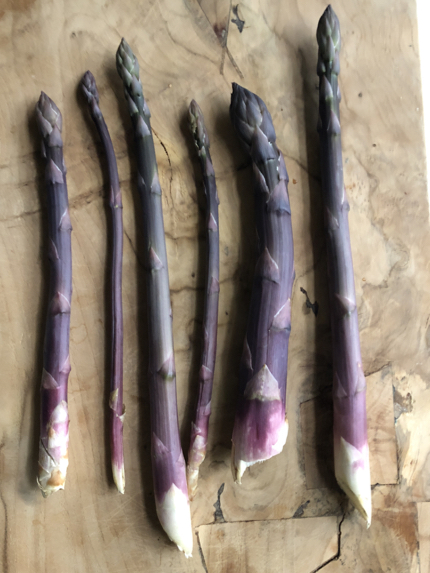
We’re also enjoying the regular addition of garden asparagus to our daily feasts – as you can see, when you grow your own, they don’t come ‘graded’ but in all shapes and sizes! I did plant green ones as well, but for some reason they didn’t grow. I don’t mind – the purple is rather spectacular, though of course it turns green as soon as it’s cooked. By the way – a raw asparagus spear straight from the earth is one glorious treat….the gardener’s perk!

While we’re on food, leaf salads have been filling our plates for weeks on end with their perky leaves accompanied by an array of leaves, from nasturtium to calendula, rocket and borage.
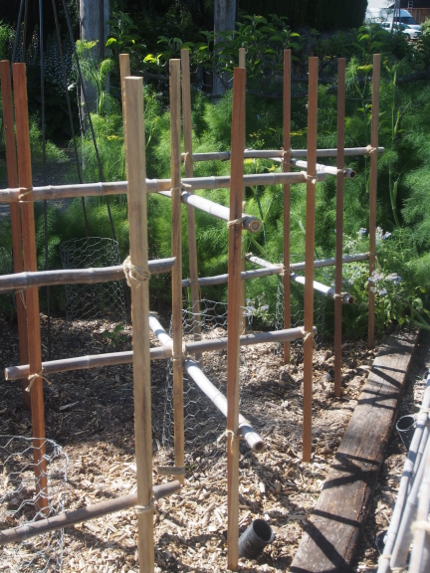
Now, getting back to those structures! I promised to show you the framework I put in each year for the varieties of tomatoes that don’t get quite as tall as the ones I plant to climb up the tunnel next door. I plant at the centre post of the five uprights that make up a ‘box’, then as they grow, I train their branches across the horizontals, almost like espaliering them, to create good airflow around the foliage.
You can also glimpse the section of ‘ag pipe’ in the pic above: I dig a piece in to accompany each plant, so I can water down the pipe to the deep tap roots tomatoes develop, rather than spraying water over the leaves, which only attracts fungal disease.
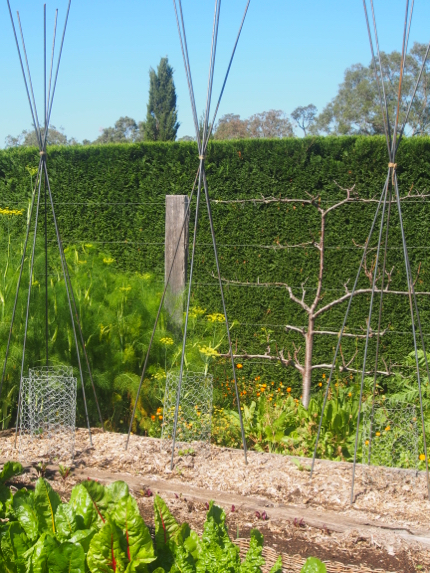
Iron rod wigwams are a new introduction to the main kitchen garden this season after experimenting with them down the back for a few years. I can’t wait for them to rust and once they have, reckon they’ll fit in well with the rustic aesthetic! They’re easy to work with and, of course, won’t disintegrate. But I have no intention of ditching the beautiful black bamboo canes I usually use here – it’s just that I haven’t had a moment to collect bundles recently from a lovely jungle close by, belonging to the same lucerne-growing friends. It’s a big job, a two-man one. So this season, I’m putting the old canes through their last season before they hit the compost. Hopefully these wigwams will soon be smothered in sweet potato vine.
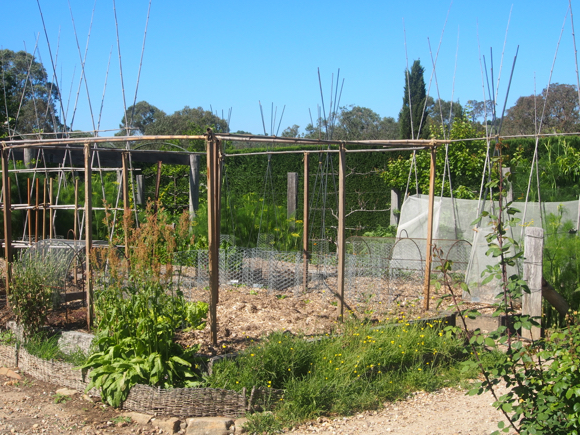
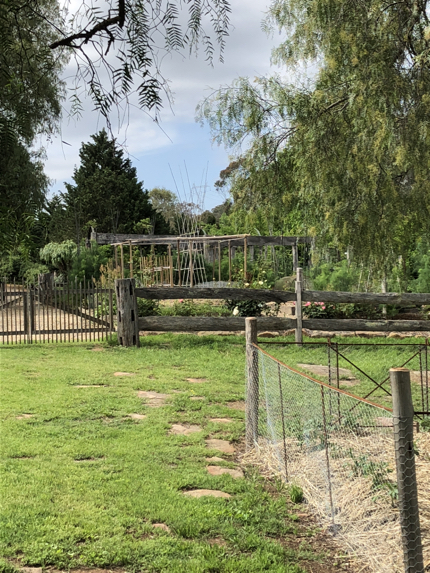
The traditional side of the garden is more structural framework than foliage at this fledgling time of the season, but all being well, it will soon be smothered in rampant growth….fingers crossed!
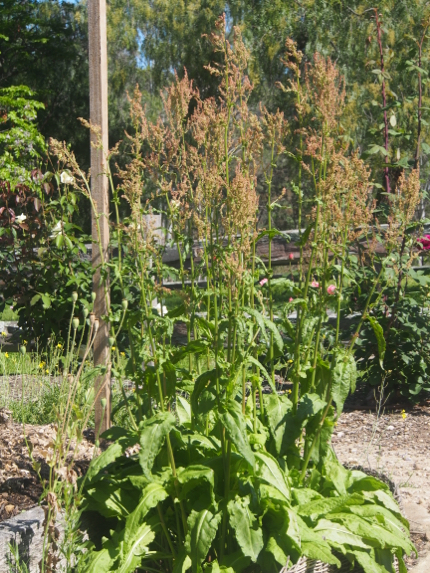
I know some people may consider them weedy, but I love the flower spikes that sorrel sends up at this time of year….I have more under the espaliers at the back of the garden and they make a handsome addition to large scale flower arrangements in the Dairy.
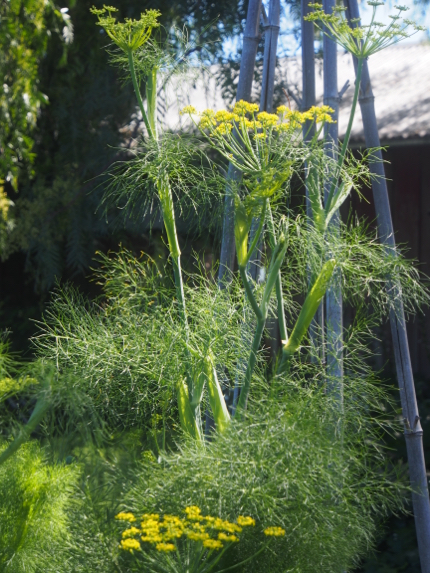
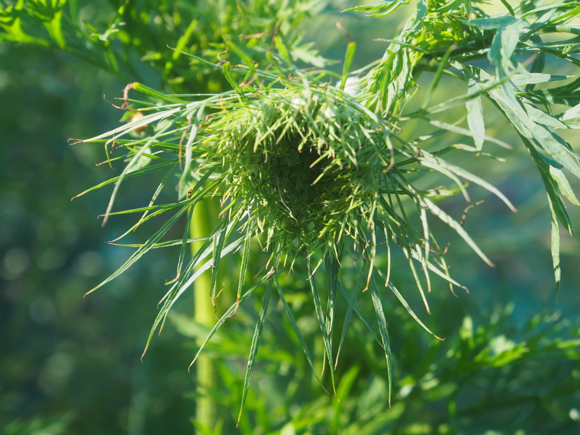
As do fennel flowers which are coming into their own now, reaching for the sky!
podcast ep two guild
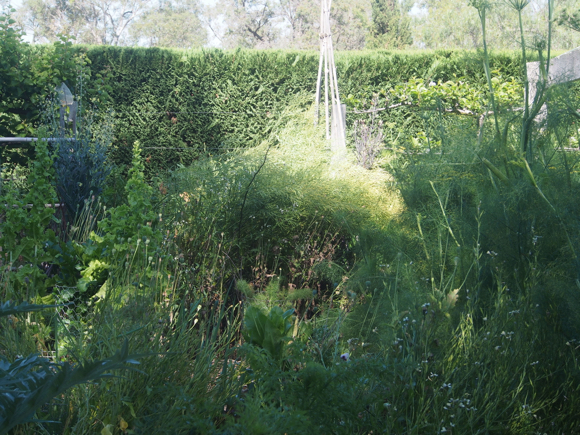
The guild side is another realm altogether from the traditional side at this time of year. It has, as they say, gone to seed! I do so emphatically disagree with this expression being used in derogitory terms…..as with seed comes rebirth, and in my humble opinion, this is a haze resembling pure bliss! There are seed heads aplenty to gather and share, though some will spill their seed at their feet, and re-appear next season when the time is right. But in the meantime, when the first light catches that mound of mustard pods at the back, it’s quite a sight to behold.
And I promise, all will be back in neat and tidy order soon enough!

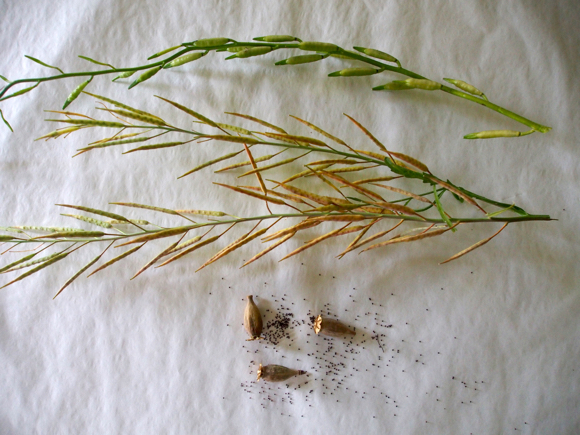
So here is a good place to show you an updated version of the example I explained last time. Can you see the pods’ progress? (These are new stems of course – those last ones went to the compost). Again, the Rocket is at the top and you can see just how much the pods have swollen since last time. Underneath is the mustard Red Elk….beginning to dry out, though the contents of each pod are still a bit too ‘green’ to cut and bring in for storage. They’re not yet ‘rattling’, but many will be any day now, so I’m on guard and ready to collect!
Under those I just couldn’t resist….the kitchen garden poppy heads are beginning to dry out, their little ‘hats’ have popped up, revealing little ‘windows’. When the girls were young, we pretended elves and fairies lived inside, but of course, hundreds upon hundreds of poppy seeds do! They’re fun for scattering onto a dish here and there…each one is like a little pepper pot. And yes….a big task ahead is to cut off all their heads and capture the seed before it escapes into neverland….
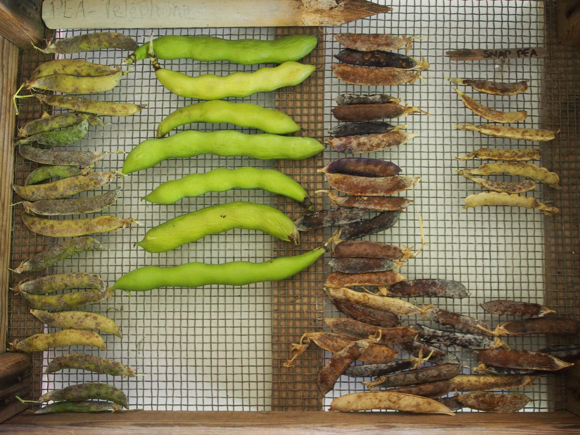
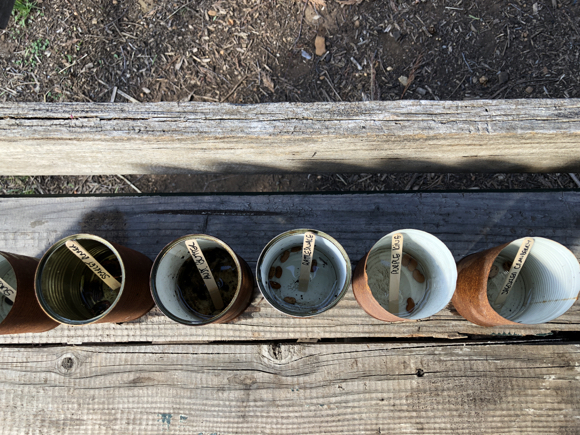
And before I leave the topic of seed, here are the peas and a few broad bean pods I collected. I’ll leave them to dry completely on this wire tray, then pop them into brown paper bags to store (still in their pods), in a cool, dark place, ’til I need to sow them next year.
But while some plants are well on their way to setting seed in the guild beds, others are newly on their way to flower. Like this exquisite young carrot flower….a collection of green bracts so far.
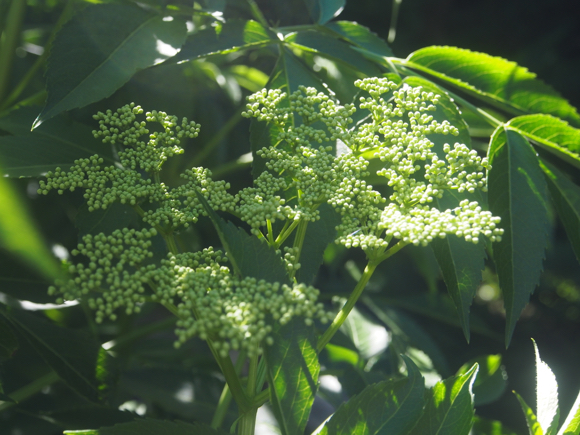
And the first young elderflowers are setting down the back….not a moment too soon as I really do have only one bottle of cordial left! As a result, there may not be many flowers for arrangements…..they’ll all be heading for my big china bowl with lemon and boiling water, to fill the kitchen with that intoxicating aroma. If you have flowers on the way too, the recipe for the cordial is in The House and Garden at Glenmore! (As is the recipe for Broad Bean Puree).

I know I mentioned bagging apricots in this episode, but I’ve also tied bags to protect the tiny new quinces from both bird attack and fruit fly. While it may not be completely foolproof, it made a huge impact last year and individual bags don’t suffocate the foliage of the whole tree like one large net seems to. Yes, it’s time consuming, so I just tie on a few when I think of it. At some point, when I have a spare moment….hmmmm??????…..I’ll revisit and select the best fruit to keep, because quinces become large and so this many will burst the bag, but also, I’d rather go for quality over quantity.
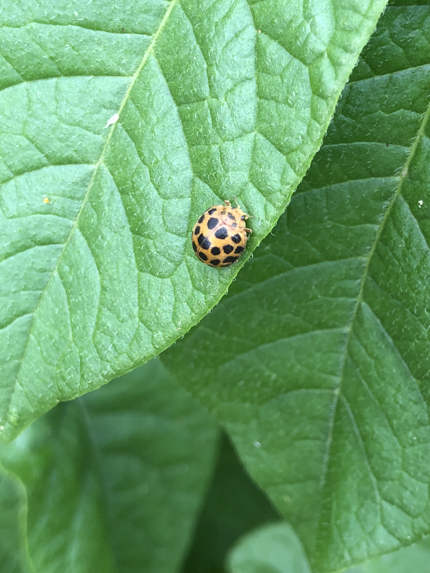
Then before we get back to that all-important topic of the episode…..I just want to show you an image of the 28-spotted ladybird, because early on, I didn’t realise what a problem she was….I just thought how exciting – surely a plump ladybird must be twice as good as a tiny one – well…..no!
And they multiply quickly, so do be vigilant. At the moment, I’m taking individuals if I notice one (usually when watering in the mornings – I’m not just standing there with the hose dreaming…..I’m on patrol!) and put them on the ground and squash them under my shoe before they can escape. Let’s hope I don’t need to get to the next method – a tin can filled with water and something to use as a lid. I know it’s ugly, but it works….and we could lose all the foliage of plants belonging to the Solinacae or nightshade family, virtually overnight.
SO…..TO THE COMPOST, as promised!
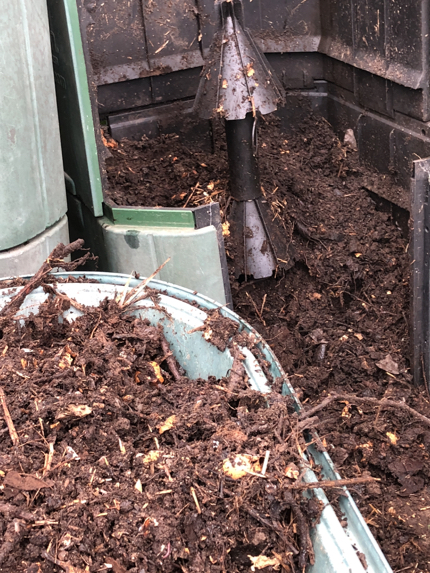
Let’s begin with this image showing the contents of an Aerobin that had food scraps placed in it pretty much every day for six months. The straw bedding from the chooks goes in once a week and otherwise, I add dry material like torn up brown paper bags from the butcher, or torn up egg cartons if I have them….baking paper etc. and at the weekend, when I remember, I sprinkle in just a very small amount of either blood & bone or pelletised chicken manure….or a broken-up cowpat if I have some on hand. At the weekend, I usually have my gardening gloves not far away, whereas through the week, I’m usually in too much of a hurry. But I don’t add any water to the Aerobin. The food scraps themselves are ‘wet’ enough and you don’t want to create sludge.
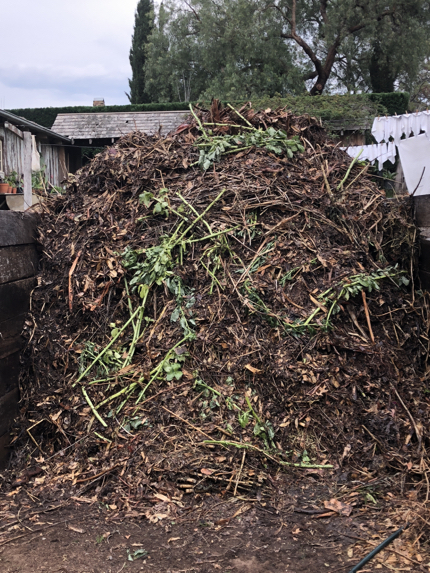
After six months (roughly) of adding material, it then ‘rests’ for six months, during which time it breaks down into compost, pretty much of its own accord. If anything, it’s a bit wet and heavy. So….out it comes, just in time to join the big heap of garden waste that we’re about to begin work on for the first time….the material we’ve been accumulating from the entire garden, since last autumn.
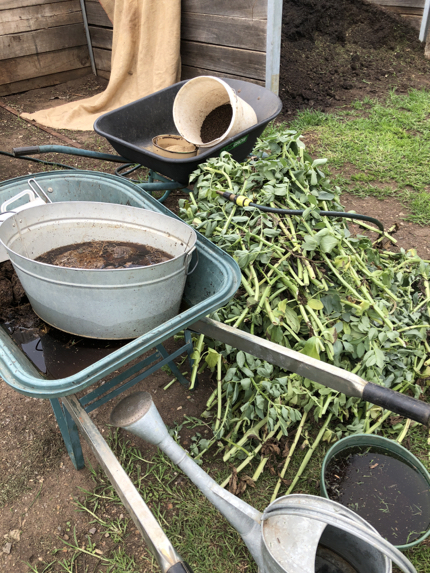
First I gather together all the components I like to add to our heap. You can see the cowpat tea in the wheelbarrow – well that was a hefty load to pick up I can tell you! Bend ze knees! Then on the ground, is the basin of liquid that was flushed out of the worm farm earlier that morning. The watering can, so I can make the liquid brews; some of the broad bean foliage, and behind in the second barrow, one bucket contains pelletised chicken manure, and in the old enamel basin, a mound of blood and bone. Almost set to go….just get the hose at the ready and Larry into the driver’s seat of the tractor!
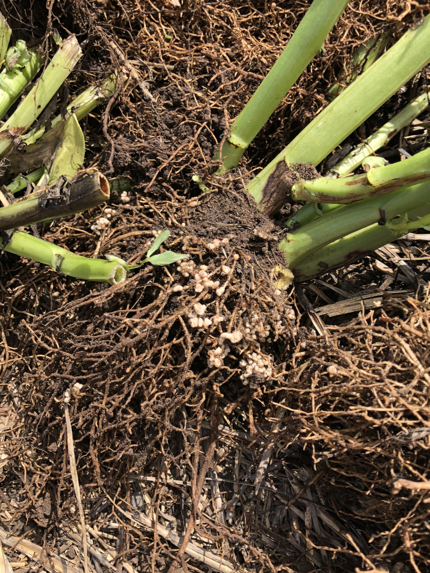
Joining the bulk of garden material are the nitrogen fixing nodules that grow on the roots of the legume family. There were many more on the broad bean roots this time, than the peas.
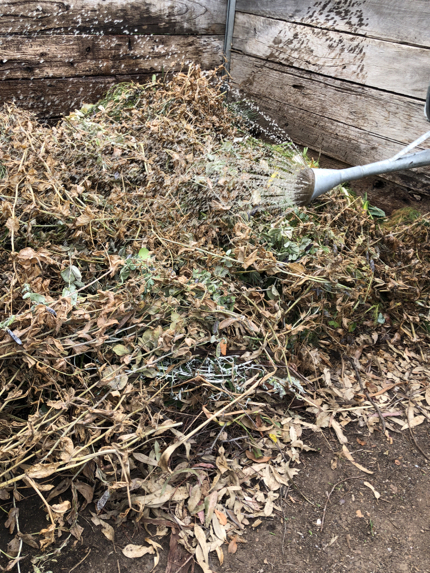
I prepare my brews of worm liquid and cowpat teas in the watering can, as I explained…turning the hose to full blast so they froth and foam, then pour all over a load of material.
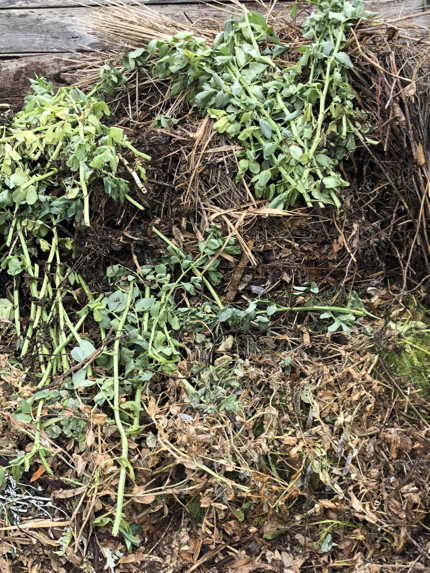
Green, fresh material is fed in layers into the more spent, older garden waste.
Here comes Larry with another load….get out of the way Mrs Robertson!
You can see most of my ingredients have been added by now….in layers, as each bucket comes in ’til eventually, I have nothing left to add.
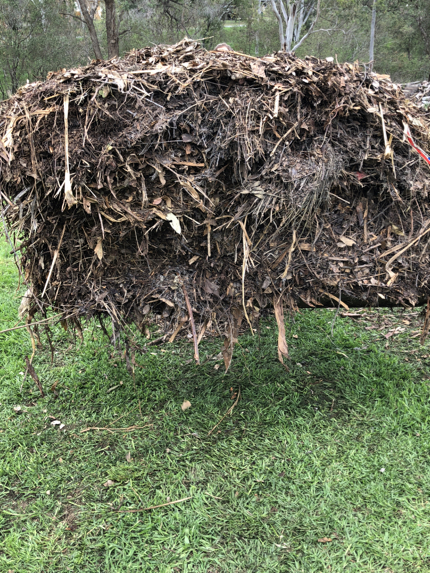
So here it is, looking pretty good. We shovel the last bits by hand and rake up all the odd bits around and about.
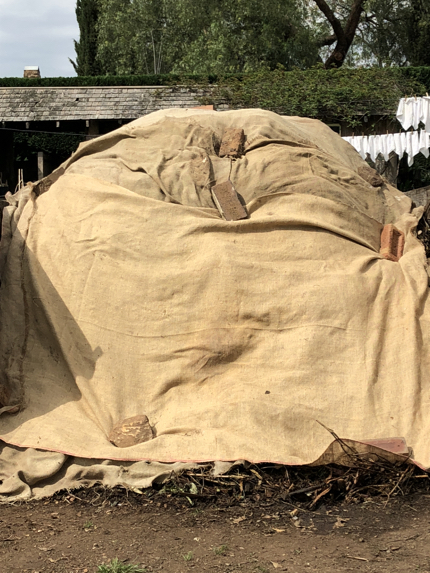
Then it’s all covered with hessian, to keep the moisture in and so we don’t lose any of that precious microbial activity that we’re hoping to build.
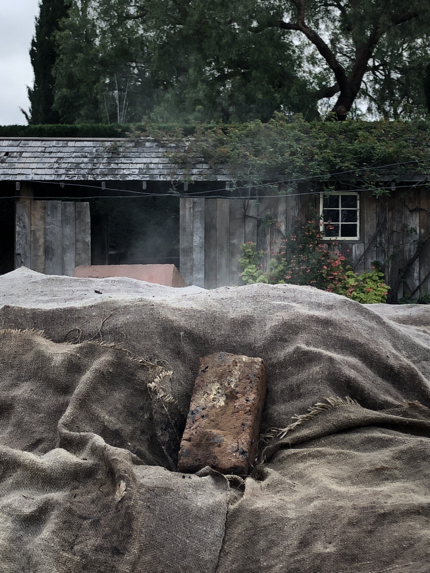
Next morning….can you see the steam rising? There’s a much more clear and fun capture of it, if you look at the little clip I added to instagram. I can’t seem to add little videos to this page, so click the link and you’ll see what I mean. And oh the smell….so fresh and clean….
So! That’s my take on compost…for now anyway! There’s more I want to explain, but I reckon it can wait for another time! Like this heap, which will sit for a month, ’til we have the opportunity to turn it again. But it won’t be quite as huge a task next time round – this was the big once-a-season version….to activate it.
So compost aside, which really all just happens by the by….
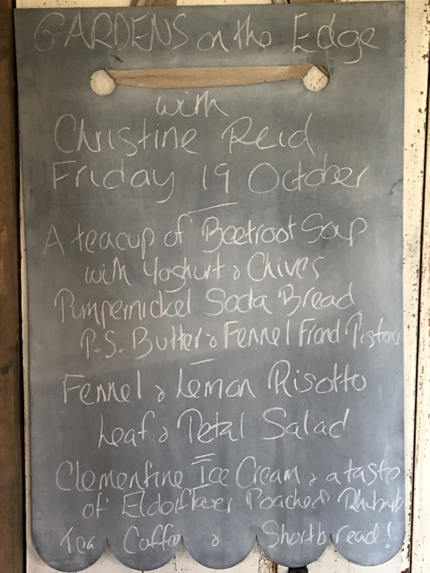
There have been activities and events, cooking and food, and most importantly, the garden’s been filled with people. We enjoyed a delightful book launch event with author of Gardens on the Edge, Christine Reid, who was accompanied by historian Dr James Broadbent, who’s garden, ‘The Cottage’ at Mulgoa, features in this book that captures the essence of gardening in our spectacular and diverse environment. The menu for lunch was, as always, inspired entirely by the garden. Guests came from far and wide and James went on to give a spontaneous talk about old-fashioned roses, which was a treat for all.

The willow panel workshop with Penny Simons saw hurdles and gates take shape from what was, a mere few hours before, a huge bundle of willow on the floor. Such clever participants!

And the Borders have been building to their short-lived but welcome froth of spring pink heaven! Well….I thought you deserved something pretty to finish off this compost-filled episode! I’m kind of hoping now…a week or so on since I snapped this image, for a lovely downpour to wash spent blossom away!
And if those black cockatoos whose calls you hear at the end of the episode are anything to go by….I may get my wish! Although it’s no guarantee, many of the old locals believe sighting black cockatoos around here means rain is on the way. Isn’t the sound of their prehistoric call amazing? I can’t believe I had the microphone on hand to capture it! But I was so busy recording them I missed photographing them!
If you’re keen to scurry down another burrow….a little treat just appeared on my radar that you may enjoy: When Flore Vallery-Radot, aka The Flo Show, asked if I would mind if she captured images when she attended an autumn inThe Kitchen Garden workshop earlier this year, I didn’t quite realise she would make such a delightful, very short film from them. You can view it here.
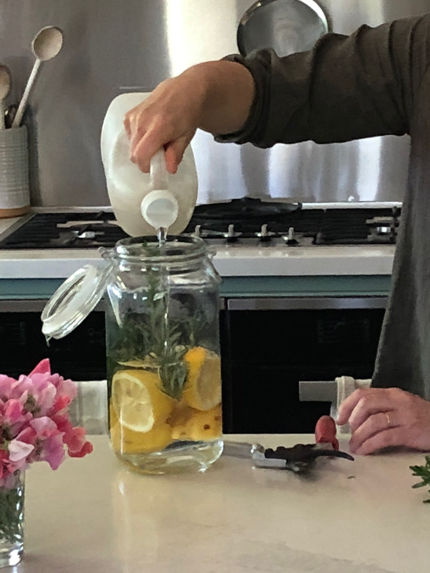
And one last thing….I’ve just had Gillian Bell staying for a flying visit to plan her workshop here on 24 November. It’s always fun to have a friend in the garden….to give them the fun of collecting fruit and flowers, vegetables and herbs, and Gillian collected them in abundance! But while she set off with a heavy load of oranges and lemons, sweet peas and eggs, in return she left me a jar, made from my lemons and rosemary of her special lemon cleaner! I’m rather excited about this tall jar sitting on my kitchen bench steeping, but ready to use, she tells me. It’s a doddle to make and you can find the recipe for it here: Gillian’s Famous Lemon Cleaner!!!!
Do you know? I reckon this will probably be the longest of all the Episodes (famous last words!) but there was rather a lot to explain this time around. Well done for getting this far!
‘Til next time, for which I’m already contemplating a tangent or two….

| Going, going…… | peas, broad beans, parsnip, celeriac, celery, calendula flowers, parsley, mint. |
| Eating…. | last of the peas, broad beans and fennel but still a good supply of beetroot, lettuce and coloured chard. Leeks, asparagus, globe artichokes, rhubarb and the first strawberries. Surprise new potatoes from some not completely dug last season! Lovage leaves, leaf amaranth, chive flowers, sage, rosemary, thyme and tarragon. Nasturtium and borage petals. Last of the Lisbon lemons, Valencia oranges. |
| Sowing seed of… | beans, corn, cucumber, zucchini, pumpkin, carrot, lettuce, loofah, basil Genovese and more parsley – how dare it disappear on me! |
| Planting seedlings of… | tomatoes, beetroot, lettuce. |