Play Podcast
It’s late November, when comfrey tea becomes a stinker and fennel reigns supreme….
Once again, the most enormous amount of activity has taken place in the garden since the last episode! Where last time, it was all about the traditional side of the garden getting a complete overhaul, this recent period has been all about the guild beds. (And all being well, next time, will be all about nurturing growth, rather than robust work!).
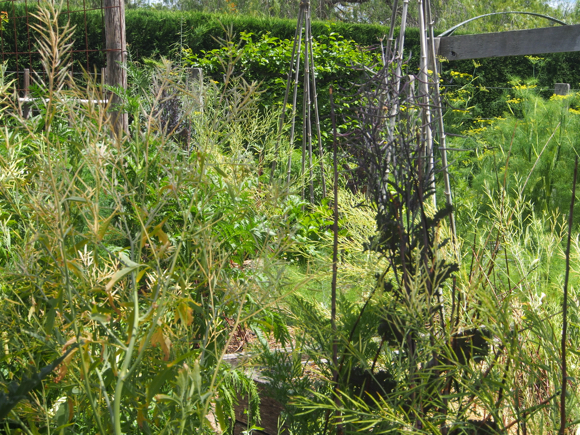
I’m sure you’re beginning to grasp some kind of understanding now, of how I take a completely different approach to the way I garden the two sides, using the contrasting methods of traditional versus guild. While the traditional side pleases my yearning for an ordered, disciplined, old-fashioned concept of a kitchen garden (well, to a point – that’s a topic and a tangent I want to return to in another episode!), the guild side quenches my desire for a wildly romantic garden….the kind that’s difficult to achieve anywhere else in the layout here at Glenmore.
The very manner in which I allow plants in the guild beds to complete their full cycle, ensures they hang in for a lot longer each season than those on the traditional side, where I’m anxious to get the food I need for our table growing as quickly as possible. In the guild beds, I don’t rush to pull them apart, instead enjoying the way they descend into a state of gay abandon and frivolity on their way to decay; as fresh faced flowers heavy with pollen and attractive to hordes of bees fade…to green, then brown…..before bleaching out altogether, and spilling their seed to begin the process of life all over again. The sense of bounty along the way is captivating to the eye, but so much more….it encapsulates the circle of life, from seed to seed.
In working the guild beds, I’ve learned more about the nature of plants than in any other part of the garden. These simple, in some cases rather ‘weedy’ varieties, engender a sense of wonder, that I’ve seen captivate others too. I find a peculiar sense of deep understanding in witnessing their full cycle over and over again, season in, season out, year after year, that goes beyond the notion of gardening. Bearing witness to this cycle is a privilege to watch…and participate in.
But let’s get back to the practical side of gardening, because if you don’t put in the effort, you won’t have the results to enjoy – on any level!
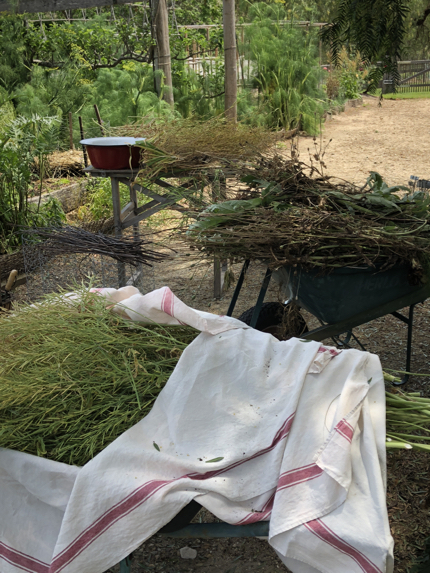
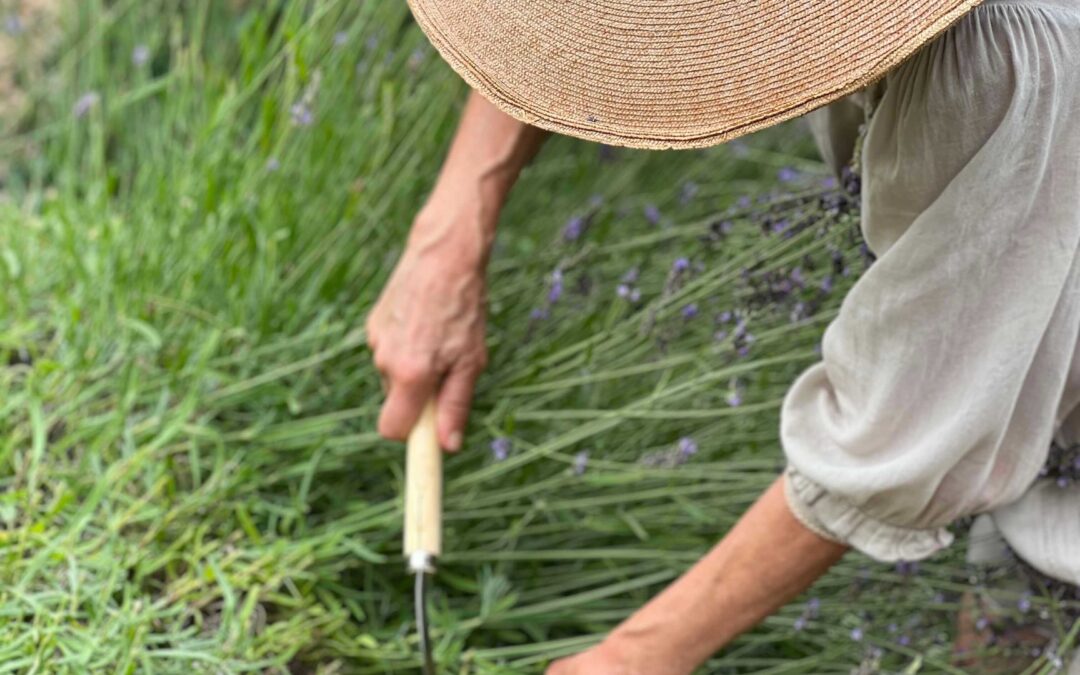
While the activity in the guild beds is generally more staggered than on the traditional side, there’s still a lot of hard work, and also fun to be had.
This image probably represents my absolute favourite kind of day in the kitchen garden….the anticipation of clearing to make way for new planting makes for a level of energy to get you on your toes, moving quickly….and seeing real results as you go simply increases the level of excitement, so by the end of the day, you’re rewarded with a great sense of achievement!
Here you can see I’ve gathered great stalks of seed into an old tablecloth, pulled out the remains, filled barrows to take to the compost, collected bundles of twigs for setting out and gathered cylinders to protect new seedlings. A working bee of epic proportion…..and I love nothing better than to do it uninterrupted….up with the sparrows and no-one about, so I can work ’til dusk, making up new planting schemes as I go! (That said, it used to be a good time for chatting with the girls and I do wish they were here – at this point of the proceedings, I’d set them up with a chair to sit in the shade and cut the stems from the main stalks of rocket or red elk to store in big brown paper bags, but these days, that task falls to me at some later stage!).
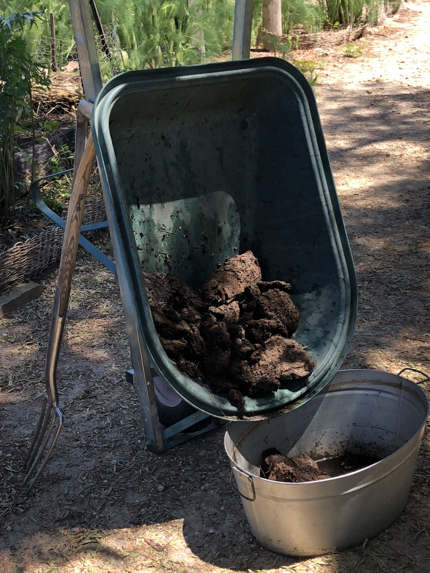
There’s not much point bringing an empty barrow back to the garden…so I usually fill it with something else I need while I’m going past. In this case, a batch of cowpat tea for the plants on the traditional side that need a dose, and some spent pats on their way to other parts of the garden….I’m trying to encourage a couple of passionfruit that I understand to be heavy feeders, but boy do I find them temperamental to grow! And I know I’m not alone. So now they’re loaded up with cowpats, in hope…..
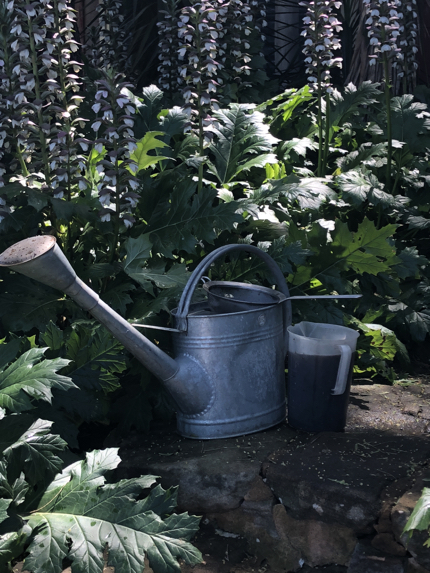
Home made brews – I try to be as closed-loop with our waste and to buy in as little for the garden as possible. Whilst we’re far from perfect, we do try!
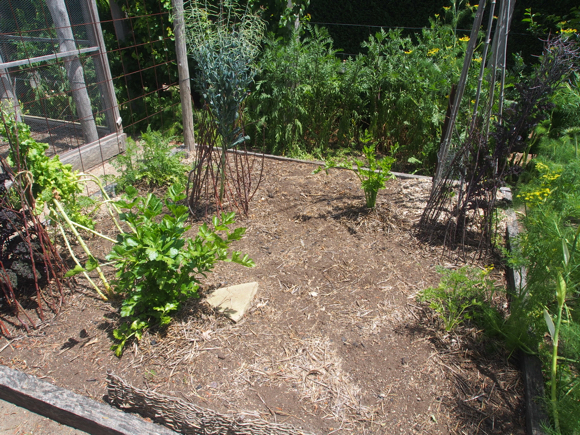
Once I’ve cleared the first bed, how bare it is! But as I said in this episode, I find there’s value in keeping these few mature plants from the last season in the garden…. the kale as a decoy, the celery and carrots for their flowers, the lettuce for its seed…and so I get to work around them….
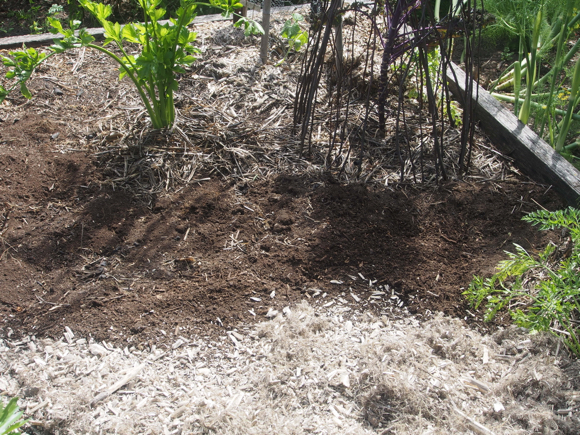
The old mulch is scraped up around the spent plants as it’s pretty thin on the ground anyway…and they’ll be coming out soon enough. Once they’ve done their duty, each of their own little patches will be aerated, given new compost and mulch, just as the areas between them have been prepared now.
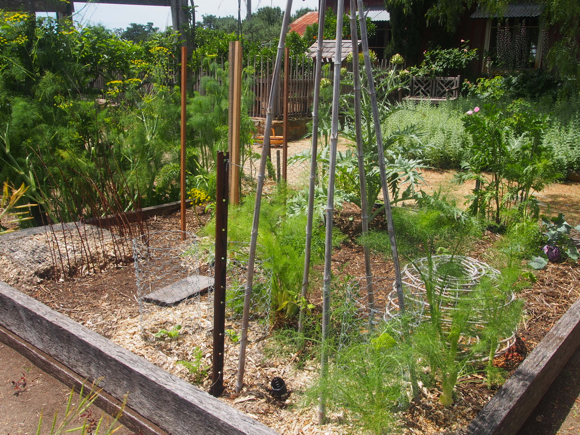
Once the beds are prepped, planting can get underway….I tend to decide where to plant ‘on the run’. I think about placing the main structures first, like wigwams, a tomato box or two, and of course the corn, which takes up space and creates shade….so I dwell on those things first, then build, then plant. This season I decided to leave the wigwams in place from last…but I still haven’t got around to re-tying the tops – it’s on the list of jobs that grows by two, each time I tick one off!
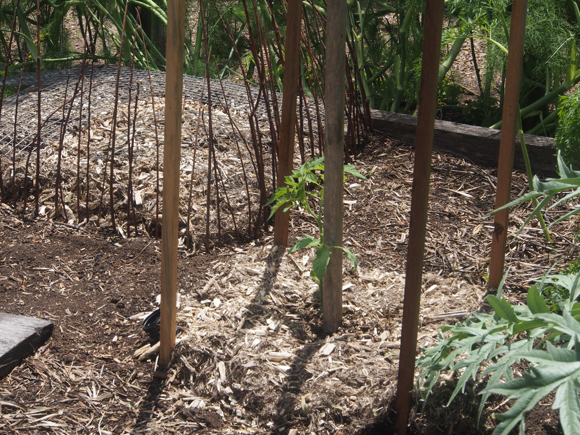
I do feel the need to press on in these beds though, once the old plants are removed…to get new ones in and established as quickly as possible! So here you can see I haven’t yet completed the tomato ‘box’, but at least I’ve planted the tomato itself, so it’s settling in and I can tie the cross-rods on later. And I’ve got the corn seed planted, but ran out of time to finish making the ‘twig surround’ for protection….so I temporarily laid down old wire mesh to protect the newly planted seed…and eventually got back to completing the enclosure the following weekend.
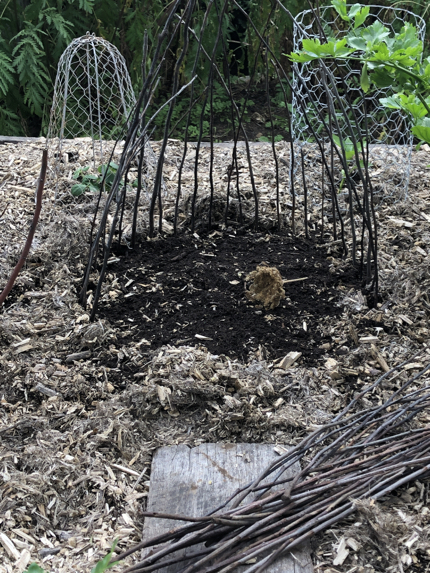
After that, I think about infilling the rest of the bed, from a productive, as well as an aesthetic perspective. Those kind of ‘open baskets’ I came up with years ago have become an important part of the aesthetic in this section of the garden and I primarily use them to delineate the areas where I sow seed, so I know where it is, and also to protect it from pests.
To make them, I use the prunings kept from the previous season’s growth of the espaliered fruit trees across the back of the kitchen garden. Each produces quite different coloured ‘wood’, so, yes…being as pathetic as I am, I separate the sticks into bundles, to keep each to its own (one year I even labelled them….I think that image is in the book!). If I’m not in a hurry, I’ll make the patterns more intricate and keep the varieties separate, but if I’m in a rush, I’ll just whack them in the ground to get the job done! Cut side down, tips up!

I make half the enclosure, scuff up the area I intend to sow; scatter the seed, sprinkle a dusting of compost on top and complete the enclosure. In this case, I took a whole head of carrot seed (i.e. a dried flower) from last season and crumpled it in my hand over the earth to release the seed.
It’s in seed-sowing that I make an exception about laying mulch on top, as I don’t want to smother the seed and prevent it from pushing through, so I do leave seed-sown areas mulch- free – at least ’til germination has occurred and often, seed sown plants develop at such a rate and cover the bare earth with their foliage so quickly, that the mulch surrounding the area is enough to keep moisture in, without trying to mulch around fragile, individual seedlings.
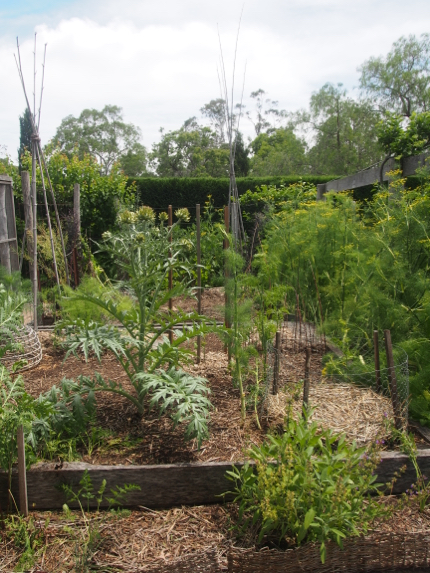
Slowly, some kind of order is restored….at least to the first two beds, which were the first to expire. The third one, which receives the most shade, hangs in just a bit longer, although it’s well spent now and I’ll pull most of it out during the coming week. It will get the same treatment…aeration, compost and mulch before planting anew. Then this side of the kitchen garden will be all set for the summer season ahead.
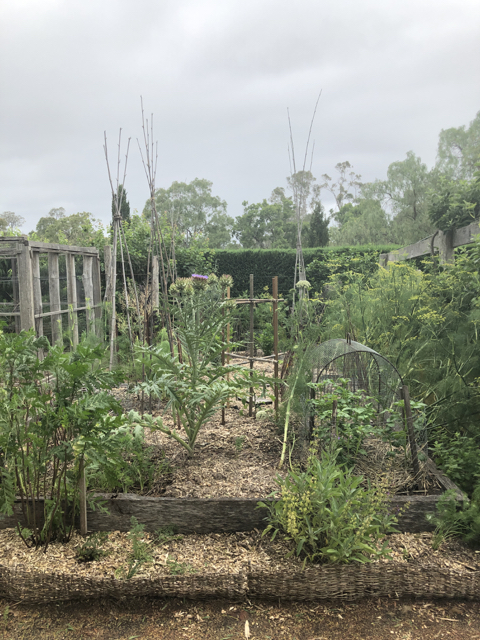
Just one more point I’d like to emphasise before moving on: someone asked me just this last week if I dig the compost in? The answer is no, I don’t! I lay it on top, dropping it gently, shovel by shovel, then cover with mulch straight away….as explained in the last episode. After that, I expect the earthworms to do the ‘mixing’ through for me. I really hope that clarifies this important point. The sequence references those biodynamic principles I mentioned last time, and that I will come back to again soon. In fact….I’m hoping to host another biodynamic workshop here next year, as there’s much we can all learn – watch this space!
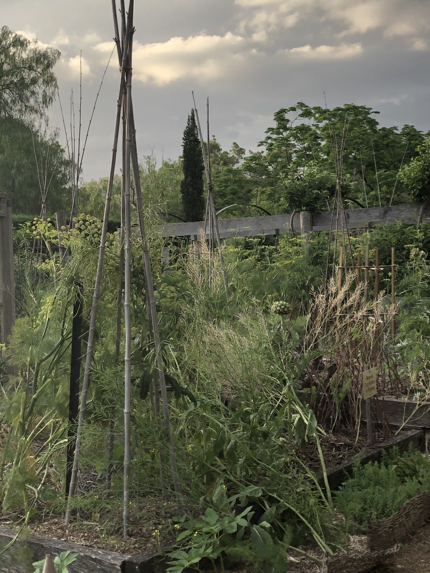
We almost scraped in by the end of spring! And were it not for wanting to use the third bed as an example to ‘show’ on the last inThe Kitchen Garden workshop of the year, it too, could have been pulled apart and prepared during the last couple of weeks, before the official start of summer!

I thought I’d pop this in so you have a visual of the book I mentioned during the episode. I know it’s still available, because a regular correspondent and many times inThe Kitchen Garden participant was asking me about it recently and I know she got hold of a copy. Reference books are invaluable, especially when you’re in the learning process, but after awhile, the basics will become like second nature. Some points though, are hard to retain in your brain, unless you experience the woes of some mistake yourself, as I explained with my potato/potarto, tomato/tomarto experience during the episode! Oh dear, now I’ve got it in my head….‘let’s call the whole thing off….let’s call the calling off off….well let’s call the whole thing off…ta-da-da’!
One of the last memories I have of my Dad is one warm sunny Sunday afternoon, when he couldn’t walk far, so I plonked him down in a deck chair in the shade of the pepper tree, with book in hand, and I called out whatever seed or seedling I was about to plant so he could look it up and say yay, or nay. The notes he made on a scrap of paper in his neat (though weak, compared to how it once was) script, still fall out of the pages each time I flip through. It was a lovely afternoon.
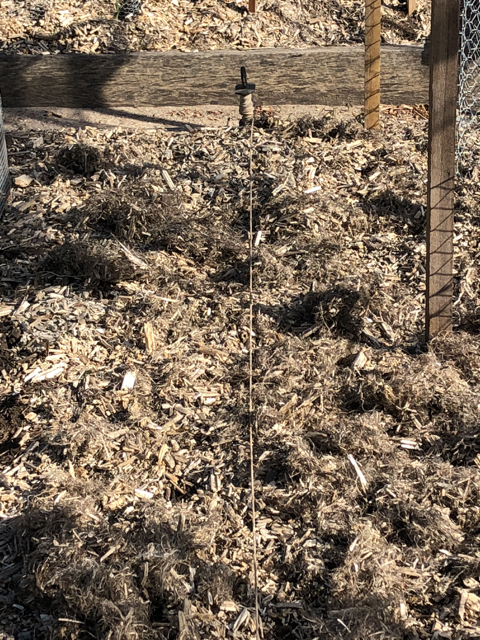
Before setting off down the back, let’s just take a quick look at the traditional side, which has required much less work these last weeks than the guild side, though no less attention. It’s more in ‘nurture’ mode now, though I am still planting out rows in the leafy green bed. I always use an old-fashioned string-line when planting out straight rows so I don’t go off on a crooked streak!
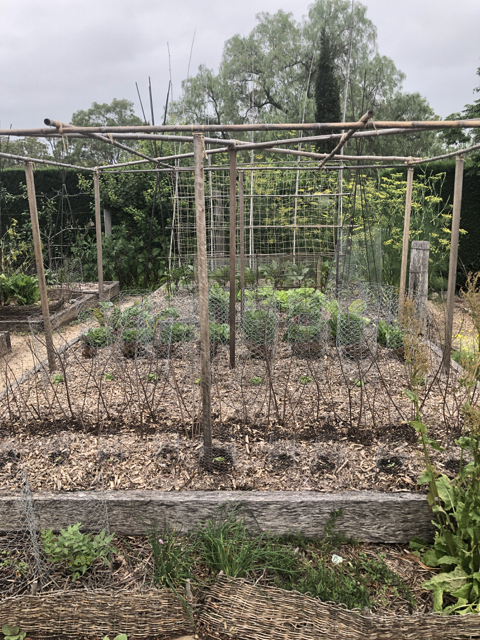
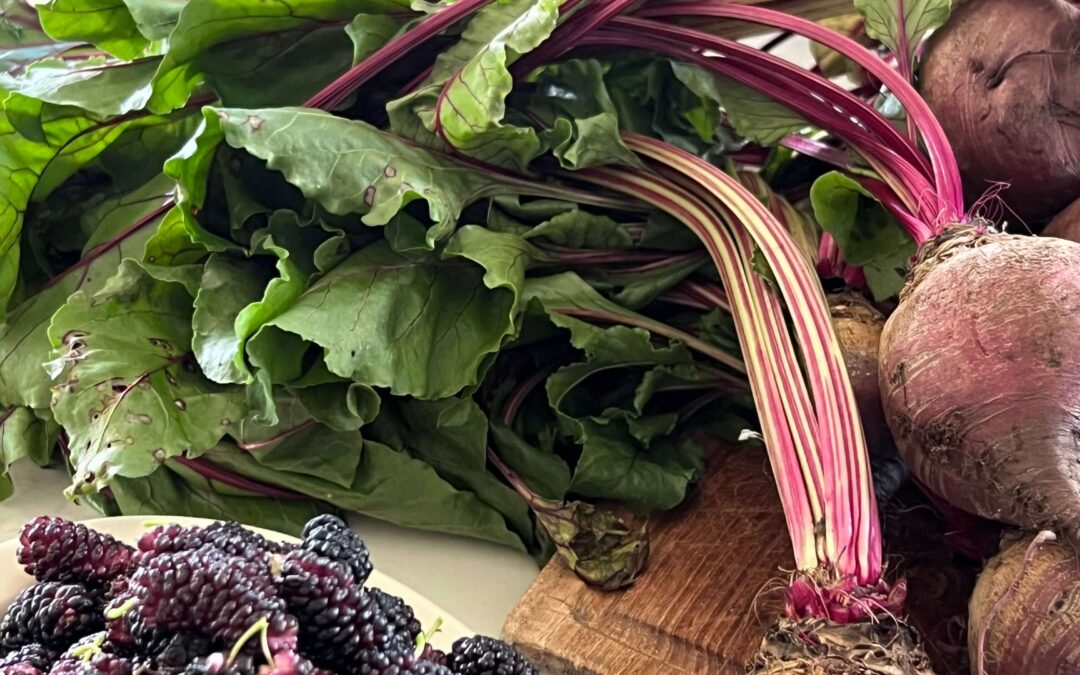
I’m about to start picking the first lettuce leaves, so in fact I covered the ‘hungry gap’ quite well on that front, and I’m already picking large coloured chard leaves for the chooks and for us! One more thing that is on my list (prompted first by a participant at last month’s workshop and now, by podcast producer Leonie as well!) is to so a row of beetroot seed to use exclusively for the leaves it produces. I keep meaning to do it, as I told them both to do when they asked! Because yes, the beetroots we want to eat do benefit from having their leaves left in tact (but I’m as guilty as anyone, picking them off regularly!). So if you too, enjoy eating lots of beetroot leaves, sow some extras in the leafy green bed.
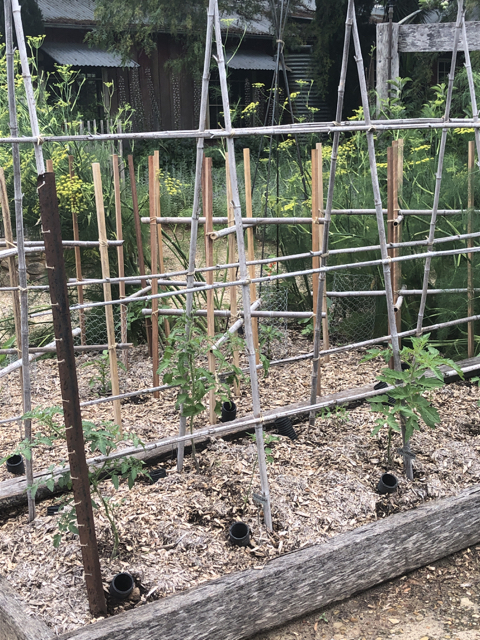
The fruiting bed at front left is still more structure than foliage, but things are on the move. With the tomatoes on the tunnel, my aim is to remove all leaves below the first horizontal rod, to keep that area close to the ground, where I water, free of foliage, so as not to encourage fungal disease. At the moment, I’m encouraging the ‘leaders’ to go up the rods, but one at the rear (from this angle) has put on a real spurt of growth and I’ve already tied a ‘side shoot’ down to the horizontal rod. Really, I espalier my tomatoes, to ensure good air circulation, because we get quite humid, so I don’t want overlapping leaves. I should be able to show you more next time!
And pinch out any flowers ’til you have good strong growth. I know it seems criminal….but you’ll get better fruit in the long run if you focus on the health of the plants first! Patience….I know….
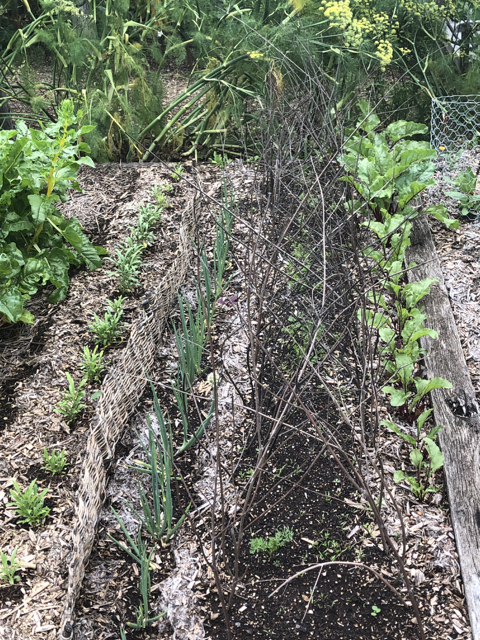
The root bed’s coming along a treat. They’re the wallflowers on the left, the spring onion experiment next…then the carrots – see the tiny ones emerging now? I’ll start thinning them out as soon as I can get a better grip on them – they’re too small yet. I put in all the sticks from old prunings to give them some protection from pests. Next is the row of beetroot (I do want these ones for their roots!). See how the ones at the back – at the south end, are larger that the ones in front? They went in first, and now it’s time to complete the row. The zinnias are to the right, and the wigwams for sweet potatoes next to them….
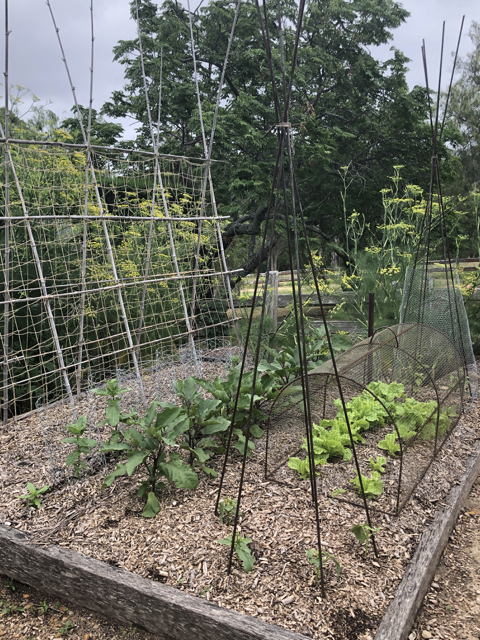
And last but not least, of the traditional beds….the legumes misbehaving! How disappointing the bean situation is so far! I’d hoped to be showing you ‘jack-in-the-beanstalk’ growth by now, but no…they’re just stunted, which is extremely annoying. Anyway, I’ve re-sown under the tunnel, so hopefully there’ll be more to show next time.
You can see how the aubergines have got away nicely though, and how I used the space between the front wigwams to try and cover the ‘hungry gap’, where I suspected I might run out of lettuces….and I’ve come very close! I planted all of these at the same time – note how the ones at the north end are much larger than those at the south! So, we can start eating these now – I’ll pick a leaf or two at a time, rather than a whole lettuce.
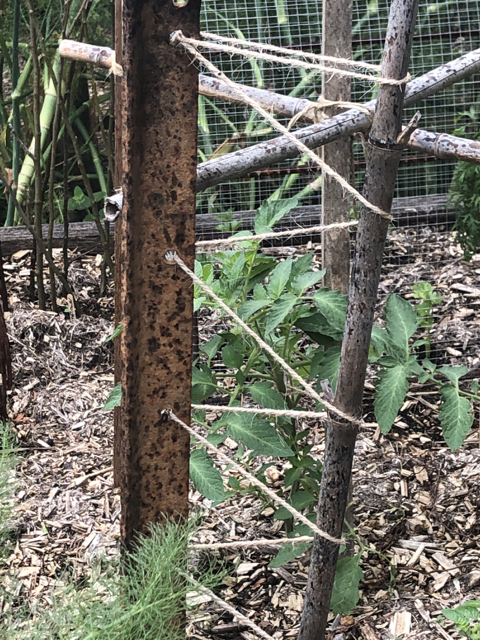
The wind we experienced a week ago was a timely reminder to make sure each structure has an accompanying ‘star picket’ fixed firmly into the ground, close to one upright. Years ago I lost an entire tunnel of peas in a strong gust of wind, so I learned my lesson well. During the summer months, I make sure the star pickets are placed at the north or north west side of a structure, as that tends to be the direction from which a prevailing wind will come, unlike those gentle easterly breezes that bring a cooling effect. During the winter, they’re placed to the south, but whatever the season, I then lace them with string, round and round a structure, a bit like a corset, so the structure is ‘anchored’ to the star picket that’s fixed firmly in the ground.
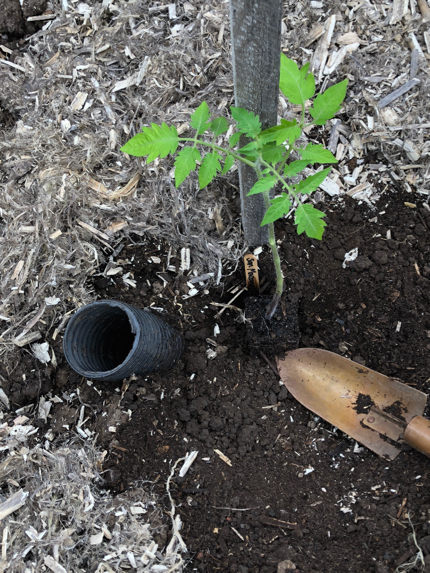
Down the back, I got those main crop San Marzano tomatoes planted, each with their own piece of ag-pipe to water down, to encourage deep roots and healthy plants…to prevent water from splashing on the foliage as best I can (as water on tomato foliage can cause fungal disease to set in). I can probably stop repeating that now…I’m sure you’ve got it in your heads and I’m beginning to feel like a broken record!
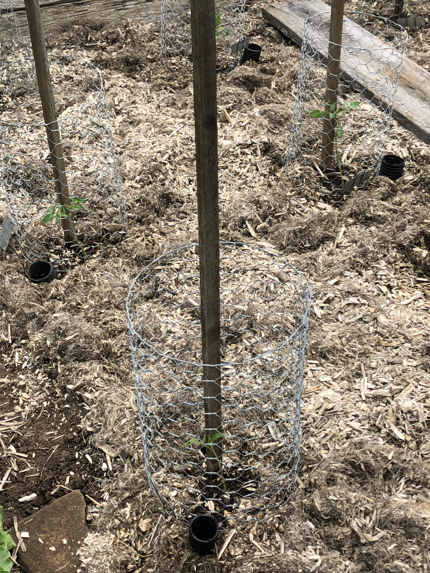
Then just ’til they were established, I encircled them with a wire cylinder for protection. With all the effort that went into getting them this far, the last thing I want is for them to be attacked! In fact they’re more sturdy now and I’ve taken the cylinders away, and already begun to remove their lower foliage and tie their leading stems in to the stake…..using a figure of 8, so they’re not tied in too tight and have room to move.
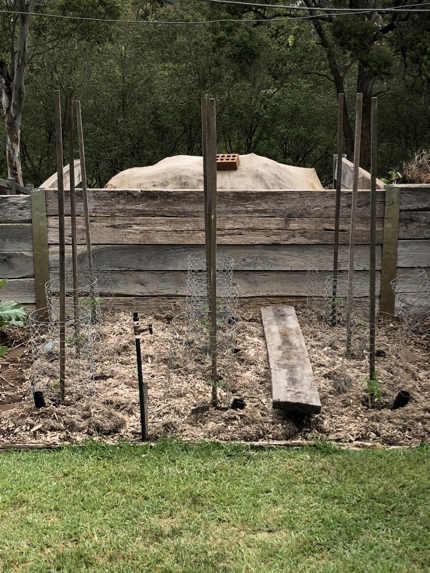
An old board to tread keeps me on track, instead of walking on the prepared bed!
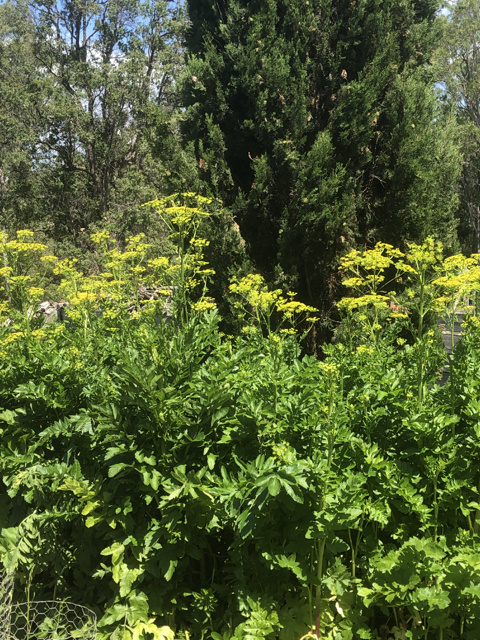
Then two beds along, the parsnips are coming into flower, with plenty more on the way!l
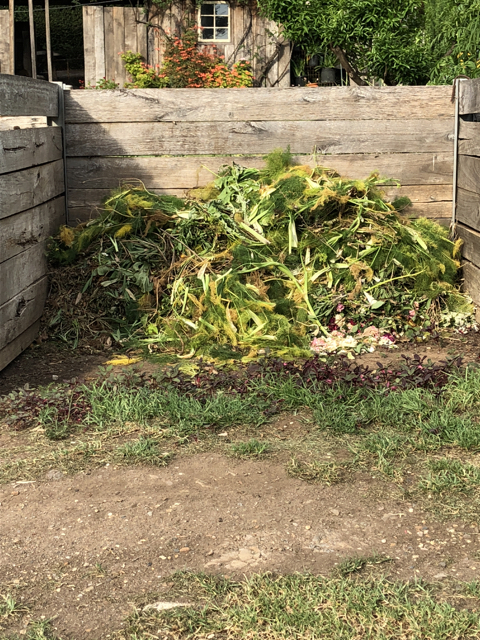
At the compost, this new pile more than doubled in size before being incorporated into the next ‘turn’ last weekend. Look at all the little self-sown amaranth leaves at the front…sometimes the best pickings can be found at the compost heap!
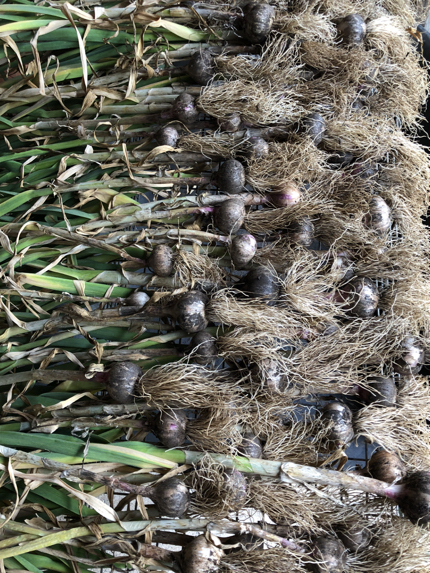
I really did pull that garlic in such a frenzied state! After multiple visits by those exquisite black cockatoos the previous week (that you heard at the end of the last episode), I thought we just might have been in for a deluge…so with a black sky and rumbling thunder, I decided not to risk it, and pulled all the garlic out in one fell swoop! Better not to risk it getting soaked, though in fact it could have had a few more days in the ground…even a couple of weeks!
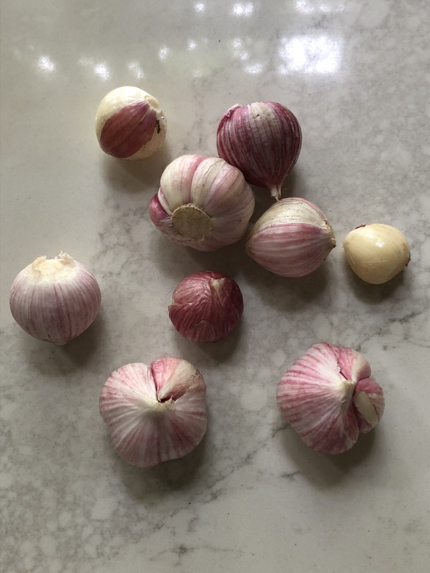
How I love the colour of new garlic…these ones have just had their outer shell removed, but left on the kitchen bench, the colour deepens to purple once again. I grew these on from Patrice Newell’s ‘purple glamour garlic‘ after her event here earlier this year – when all our guests took away a few heads to plant. Thanks to the drought the previous year, my last harvest was very poor, so I was glad to have some decent sized fresh cloves from Patrice to plant. When I get around to bunching them up this time to store, I’ll put the very best, large ones aside, to plant their outer, biggest cloves next autumn – as always, to aim for the strongest next yield possible.
In the meantime, there’s no shortage of garlic here!
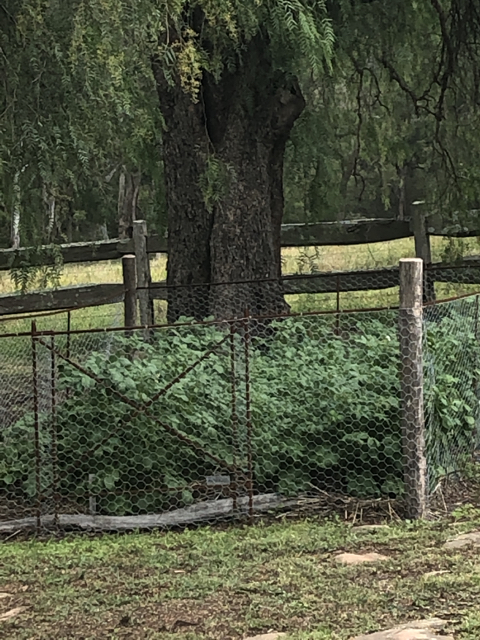
The potatoes are going great guns in their wire enclosure….I haven’t grown them here before and am anxious to see what they produce. They’re about to flower, so I should know very soon.
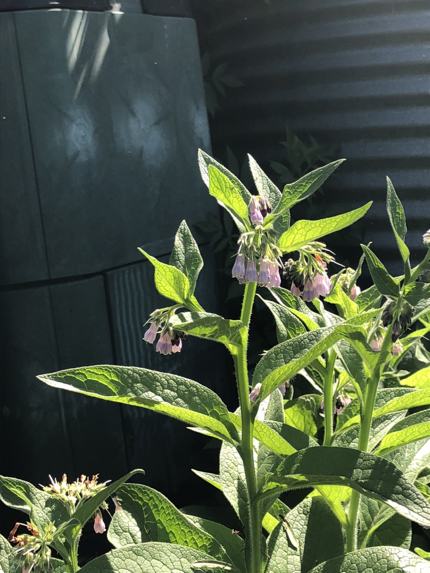
So now I think it’s time to discuss the comfrey! Here it is in flower, in front of the aerobins, where I have five good clumps of it. Known to be a good compost ‘activator’, it breaks down quickly itself, encouraging other material to do the same. What a good idea it was of my friend Janie, who thought years ago to surround her compost bays with it, so she could pluck and toss in quantities of leaves each time her heap was turned. She also thought it looked pretty, and my version here is a leaf out of her book. Each time I visit the aerobin with the day’s food scraps, I pick off a leaf or two to toss in as well. Just don’t go berserk – you can overdo it and cause your compost to become sludge (though I think you’d need an enormous amount!).
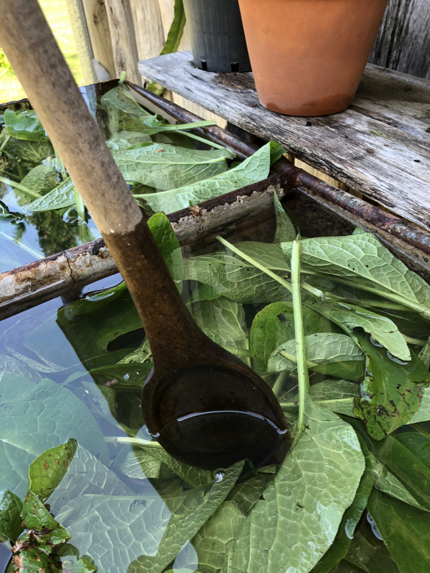
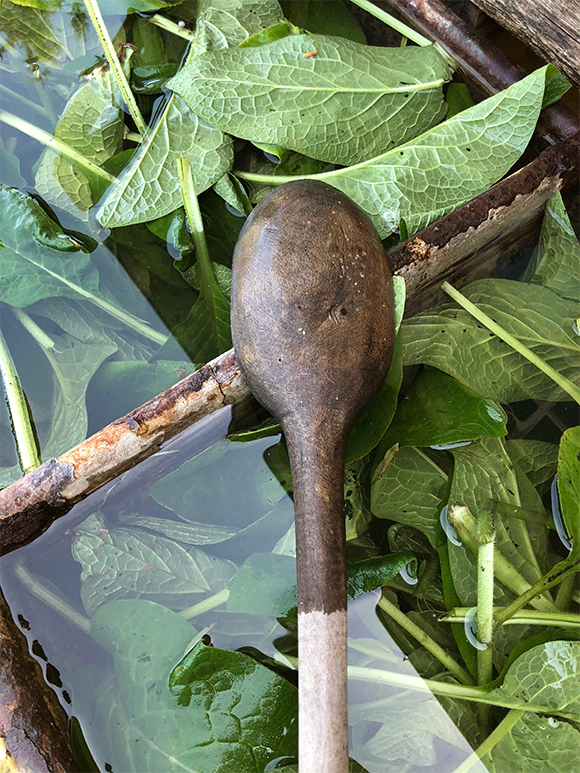
But on this particular day, I had another use in mind…making comfrey tea! So I half filled one of the big sinks with their large leaves, topped up with water, used my big wooden spoon to make sure the leaves were well submerged and laid a board on top to cover. (But I did used to make it in a plastic bucket and put an old paving stone on top, so don’t be deterred by lack of an old sink!).
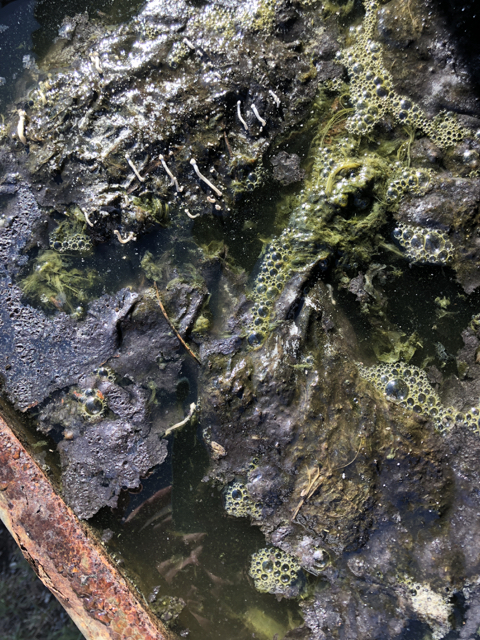
It’s sat there for almost a month now. I give it a stir every now and then, and now the leaves have broken down to an ugly looking sludge, while the stink is something else! But the odour will be short-lived, and then I’ll spoon out the slimey leaves to add to the compost and start using the ‘tea’ as a tonic for fruit and fruiting veg. It needs to be well diluted….so rather as I do with the worm liquid and cowpat tea, I add about one litre to the watering can and fill it to the brim, making sure the water froths up well. Then, the fruiting plants can have a potassium rich feed. Another home-brew – tick!
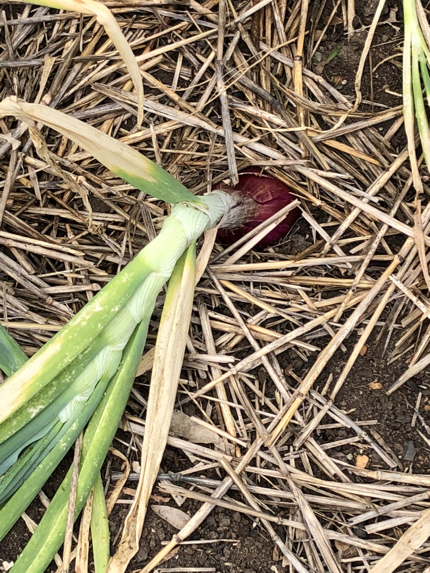
When onions start doing this, you know there isn’t long to go before harvest time….
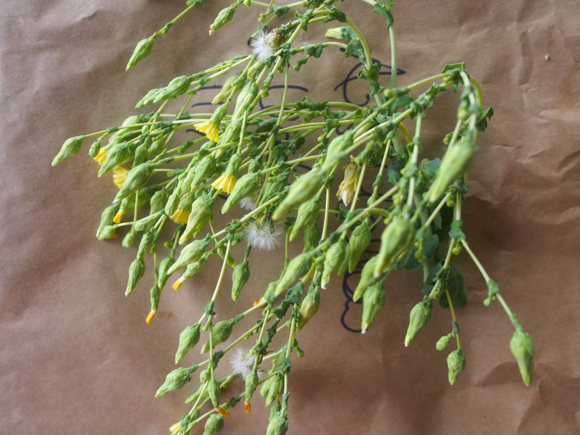
Here’s a head of lettuce flowers picked for seed….it’s the flowers that have turned to ‘fluff’ that contain loads of seed. As always, it’s important to pick for seed saving in dry weather. The unopened buds, despite being picked, have continued on their journey and are now all ‘fluff balls’ filled with seed! This single head will well and truly replenish my ‘seed bank’, though there are more in the garden that I’ll collect too, so I can share them around. Once I’ve picked those, I’ll pull the plants out.
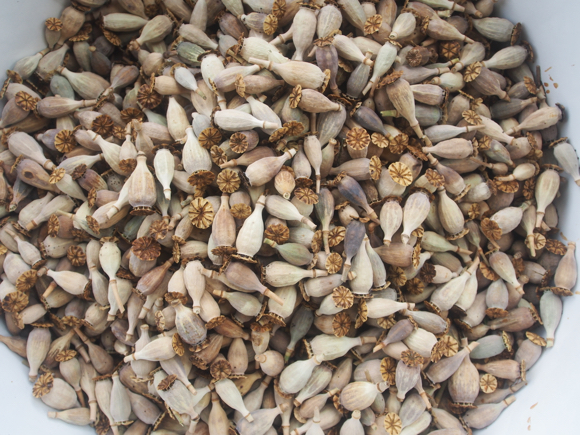
In fact during the last weeks, there’s been whole lot of seed collecting going on…these are the decapitated pods of all the delicate single pink poppies that flower in the kitchen garden throughout late winter and early spring. As soon as their little ‘hats’ pop up, I start cutting off their heads, both to rescue the seed for next year and to prevent it from escaping beyond our boundary…
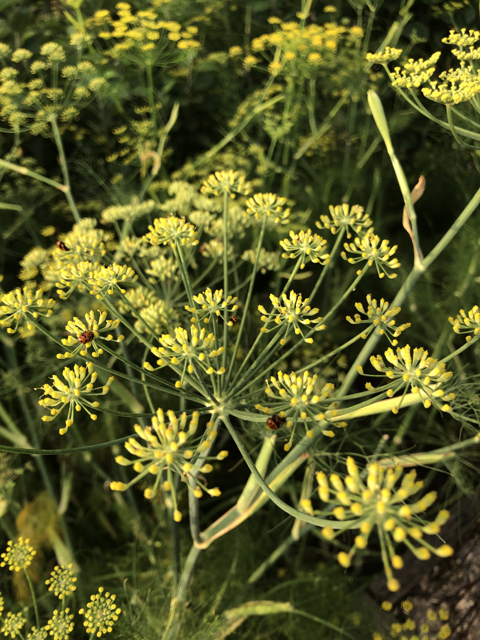
Which brings me, I think, to the topic of fennel….my stalwart…my absolute favourite plant in the garden…as I told you in the introduction!
Why? Well just look at this haze of flowers…each of them held on the tallest stems, their feathery foliage too, softening the hard edges of the kitchen garden – especially at the moment, while it’s all a bit bare and ‘new’. And….just look at the ladybirds they attract – our defence force against summer aphids! I could show you dozens of images of bees buzzing around them too, but I’m sure you get the picture! So from a visual perspective, and a companion one, they’re such good value. But there’s more…..
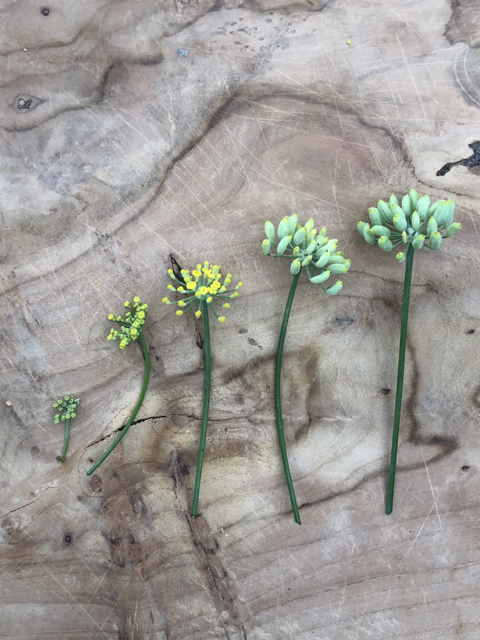
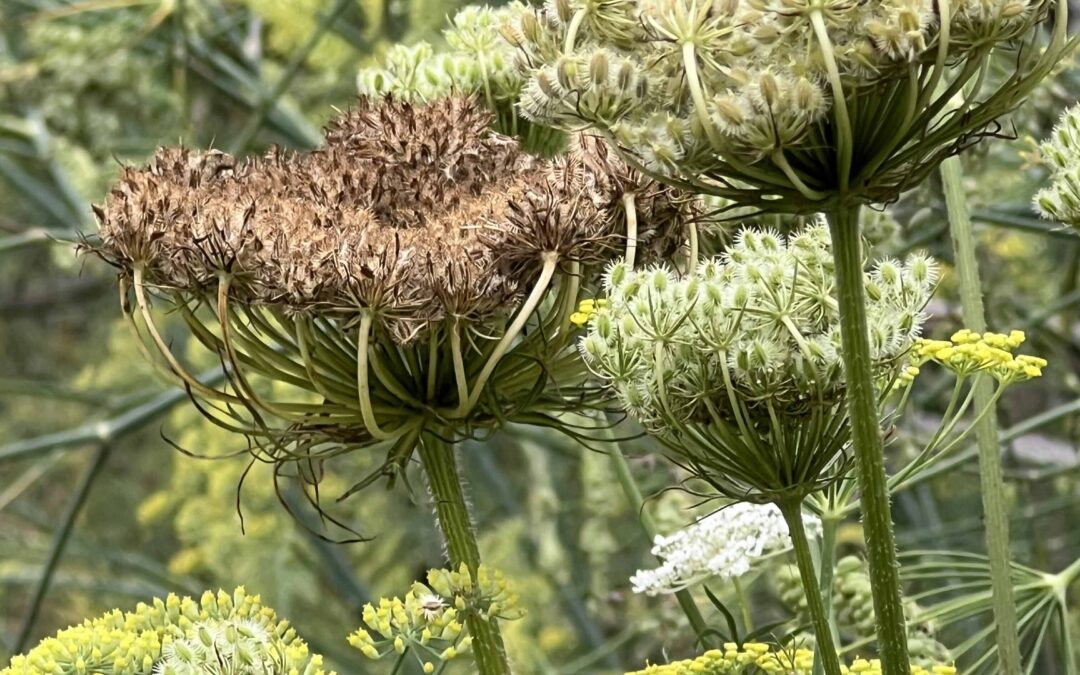
So I thought I’d lay some specimens out for you to see the detail! Each flower head is made up of lots (ok so I haven’t counted!) of these clusters, each on their own individual stem. They start out very tiny and green, and you can clearly see their progress here as they grow…they become butter yellow and much larger, at which time there is a point at which you can gather fennel pollen. I’ve yet to discover the optimum moment for harvesting that (though I may have done at Gillian Bell’s workshop last Saturday, to everyone’s delight!).
But it’s beyond that moment of development, as each tiny floret continues on its passage towards forming seed, that it swells. As you see on the two at far right, it’s at this particular stage, that it makes the most exquisite little morsel to eat, for a hit of rich aniseed flavour on the palate!
So….as far as being edible is concerned, we can eat the swollen bulb through the winter and spring season, but if you plant many more than you need and allow them to grow on beyond the bulb stage, you can enjoy the beauty of the flowers, revel in the good bugs they bring, and eat their pollen, as well as these ‘buds’. But don’t pick them all (you’re unlikely to as there will be many), so you can collect the seed to begin the cycle all over again.
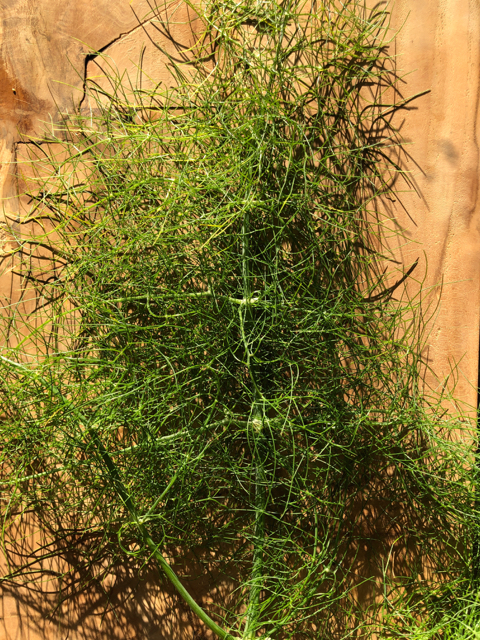
Last but not least, the fronds are edible too. Sometimes I use fine new growth instead of dill, or older fronds for decoration….perhaps to surround a whole poached salmon, for instance. And after Gillian’s workshop last weekend, where we all learned about the methods she employs to infuse the scent of plants into her cakes, I’m looking forward to experimenting once again; to see if I can reproduce fennel soup to resemble one we enjoyed in Rome many moons ago (but still haven’t forgotten), and….to try combining my ice cream recipe with Gillian’s infusion technique, to see if I can produce a fennel ice cream that I like! Well…we shall see!
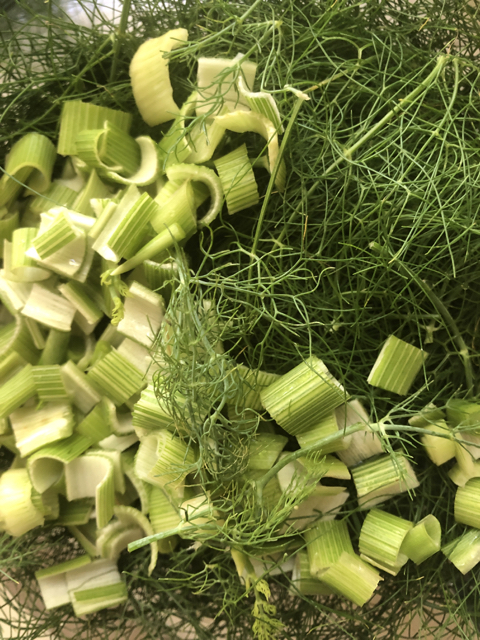
But one thing that an event lunch hasn’t lacked here recently, is Fennel Frond Pistou! I can’t give you precise quantities, but take a good quantity of fennel fronds (including the base of the frond – they peel easily away from the stalk) – about two dozen, and chop them up. Peel a couple of cloves of new garlic and smash, then add enough salt to pummel the garlic with the blade of a heavy knife so it’s crushed. Add the garlic and the fennel to a food processor and whizz with lots of olive oil. Add pepper, check consistency, scrape down the sides of the bowl and blitz again ’til you have a consistency that you like. I like it to be well blitzed, but not too runny. Add a squeeze of lemon juice – not too much, and then allow the flavours to infuse.
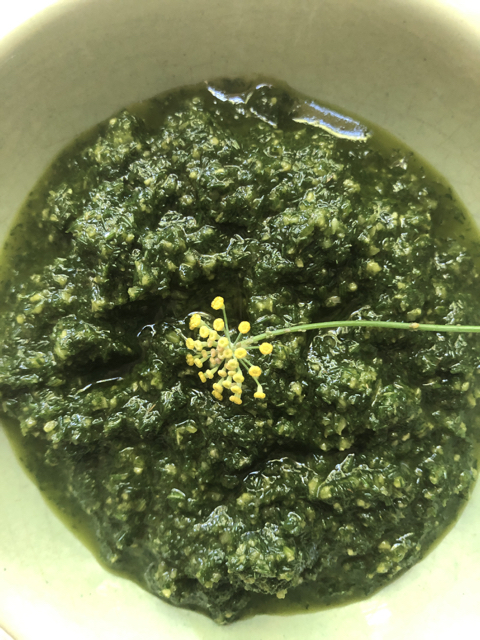
I generally make it a day ahead of time and check for salt and pepper before putting it out in a bowl. It is simply delicious with chicken, fish, folded through pasta or an omelette, or as we’ve been enjoying at the lunches, with asparagus, baby new potatoes, roast beetroot and a little prosciutto, along with and/or philly cheese and Pumpernickel Soda Bread (for which I use Belinda Jefferey’s fabulous recipe). It is simply the best! And the pistou keeps well in the fridge too…so make a good batch while you’re at it!
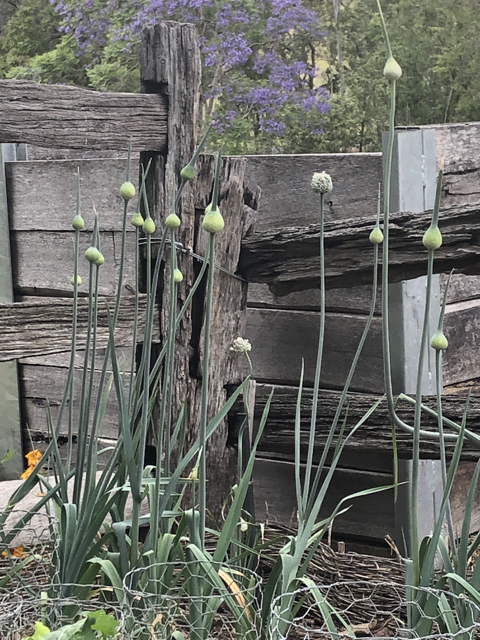
The leeks all began to bolt on those couple of 38 degree days, so I had to pull most of them out much sooner than I’d have liked. Their growth was stunted thanks to lack of rain, when normally we’d have been eating them much earlier. But….annoying as it was….
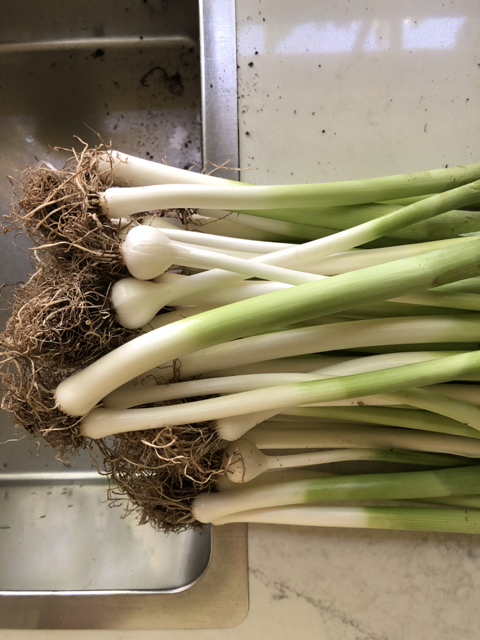
They were put to good use! Here’s how they ended up….
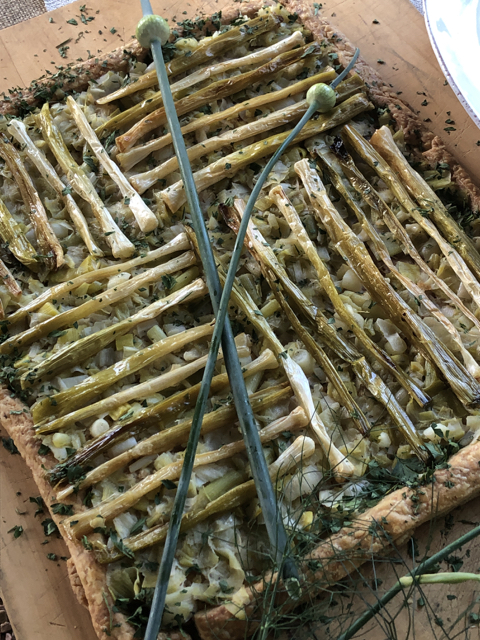
In Gillian’s scrumptious leek tart for lunch at her magical baking day here!
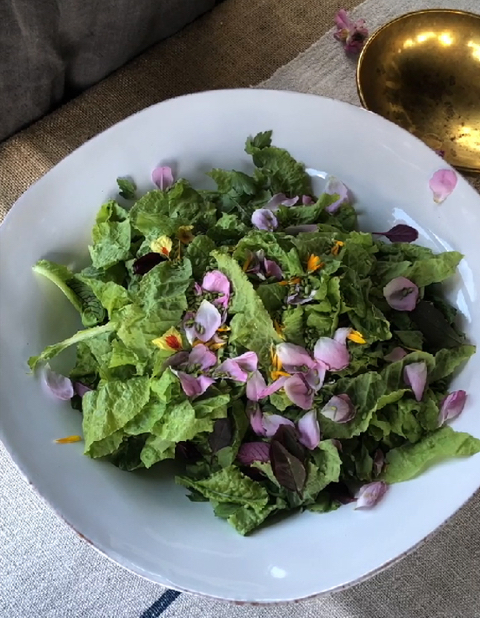
Accompanied by a leaf and petal salad from the garden, and lots of fennel buds…
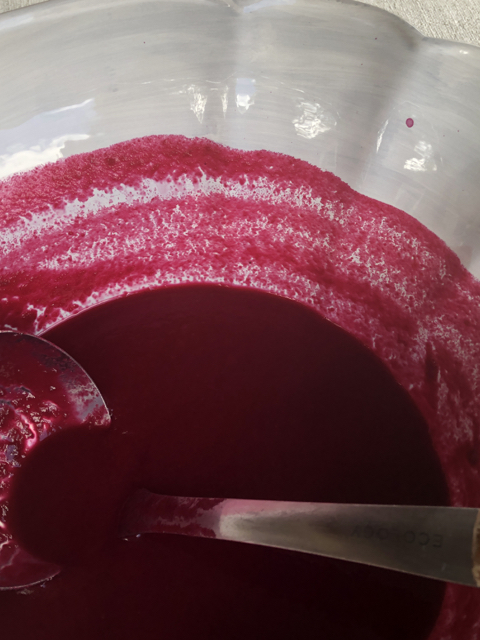
We also enjoyed a little teacup of rich pink beetroot soup that I made as a starter…(to go with aforementioned Pumpernickel Soda Bread and Fennel Frond Pistou!).
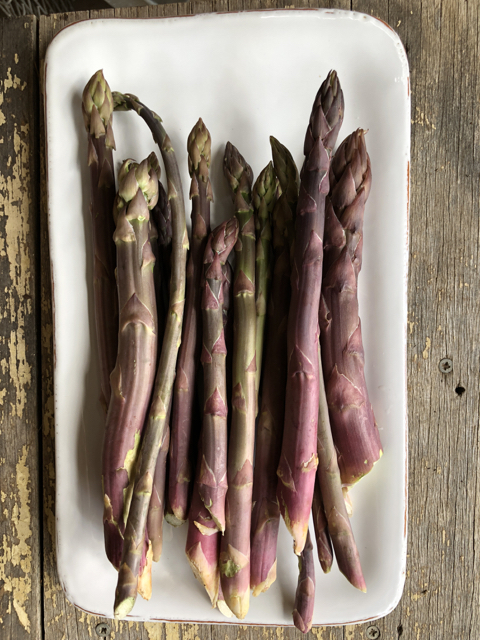
There have been asparagus aplenty to add to our plates…
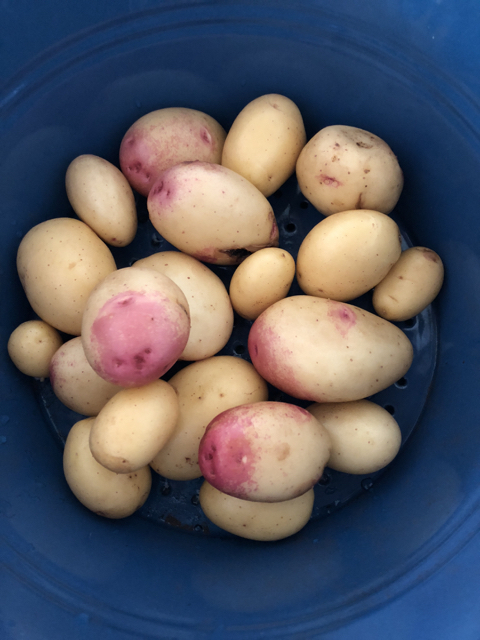
And chance find potatoes from ‘mistakes’ left in the ground last year…like these pretty King Edwards…how kind of them to bring even more pink into the equation!
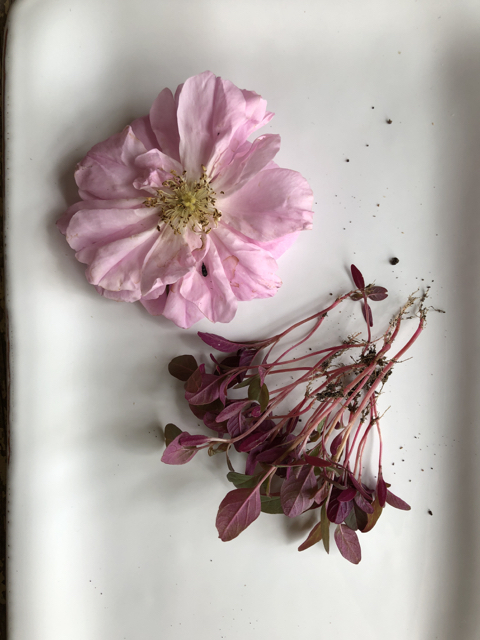
And rose petals and baby amaranth leaves to set it all off….
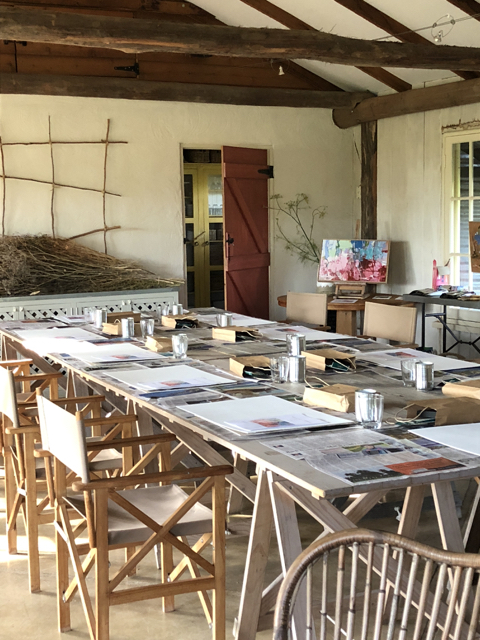
There have been workshops, like this glorious abstract painting day with Matilda Dumas, that was filled with exuberance, colour, inspiration and joy. (You can see a little bit more of this day on insta stories here, though for some reason it didn’t all upload…at least not in order, so persevere with the sequence and you’ll get more of an idea!). And….to add to the excitement of that day, Til has agreed to set up a little artist’s nook, rather as she did here at the workshop, with books and paintings, at our Open Garden next year!
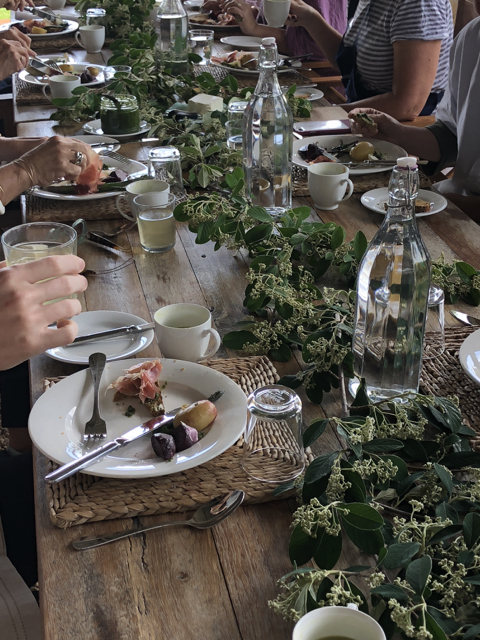
And many long table lunches….filled with food and flowers from the garden….
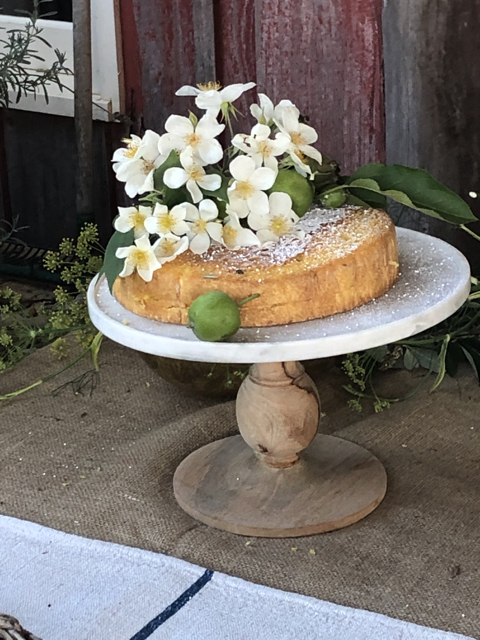
And cakes! Thanks to Gillian Bell Cake….the mistress of wedding cakes, who travels the world with her whisk and bakes, inspired by memory and gardens, produce and locality, wherever she roams. In this instance, she baked a garden-at-Glenmore inspired Fig Leaf cake for morning tea and an Apple-Scented Pelargonium cake for the workshop, captivating us all with the way she goes about it . She was thoroughly inspiring (and I never thought I’d see the day I’d eat my apple-scented pelargoniums!). But the taste…..was sublime…let’s all swoon together now!
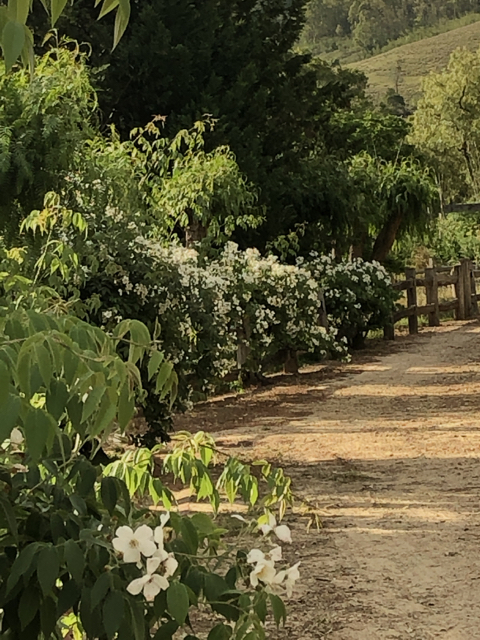
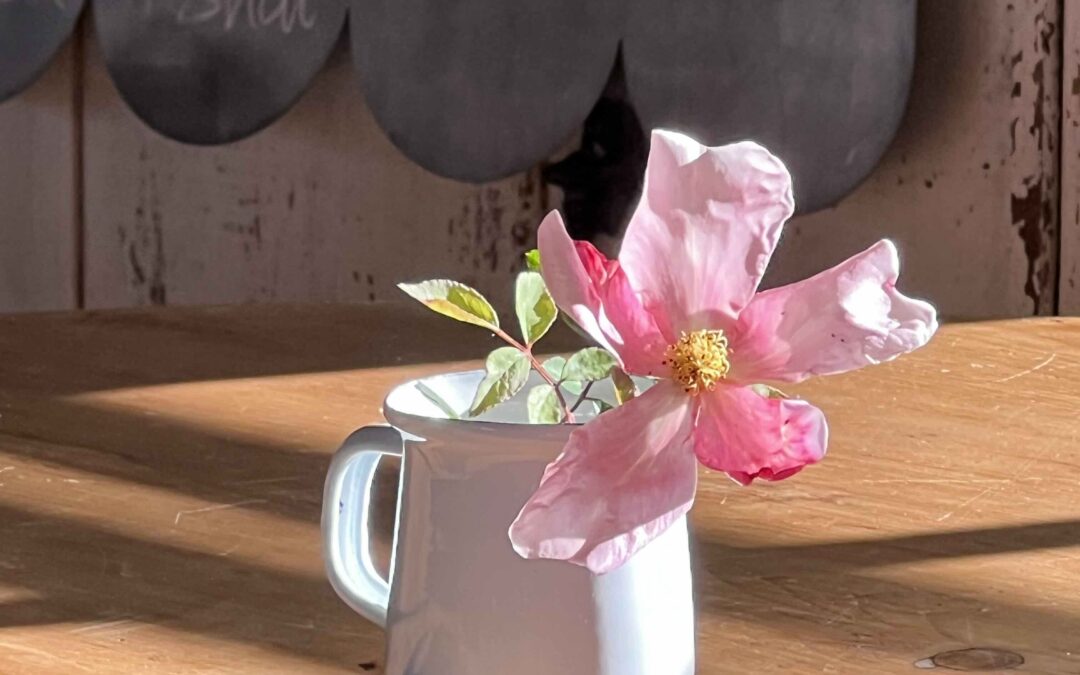
It’s the musk rose R. brunonii that’s been spilling its scent all around these last weeks. And if you can imagine that delicate yet concentrated scent in your mind, infiltrating the air all ’round, and click here to insta stories to hear the bees buzzing in the peppercorn tree, you may just get a hint of the dizzy feeling engendered here during this last month! (the sound is more clear if you listen on your phone rather than at your computer though).
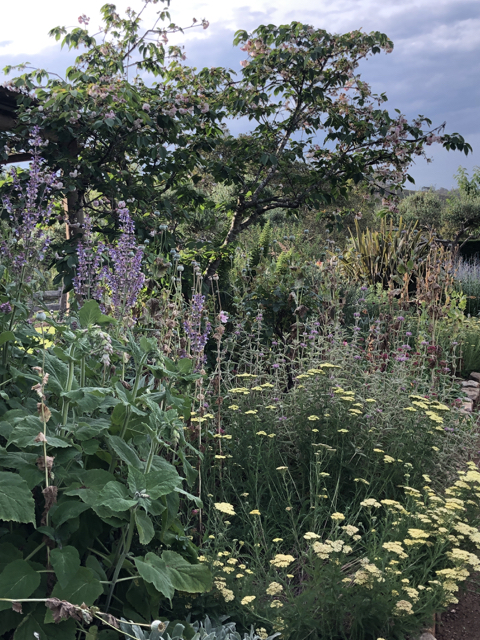
The Borders have moved on….beyond their ‘pink’ stage, filling out into yellows and mauves, interspersed here and there with the towering pods the peony poppy flowers left behind.
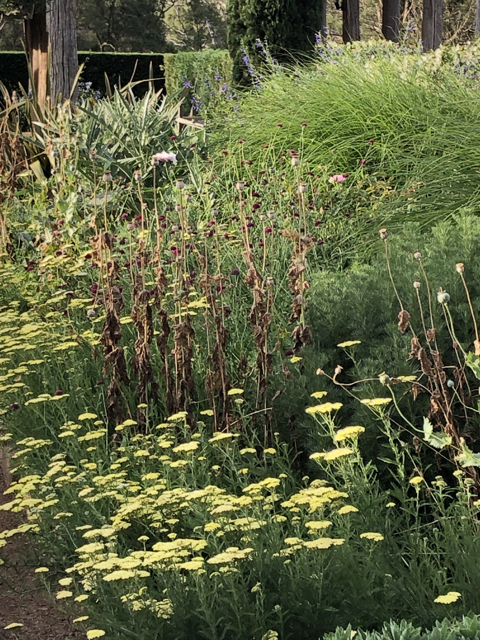
And much as I love them, the poppy pods have now had their moment to shine in the garden, and were pulled just before the great day of rainfall earlier this week! Dry, safe, and spectacular, so I can collect their seed and play with them inside now!
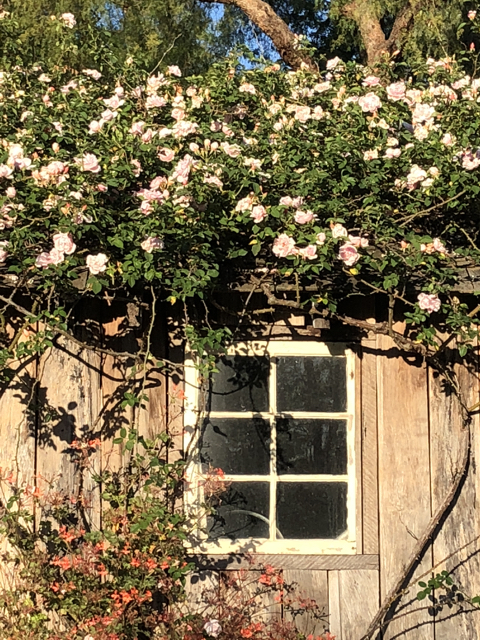
And Albertine did her shell pink thing on the potting shed roof….
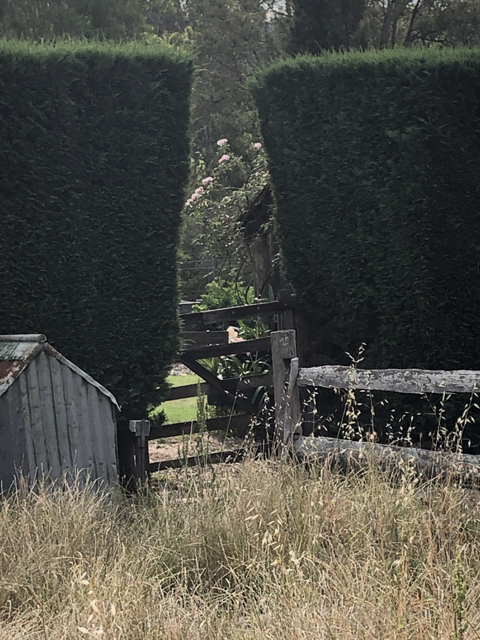
So now it’s time to calm down a tad….to see some friends and plan for Christmas…but not before I’ve made some major inroads into planning the year ahead! So watch this space….because not only do I have OPEN GARDEN to organise for 2019, but a calendar of events to tempt….there are already some tantalising ones etched into my calendar to announce very soon! So if you’re not already there, do join the mailing list, as that’s where I make all exciting announcements first! I don’t send too many newsletters, so they won’t annoy you!
‘ Til next time. But in the meantime, I wish you all a wonderful festive season.

| Going, going…… | Leeks, globe artichokes. |
| Eating…. | Lettuce, coloured chard, beetroot, asparagus, leeks, globe artichokes, surprise potatoes, rhubarb, strawberries, fennel fronds and buds, lovage leaves, leaf amaranth, chive flowers, parsley (old), sage, rosemary, thyme and tarragon. Nasturtium, chive and rose petals. Last of the Lisbon lemons, Valencia oranges.The zucchinis are coming – whoop whoop! |
| Sowing seed of…. | beetroot for leaves, beans, corn, cucumber, zucchini, pumpkin, carrot, lettuce, basil Genovese and more parsley. |
| Planting seedlings of… | tomatoes, beetroot, lettuce. |

